Use ngx-translate Service in Angular Grid
Setup The Angular Application
Follow the Getting Started guide to set up your Angular application with Smart UI.
Setup the Angular Smart.Grid Component
Follow the Angular Grid guide to read more about how you can use the Angular Grid component.
Use ngx-translate Service
In this guide we will show you how you can use ngx-translate to change the labels of Smart Grid columns.
First, you need to install @ngx-translate/core and @ngx-translate/http-loader packages using the following commands:
npm install @ngx-translate/core --save
and
npm install @ngx-translate/http-loader --save
Then, import the required modules in app.module.ts together with translate loader function like this:
    import { NgModule } from '@angular/core';
    import { BrowserModule } from '@angular/platform-browser';

    import { GridModule } from 'smart-webcomponents-angular/grid';

    import { AppComponent } from './app.component';

    import {TranslateLoader, TranslateModule} from '@ngx-translate/core';
    import {TranslateHttpLoader} from '@ngx-translate/http-loader';
    import { HttpClient, HttpClientModule } from '@angular/common/http';

    export function createTranslateLoader(http: HttpClient) {
      return new TranslateHttpLoader(http, './assets/translate/', '.json');
    }

    @NgModule({
      declarations: [
        AppComponent
      ],
      imports: [
        BrowserModule,
        GridModule,
        HttpClientModule,
        TranslateModule.forRoot({
          loader: {
            provide: TranslateLoader,
            useFactory: (createTranslateLoader),
            deps: [HttpClient]
          }
        })
      ],
      providers: [],
      bootstrap: [AppComponent]
    })
    export class AppModule { }
app.component.html should have the following code:
<smart-grid [dataSource]="dataSource" [columns]="columns" #grid id="grid"></smart-grid>
Inside app.component.ts you need to add the translateService in the constructor like this:
    constructor(private translate: TranslateService) {
        // Specifies the available languages to the service
        translate.addLangs(['en', 'fr'])
        // Specifies the current languages to the service
        translate.use('fr');
    }
And inside the AfterViewInit lifecycle hook you should set the columns label to the translated value, like this:
    ngAfterViewInit(): void {
        const that = this;
        // afterViewInit code.

        for (let i = 0; i < this.columns.length; i++)
        {
          this.translate.get(this.columns[i].label!).subscribe((res: string) => {
            this.columns[i].label = res;
          });
        }
    }
Here is the full code of app.component.ts:
    import { Component, AfterViewInit } from '@angular/core';
    import { GridColumn, Smart } from 'smart-webcomponents-angular/grid';
    import { GetData } from '../assets/data';

    import { TranslateService } from '@ngx-translate/core';


    @Component({
        selector: 'app-root',
        templateUrl: './app.component.html'
    })

    export class AppComponent implements AfterViewInit {

      constructor(private translate: TranslateService) {
        // Specifies the available languages to the service
        translate.addLangs(['en', 'fr'])
        // Specifies the current languages to the service
        translate.use('fr');
      }

       dataSource = new Smart.DataAdapter({
            dataSource: GetData(500),
            dataFields: [
                'id: number',
                'firstName: string',
                'lastName: string',
                'productName: string',
                'quantity: number',
                'price: number',
                'total: number'
            ]
        });

        columns: GridColumn[] = [
            { label: 'First Name', dataField: 'firstName' },
            { label: 'Last Name', dataField: 'lastName' },
            { label: 'Product', dataField: 'productName' },
            { label: 'Quantity', dataField: 'quantity' },
            { label: 'Unit Price', dataField: 'price', cellsFormat: 'c2' },
            { label: 'Total', dataField: 'total', cellsFormat: 'c2' }
        ];

        ngAfterViewInit(): void {
            const that = this;
            // afterViewInit code.

        for (let i = 0; i < this.columns.length; i++)
        {
          this.translate.get(this.columns[i].label!).subscribe((res: string) => {
            this.columns[i].label = res;
          });
        }
      }
    }
Inside the assets/translate folder you need to add .json files with translations for the languages you will be using.
Our fr.json will look like this:
{
"First Name": "Prénom",
"Last Name": "Nom",
"Product": "Produit",
"Quantity": "Quantité",
"Unit Price": "Prix unitaire",
"Total": "Total"
}
Result: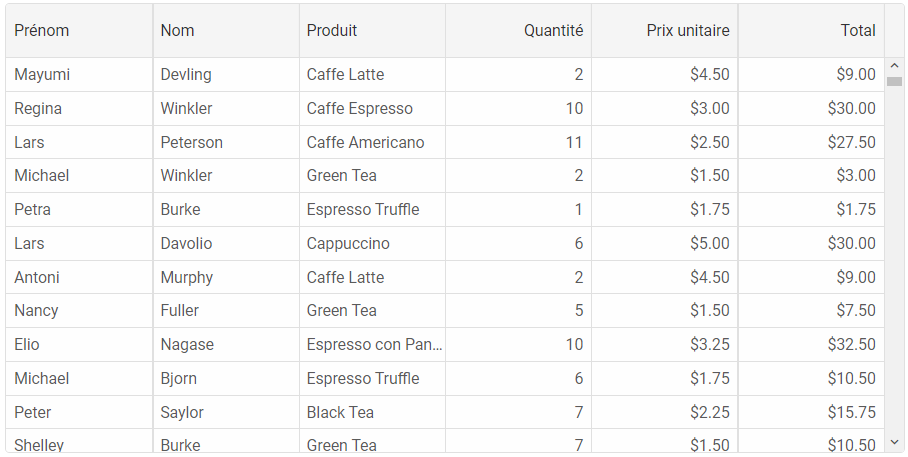 /div>
/div>