Using Smart.Grid with StencilJS Framework
This document provides a complete guide on how to build and use the Smart with the StencilJS Framework.
Prerequisities
- Node.js
- IDE (e.g. Visual Studio Code )
Setup development environment
-
Create a new folder called stencil. From inside the folder open the Command prompt/Terminal and run the
following command line to install the StencilJS framework:
on Windows:
npm init stencil
on Linux:
sudo npm i stencil
-
When prompted for selection choose app ( we are going to create a simple application) and press Enter to continue.
? Select a starter project.

Starters marked as [community] are developed by the Stencil
Community, rather than Ionic. For more information on the
Stencil Community, please see github.com/stencil-community
› - Use arrow-keys. Return to submit.

❯   component          Collection of web components that can be
                       used anywhere
    app [community]    Minimal starter for building a Stencil
                       app or website
When finished, a new stencil Project will be created in the stencil folder.
Create a new StencilJS component
-
Install the smart-webcomponents npm package in the application folder. From inside the
project folder - stencil, type in the following command:
npm i smart-webcomponents
-
Create a new StencilJS component by running the following command from inside the project folder:
stencil generate my-first-component
The new component will be generated and placed inside the stencil/src/components.
my-first-component.tsx file hosts the definition of our new component. Here's the component definition:
import { Component, Prop, Host, h } from '@stencil/core';

import { Grid, GridColumn, GridBehavior } from 'smart-webcomponents/source/typescript/smart.elements';

import 'smart-webcomponents/source/components/smart.ui.grid.js';

const w = window as any;

@Component({
  tag: 'my-first-component',
  styleUrl: 'my-first-component.css',
  shadow: true
})
export class MyFirstComponent {
	@Prop() columns: GridColumn[];
	@Prop() behavior: GridBehavior;
	@Prop() dataSource;
	@Prop() appearance;
	@Prop() paging;
	@Prop() pager;
	@Prop() sorting;
	@Prop() editing;
	@Prop() selection;

  componentDidLoad() {
	 this.appearance = {
	  alternationCount: 2,
	  showRowHeader: true,
	  showRowHeaderSelectIcon: true,
	  showRowHeaderFocusIcon: true
	}

	this.sorting = {
	  enabled: true
	}
	this.editing = {
	  enabled: true
	}
	this.selection = {
	  enabled: true,
	  allowCellSelection: true,
	  allowRowHeaderSelection: true,
	  allowColumnHeaderSelection: true,
	  mode: 'extended'
	}
	this.columns = [
	  { label: 'Id', dataField: 'CustomerID' },
	  { label: 'Company Name', dataField: 'CompanyName' },
	  { label: 'Contact Name', dataField: 'ContactName' },
	  { label: 'Contact Title', dataField: 'ContactTitle' },
	  { label: 'Address', dataField: 'Address' },
	  { label: 'City', dataField: 'City' },
	  { label: 'Country', dataField: 'Country' }
	];
	this.behavior = { columnResizeMode: 'growAndShrink' };
 	this.dataSource = new w.Smart.DataAdapter({
	  dataSource: 'https://raw.githubusercontent.com/HTMLElements/smart-webcomponents/master/sampledata/customers.json',
	  id: 'CustomerID',
	  dataFields: ['CustomerID: string', 'CompanyName: string', 'ContactName: string', 'ContactTitle: string', 'Address: string', 'City: string', 'Country: string'],
	});
  }

  render() {
    return (
      <Host>
        <smart-ui-grid appearance={this.appearance} sorting={this.sorting} selection={this.selection} editing={this.editing} behavior={this.behavior} dataSource={this.dataSource} columns={this.columns} id="grid"></smart-ui-grid>
      </Host>
    );
  }
}
Here we have a simple StencilJS component called my-first-component that contains a Smart.Grid component inside it's template
-
Add the new component to the stencil/index.html page in order to view the component:
<body> <my-first-component label="Stencil Grid Component"></my-first-component> </body> -
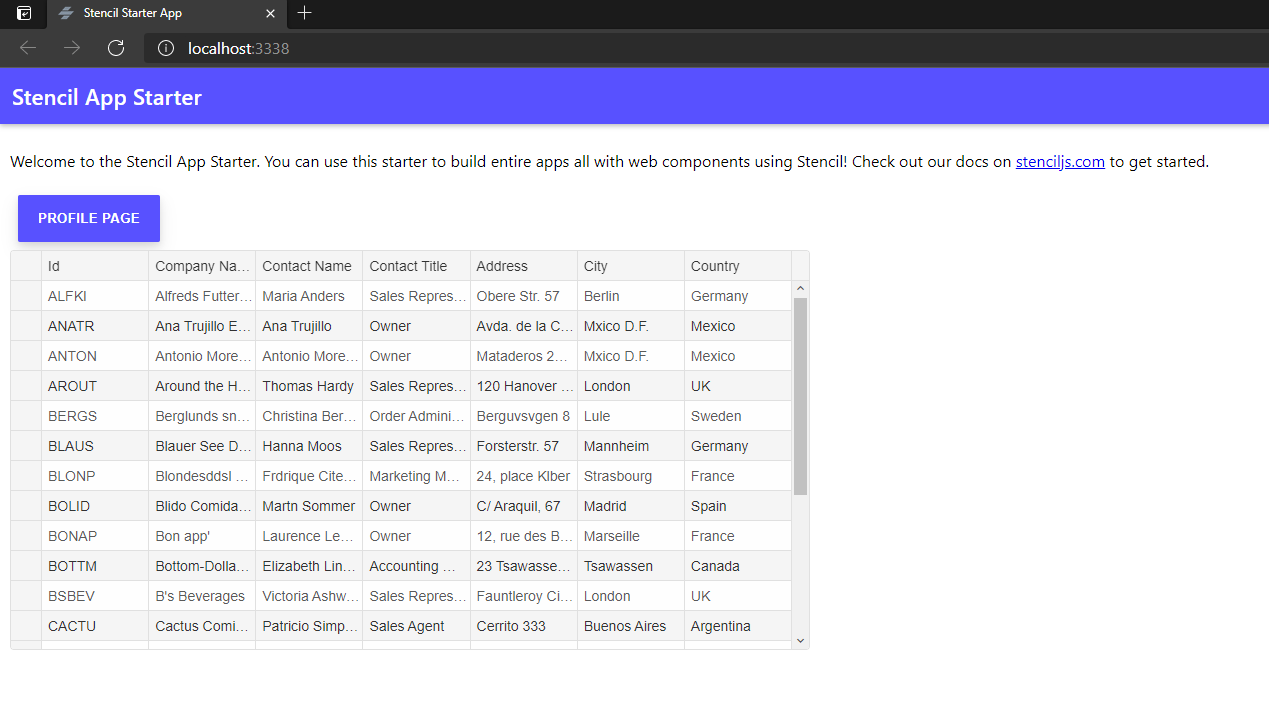
Run the application by opening a command promp from inside the root directory of the project and entering the
following command:
npm start
The StencilJS server will run the application on localhost:3333 and a new tab will open in your browser to view the result: