Getting Started with Menu Web Component
Smart UI Web Components work with current evergreen browsers and Node 18+ for local tooling; pin package versions to match your project policy.
Smart UI is distributed as the smart-webcomponents NPM package. You can also use the full download from the Download page.
Quick start
- Install the package:
npm install smart-webcomponents
- Load the Menu module (ES module script):
<script type="module" src="node_modules/smart-webcomponents/source/modules/smart.menu.js"></script>
- Add the default stylesheet (prefer angular.json / bundler entry in app codebases; for plain HTML use a link):
<link rel="stylesheet" type="text/css" href="node_modules/smart-webcomponents/source/styles/smart.default.css" />
- Add markup in one of two ways - semantic custom element (the component tag is in your HTML) or a host
div(you mount programmatically with appendTo):
Semantic element (id matches the selector in Smart()):
<smart-menu id="menu"></smart-menu>
Host container (id matches appendTo on Smart.Menu):
<div id="menuContainer"></div>
- Initialize after the module loads: define a const menuOptions object, then either bind with Smart('#menu', ...) on the semantic tag or use new Smart.Menu({ ...menuOptions, appendTo: '#menuContainer' }) on the host
div:
<script type="module">
	import 'node_modules/smart-webcomponents/source/modules/smart.menu.js';

	const menuOptions = { checkboxes: true };

	// Option A - semantic <smart-menu> with id="menu"
	Smart('#menu', class {
		get properties() {
			return menuOptions;
		}
	});

	// Option B - host div id="menuContainer"
	// const menuInstance = new Smart.Menu({
	// 	...menuOptions,
	// 	appendTo: '#menuContainer'
	// });

	// Option C - constructor(selector, options), then append the returned element yourself
	// const myMenu = new Smart.Menu('#menu', menuOptions);
	// document.body.appendChild(myMenu);
</script>
Uncomment Option B when you use the host
div; use Option A when you use the semantic element. The Runtime cookbook also documents new Smart.Menu('#menu', menuOptions) with appendChild, and document.createElement('smart-menu') with .props or Object.assign (all are valid patterns; do not combine overlapping patterns for the same instance unless you intend multiple components). - Serve the folder over HTTP (or use your bundler dev server) and open the page.
Runtime cookbook
Alternative creation patterns and imperative APIs. These are all valid ways to create Smart UI components: semantic markup + Smart(); new Smart.Menu({ ...options, appendTo: '#...' }); new Smart.Menu('#menu', menuOptions) plus appendChild on the returned element; and document.createElement('smart-menu') then assigning options via .props or Object.assign on the element.
Constructor with a selector string and options, then append the returned element (for example const myMenu = new Smart.Menu('#menu', menuOptions)):
	const menuOptions = { checkboxes: true };
	const myMenu = new Smart.Menu('#menu', menuOptions);
	document.body.appendChild(myMenu);
Create with document.createElement('smart-menu'), assign properties (same as any custom element), then append:
	const menuOptions = { checkboxes: true };
	const menu = document.createElement('smart-menu');
	Object.assign(menu, menuOptions);
	document.body.appendChild(menu);
Host on a div with appendTo (import the module, then instantiate when the document is ready; the container id must match appendTo):
	import "../../source/modules/smart.menu.js";

	document.readyState === 'complete' ? init() : window.addEventListener('load', init);

	function init() {
		const menuOptions = { checkboxes: true };
		const menu = new Smart.Menu({
			...menuOptions,
			appendTo: '#menuContainer'
		});
	}
Appearance
The menu structure contains smart-menu-item and smart-menu-items-group elements.
The following attributes are available for these custom elements.
- label - the label to be displayed in the Menu
- separator - if present, a visual separator (horizontal line) is added after the item
- disabled - disables the selection of an item
The following attributes are only available for smart-menu-item.
- value - a custom value that is not displayed, but is passed as an argument to the itemClick event (called when an item is chosen).
- shortcut - a helper text/icon that can represent a keyboard shortcut that activates the item. The shortcut is not displayed for top-level items in horizontal and vertical modes.
Animated menu could be achieved when animation class is added .
<smart-menu class="animation"></smart-menu>
Demo
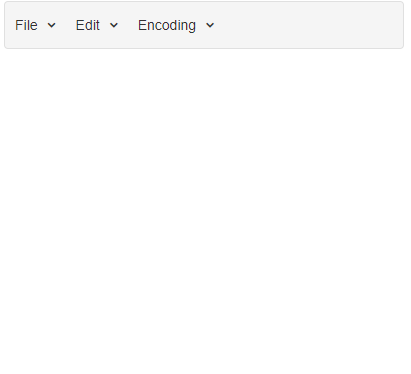
The Menu and its items can have checkbox or radio button selection. To allow this the user has to set element's checkboxes property to true and checkable for the particular items or group.
<smart-menu checkboxes checkable></smart-menu>
Demo
Data Binding
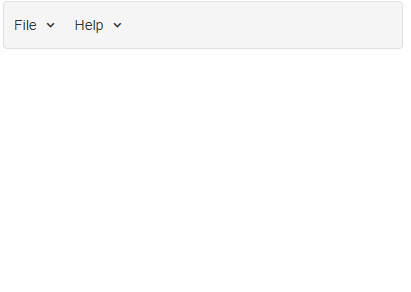
To initialize a populated Smart.Menu custom element, insert the required inner structure consisting of the auxiliary custom elements smart-menu-item and smart-menu-items-group, e.g.:
<!DOCTYPE html>
<html lang="en">
<head>
<link rel="stylesheet" href="../../source/styles/smart.default.css" type="text/css" />
<script type="text/javascript" src="../../source/modules/smart.menu.js"></script>
</head>
<body>
<smart-menu>
<smart-menu-items-group>
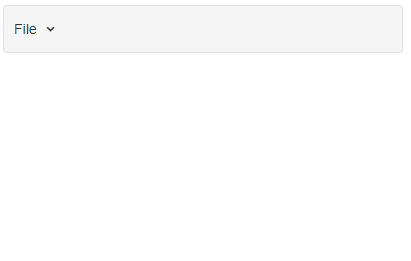
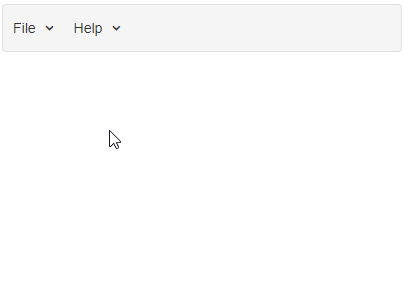
File
<smart-menu-item shortcut="Ctrl+N">New</smart-menu-item>
<smart-menu-item shortcut="Ctrl+0">Open</smart-menu-item>
<smart-menu-items-group>
Open Containing Folder
<smart-menu-item>Explorer</smart-menu-item>
<smart-menu-item>cmd</smart-menu-item>
</smart-menu-items-group>
<smart-menu-item shortcut="Ctrl+S" disabled>Save</smart-menu-item>
<smart-menu-item shortcut="Ctrl+Alt+S" separator>Save As...</smart-menu-item>
<smart-menu-item shortcut="Alt+F4">Exit</smart-menu-item>
</smart-menu-items-group>
<smart-menu-items-group>
Help
<smart-menu-item>About</smart-menu-item>
<smart-menu-item>Help center</smart-menu-item>
<smart-menu-item>Feedback</smart-menu-item>
</smart-menu-items-group>
</smart-menu>
</body>
</html>
Demo
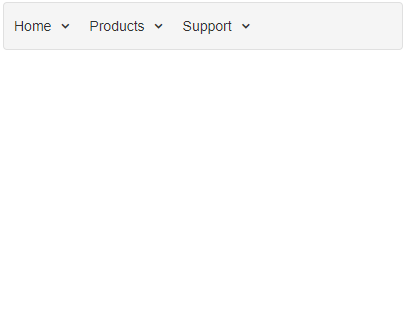
Populating from UL :
<!DOCTYPE html>
<html lang="en">
<head>
 <link rel="stylesheet" href="../../source/styles/smart.default.css" type="text/css" />
 <script type="text/javascript" src="../../source/modules/smart.menu.js"></script>
</head>
<body>
 <smart-menu id="menu">
    <ul>
        <li><a href="#Home">Home</a></li>
        <li>
                Solutions
                    <li><a href="#Education">Education</a></li>
                    <li><a href="#Financial">Financial services</a></li>
                    <li>
                        Software Solutions
                        <ul>
                            <li><a href="#ConsumerPhoto">Consumer photo and video</a></li>
                            <li><a href="#Mobile">Mobile</a></li>
                            <li><a href="#RIA">Rich Internet applications</a></li>
                        </ul>
                    </li>
                <li><a href="#">All industries and solutions</a></li>
                </ul>
        </li>
        <li>
                Products
                <ul>
                    <li><a href="#PCProducts">PC products</a></li>
                    <li><a href="#MobileProducts">Mobile products</a></li>
                    <li><a href="#AllProducts">All products</a></li>
                </ul>
        </li>
        <li>
                Support
                <ul>
                    <li><a href="#SupportHome">Support home</a></li>
                    <li><a href="#CustomerService">Customer Service</a></li>
                    <li><a href="#KB">Knowledge base</a></li>
                    <li><a href="#Books">Books</a></li>
                </ul>
        </li>
    </ul>
 </smart-menu>
</body>
</html>
Demo
Populating from dataSource.
<!DOCTYPE html>
<html lang="en">
<head>
  <link rel="stylesheet" href="../../source/styles/smart.default.css" type="text/css" />
 <script type="text/javascript" src="../../source/modules/smart.menu.js"></script>

 <script>
 window.onload = function () {
     document.querySelector('smart-menu').dataSource = [
                {
                    label: 'File',
                    items: [
                        {
                            label: 'New',
                            shortcut: 'Ctrl+N'
                        },
                        {
                            label: 'Open',
                            shortcut: 'Ctrl+0'
                        },
                        {
                            label: 'Open Containing Folder',
                            items: [
                                {
                                    label: 'Explorer'
                                },
                                {
                                    label: 'cmd'
                                }
                            ]
                        },
                        {
                            label: 'Save',
                            shortcut: 'Ctrl+S',
                            disabled: true,
                            separator: true
                        },
                        {
                            label: 'Exit',
                            shortcut: 'Alt+F4'
                        }
                    ]
                }
            ];
     }
 </script>
</head>
<body>
    <smart-menu></smart-menu>
</body>
</html>
Demo
Behavior
Smart.Menu has the following choices for display mode:
- horizontal - firs level items are displayed in a row
- vertical - firs level items are displayed in a column
- popup - the menu acts as a popup menu. This mode supports open and close methods
- tree - the menu goes in tree mode. The item groups are toggled and their items or sub groups are displayed in the same container.
selectionMode property determines the item selection. Allowed values are click and mouseenter
<!DOCTYPE html>
<html lang="en">
<head>
 <link rel="stylesheet" href="../../source/styles/smart.default.css" type="text/css" />
 <script type="text/javascript" src="../../source/modules/smart.menu.js"></script>

</head>
<body>
 <smart-menu selection-mode="mouseenter">
    <smart-menu-items-group>
        File
        <smart-menu-item shortcut="Ctrl+N">New</smart-menu-item>
        <smart-menu-item shortcut="Ctrl+0">Open</smart-menu-item>
        <smart-menu-items-group>
            Open Containing Folder
            <smart-menu-item>Explorer</smart-menu-item>
            <smart-menu-item>cmd</smart-menu-item>
        </smart-menu-items-group>
        <smart-menu-item shortcut="Ctrl+S" disabled>Save</smart-menu-item>
        <smart-menu-item shortcut="Ctrl+Alt+S" separator>Save As...</smart-menu-item>
        <smart-menu-item shortcut="Alt+F4">Exit</smart-menu-item>
    </smart-menu-items-group>
    <smart-menu-items-group>
        Help
        <smart-menu-item>About</smart-menu-item>
        <smart-menu-item>Help center</smart-menu-item>
        <smart-menu-item>Feedback</smart-menu-item>
    </smart-menu-items-group>
 </smart-menu>
</body>
</html>
Demo
The position of the menu popups is determines by dropDownPosition property. The allowed values are:
- top-left
- top-right
- bottom-left
- bottom-right
- overlay-left
- overlay-right
- auto
Manipulating the content
The element offers the following methods:
-
maximize - sets the menu to maximized mode.
<script> window.onload = function () { var menu = document.querySelector('smart-menu'); menu.maximize(); } </script> -
addItem - adds new item to the menu.
<script> window.onload = function () { var menu = document.querySelector('smart-menu'); menu.addItem(document.createElement('smart-menu-item'), '0'); } </script> -
close - closes the menu when mode is set to 'popup'.
<script> window.onload = function () { var menu = document.querySelector('smart-menu'); menu.close(); } </script> -
collapseItem - collapses a particular item. The id or the path to the item is passed in as the method argument.
<script> window.onload = function () { var menu = document.querySelector('smart-menu'); menu.collapseItem('0.0'); } </script> -
expandItem - expands particular item. The id or the path to the item is passed in as the method argument.
<script> window.onload = function () { var menu = document.querySelector('smart-menu'); menu.expandItem('1.2'); } </script> -
getItem - returns an item according to the desired id or numeric path.
<script> window.onload = function () { var menu = document.querySelector('smart-menu'); menu.getItem('0.0'); } </script> -
checkItem - checks an item. The id or the path to the item is passed in as the method argument.
<script> window.onload = function () { var menu = document.querySelector('smart-menu'); menu.checkItem('0.0'); } </script> -
minimize - minimizes the menu.
<script> window.onload = function () { var menu = document.querySelector('smart-menu'); menu.minimize(); } </script> -
open - opens the menu when mode is set to 'popup'.
<script> window.onload = function () { var menu = document.querySelector('smart-menu'); menu.open(); } </script> -
removeItem - removes an item. The id or the path to the item is passed in as the method argument.
<script> window.onload = function () { var menu = document.querySelector('smart-menu'); menu.removeItem('0.0'); } </script> -
setFocusable - sets whether the element can be focused or not.
<script> window.onload = function () { var menu = document.querySelector('smart-menu'); menu.setFocusable(false); } </script> -
uncheckItem - unchecks an item. The id or the path to the item is passed in as the method argument.
 <script>
     window.onload = function () {
         var menu = document.querySelector('smart-menu');
         menu.uncheckItem('0.0');
     }
 </script>
Keyboard Support
| Key | Action |
|---|---|
| Tab | The Menu receives focus by tabbing into it. |
| Arrow Up / Arrow Left / Arrow Down / Arrow Right | Navigation between the items. Depends on selected mode and dropDownPosition. |
| Home | Selects first enabled item in the last opennded container. |
| End | Selects last enabled item in the last opennded container. |
| Enter | Selects an item/opens a pop-up. |
| Escape | Closes the selected popup and focuses its parent popup. |
| Space | Toggles an item's checked state. |
Keyboard Support in Tree/Minimized Mode
| Key | Action |
|---|---|
| Tab | The Menu receives focus by tabbing into it. |
| Arrow Up / Arrow Down | Navigation between visible items. |
| Left Arrow | On an expanded item, collapses the item. On a collapsed or a "leaf" item moves focus to the item's parent item. |
| Right Arrow | On a collapsed item expands the item. On an expanded item, moves to the first child item, or does nothing on a "leaf" item. |
| Home | Moves to the top enabled item. |
| End | Moves to the last enabled item. |
| Enter | Expands/collapses an item or selects a "leaf" item. If the menu is minimized and the minimized pop-up is closed, opens the pop-up. |
| Escape | If the menu is minimized, closes the minimized pop-up. |
| Space | Toggles an item's checked state. |
Append to the DOM:
const container = document.getElementById('menu-container');
container.appendChild(menu);
Remove from the DOM:
menu.remove();
Set a property:
menu.disabled = true;
menu.theme = 'dark';
Get a property value:
const isDisabled = menu.disabled;
const currentTheme = menu.theme;
Invoke a method:
menu.refresh();
menu.focus();
Add event listener:
menu.addEventListener('itemClick', (event) => {
    console.log('itemClick triggered:', event.detail.item);
});
Remove event listener:
const handleMenuEvent = (event) => {
    console.log('itemClick triggered:', event.detail.item);
};

menu.addEventListener('itemClick', handleMenuEvent);
menu.removeEventListener('itemClick', handleMenuEvent);
Common Use Cases
-
Build menu from data
Create menu items from an array
menu.dataSource = [ { label: 'File', items: [{ label: 'New' }, { label: 'Open' }] }, { label: 'Edit', items: [{ label: 'Undo' }, { label: 'Redo' }] } ]; -
Handle menu item click
Execute actions on menu selection
menu.addEventListener('itemClick', (e) => {
  console.log('Clicked:', e.detail.label);
});
Troubleshooting
- How do I create a context menu?
- Set mode = 'dropDown' and use the open() method on right-click events with appropriate positioning.
- How do I add icons to menu items?
- Include an icon property in your dataSource items: { label: 'Save', icon: 'save-icon' }.
Accessibility
The Menu component follows WAI-ARIA best practices:
- Keyboard navigation - Tab, Arrow keys, Enter, and Escape are supported
- ARIA roles - Appropriate roles and labels are applied automatically
- Focus management - Visible focus indicators for keyboard users
- Screen readers - State changes are announced to assistive technology
- High contrast - Supports Windows High Contrast Mode and forced colors
For custom labeling, set aria-label or aria-labelledby attributes on the component.
Supported stacks: Smart UI targets Angular 17+, React 18+, Vue 3+, Node 18 LTS, and evergreen browsers; pin exact package versions to your org policy.