Blazor Smart.Scheduler Bind to SQL
Setup The Blazor Application
Follow the Getting Started guide to set up your Blazor Application with Smart UI.
Create SQL Data
The following steps detail how to create a SQL Database in Visual Studio 2022 and fill it with data. If you already have SQL Data, continue to Connect Blazor to SQL Data.
- To create a table, first you need to create a database for your application. Navigate to View -> SQL Server Object Explorer
- Inside the localdb -> Databases directory, create a new SQL database by right-clicking on the Databases folder.
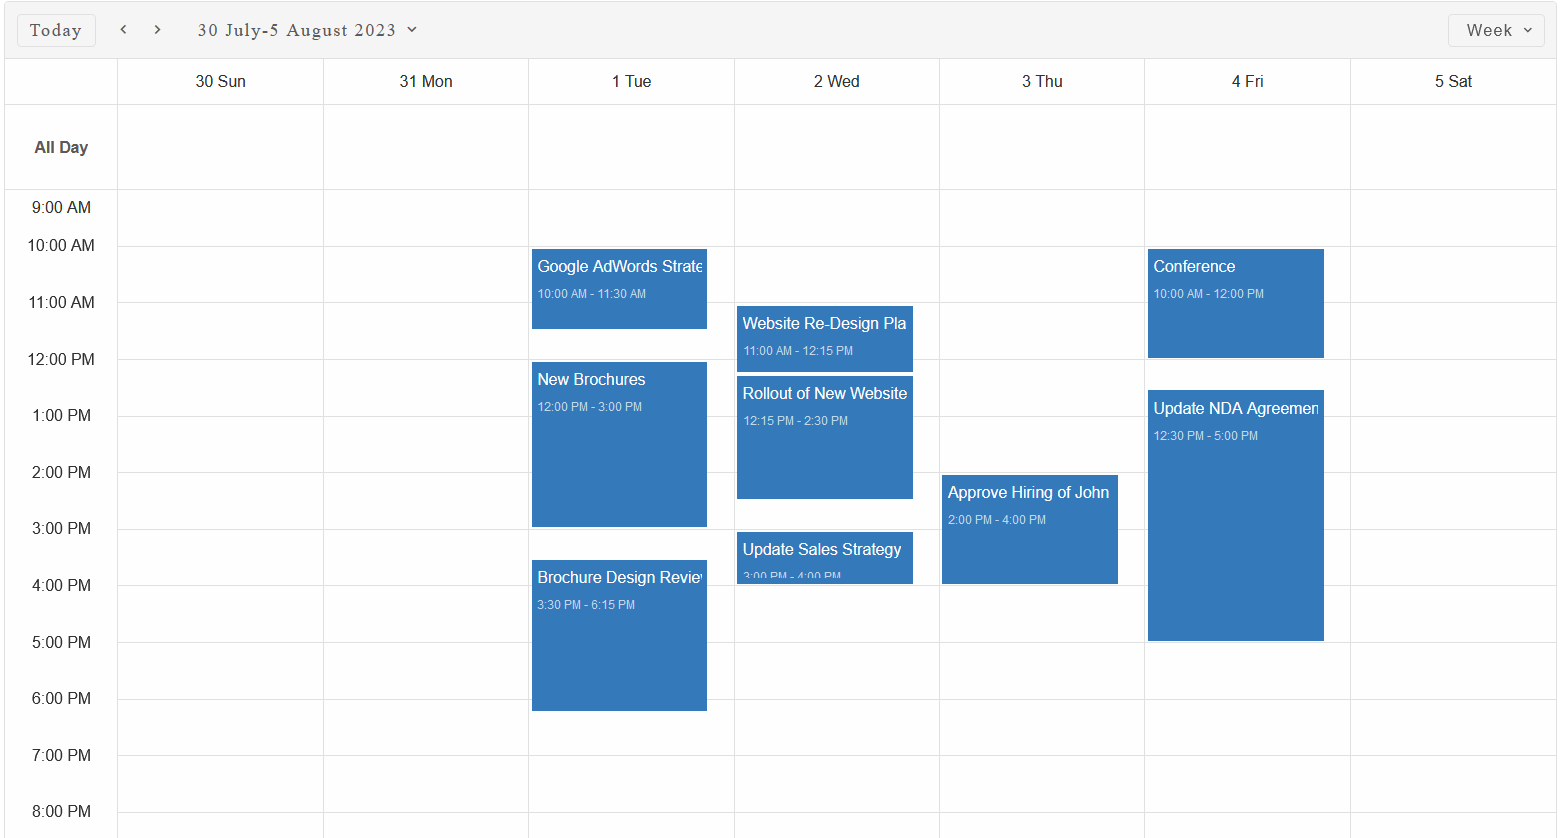
For the purpose of the Demo, we will create events.db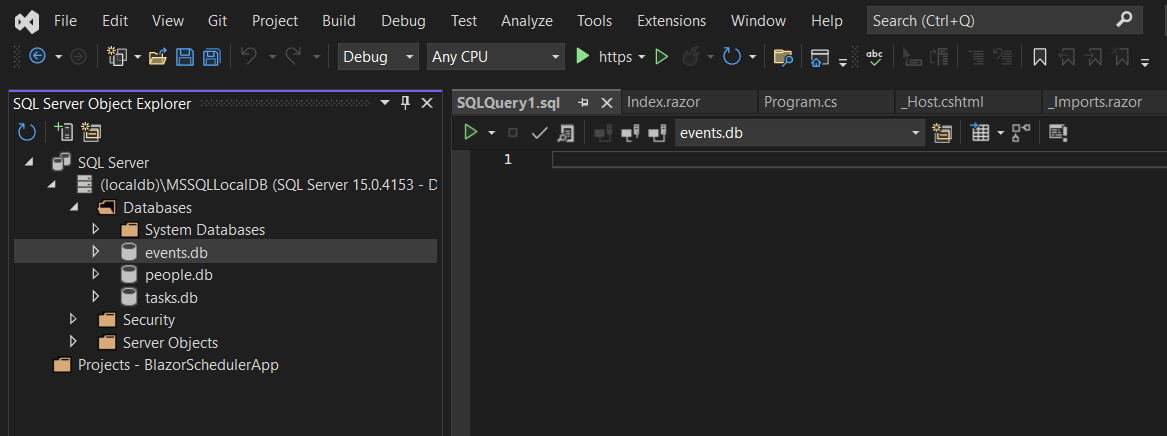
- To create a table, right-click on the database and select New Query.... Then paste the following SQL code to create a table of our scheduler events:
-- Create SchedulerTable
CREATE TABLE SchedulerTable (
    Id INT PRIMARY KEY IDENTITY(1,1),
    Label NVARCHAR(255),
    Description NVARCHAR(1000),
    DateStart DATETIME,
    DateEnd DATETIME
);

-- Insert data into SchedulerTable
INSERT INTO SchedulerTable (Label, Description, DateStart, DateEnd)
VALUES
('Google AdWords Strategy', 'Discuss our current Google AdWords approach.', '2023-08-01 10:00:00', '2023-08-01 11:30:00'),
('New Brochures', 'Meeting to introduce the designs of the new brochures.', '2023-08-01 12:00:00', '2023-08-01 15:00:00'),
('Brochure Design Review', 'Review the design concepts for the new brochures.', '2023-08-01 15:30:00', '2023-08-01 18:15:00'),
('Website Re-Design Plan', 'Brainstorming session to gather ideas.', '2023-08-02 11:00:00', '2023-08-02 12:15:00'),
('Rollout of New Website', 'Plan the release strategy for the new website.', '2023-08-02 12:15:00', '2023-08-02 14:30:00'),
('Update Sales Strategy', 'Incorporate the latest sales data.', '2023-08-02 15:00:00', '2023-08-02 16:00:00'),
('Approve Hiring of John', 'Final meeting to review and approve the hiring.', '2023-08-03 14:00:00', '2023-08-03 16:00:00'),
('Conference', 'Attend the Q3 Leadership Conference.', '2023-08-04 10:00:00', '2023-08-04 12:00:00'),
('Update NDA Agreement', 'Workshop to revise the current NDA.', '2023-08-04 12:30:00', '2023-08-04 17:00:00');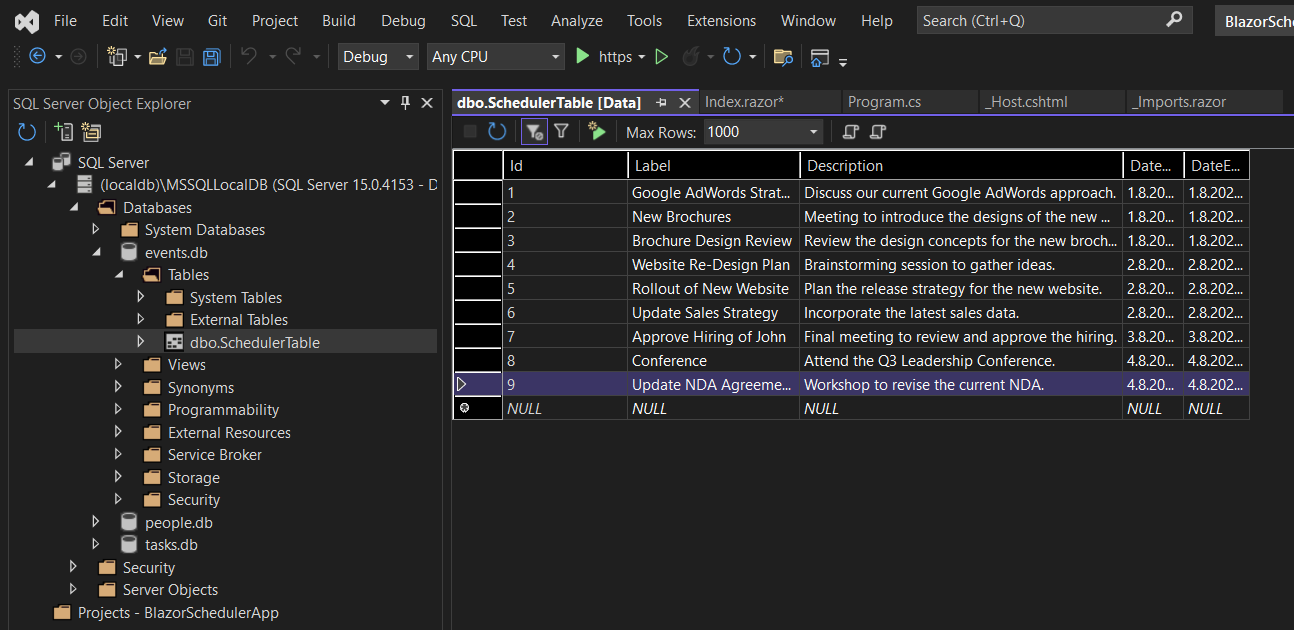
Connect Blazor to SQL Data
The following steps detail how to connect your SQL Data to the Blazor Application. If your data is already connected, continue to Bind Scheduler to SQL Data
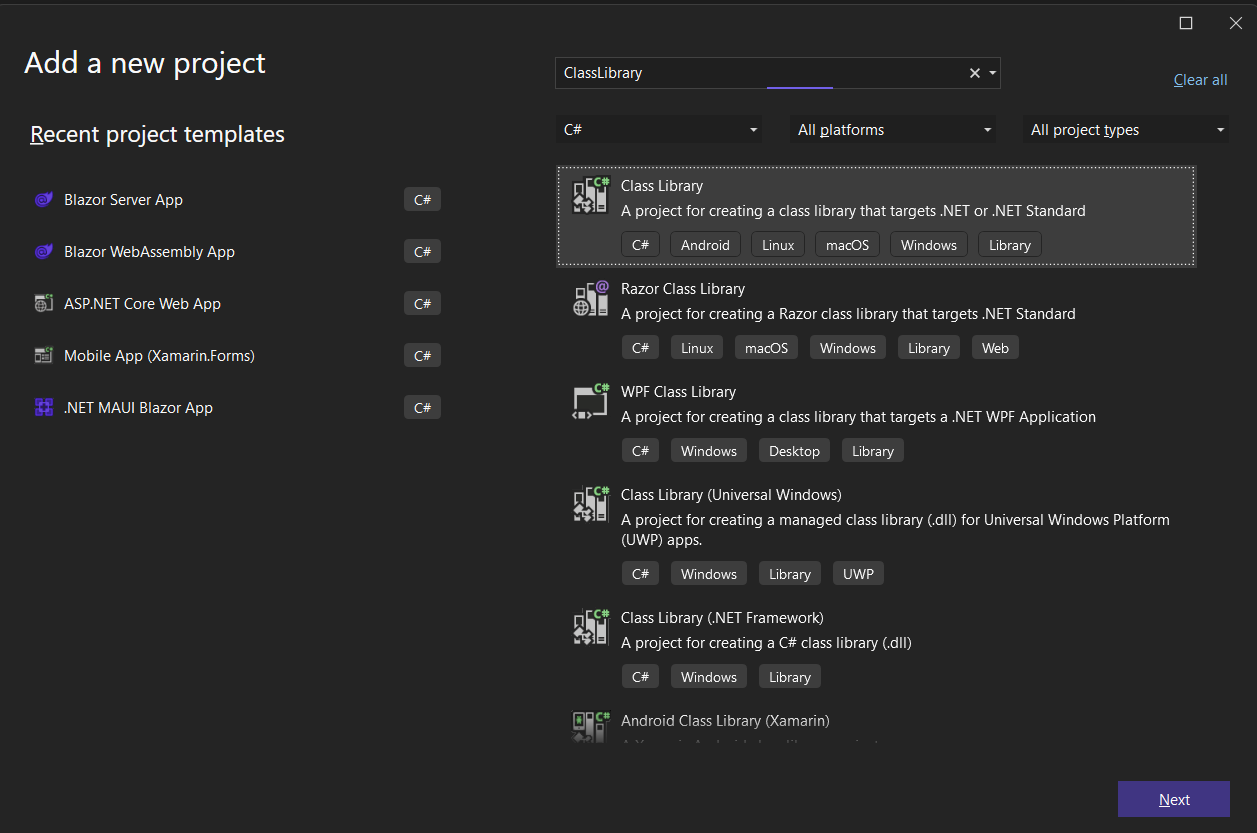
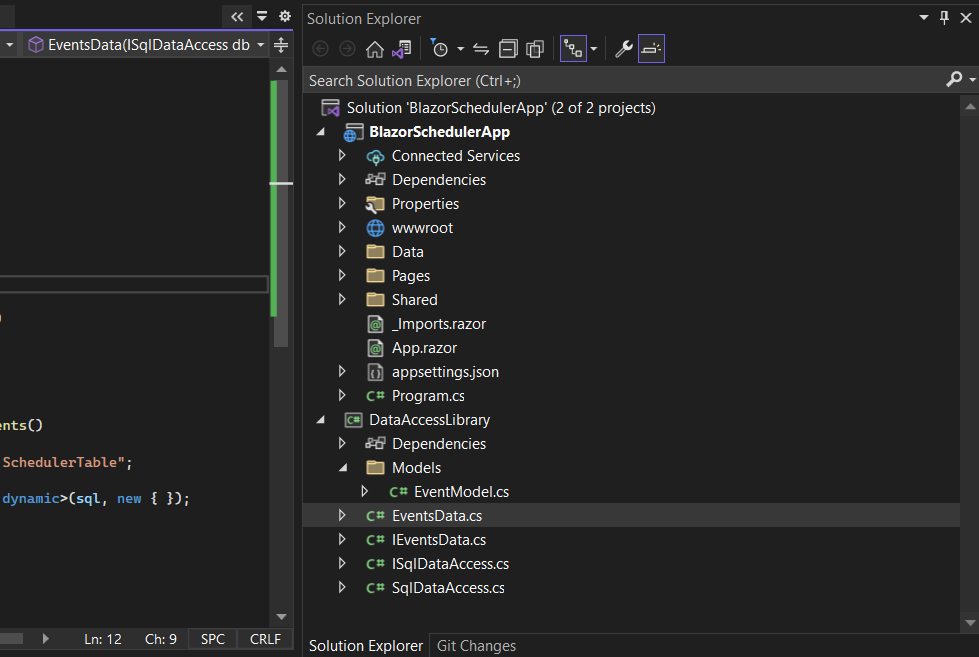
- Inside the Solution Explorer, right-click on your Solution and add a new project of type Class Library and call it DataAccessLibrary
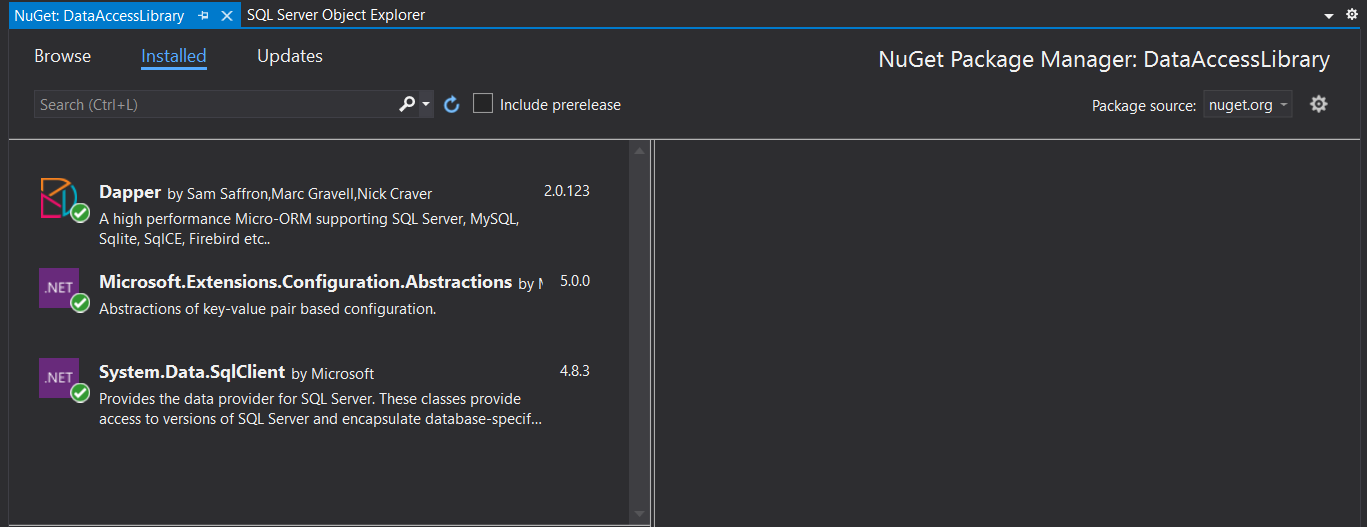
- Using the Visual Studio NuGet Package Manager, add the following dependancies to DataAccessLibrary:
Microsoft.Extensions.Configuration.AbstractionsSystem.Data.SqlClientDapper
- Inside DataAcessLibrary, create a new folder "Models", then create a new new item of type
Classcalled EventModel.cs
This is where we will define the properties of each individual Event from our SQL table:using System; using System.Collections.Generic; using System.Text; namespace DataAccessLibrary.Models { public class EventModel { public int Id { get; set; } public string Label { get; set; } public string Description { get; set; } public DateTime DateStart { get; set; } public DateTime DateEnd { get; set; } } }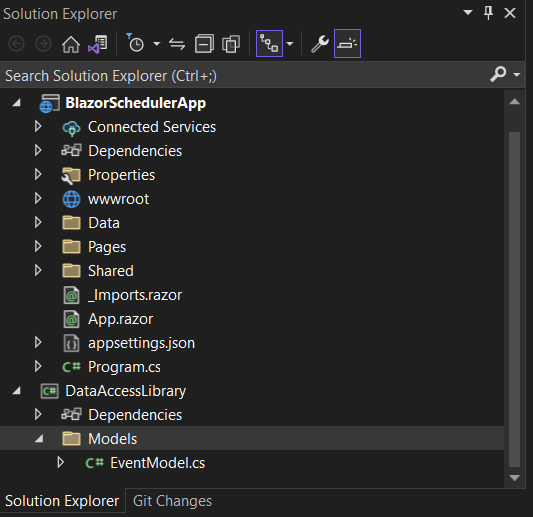
- Inside DataAcessLibrary, create a new new item of type
Classcalled SqlDataAccess.cs
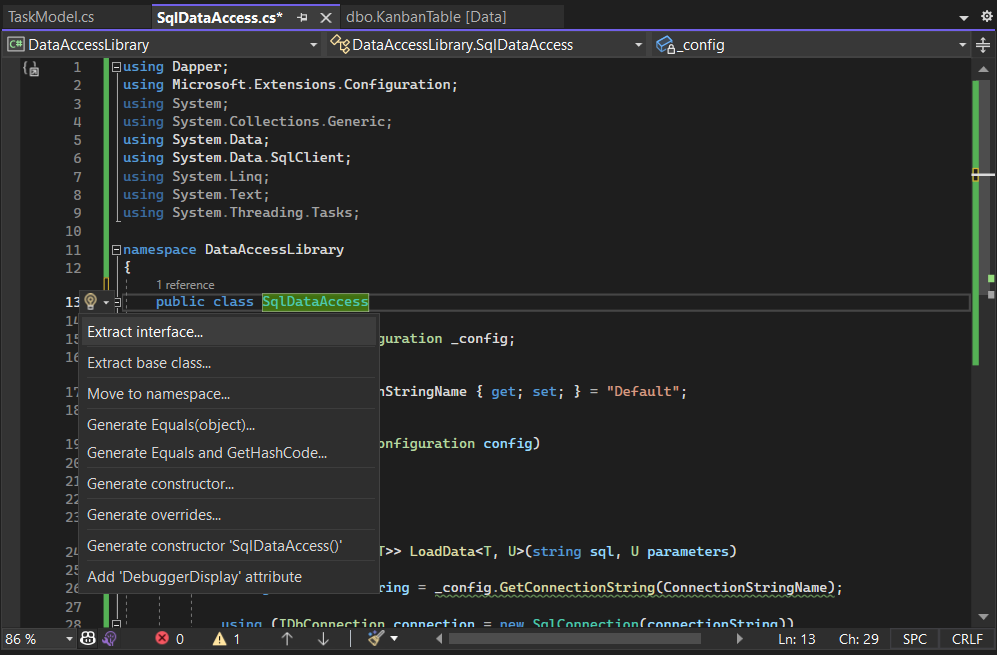
This is where we will create the LoadData function:using Dapper; using Microsoft.Extensions.Configuration; using System; using System.Collections.Generic; using System.Data; using System.Data.SqlClient; using System.Linq; using System.Text; using System.Threading.Tasks; namespace DataAccessLibrary { public class SqlDataAccess { private readonly IConfiguration _config; public string ConnectionStringName { get; set; } = "Default"; public SqlDataAccess(IConfiguration config) { _config = config; } public async Task<List<T>> LoadData<T, U>(string sql, U parameters) { string connectionString = _config.GetConnectionString(ConnectionStringName); using (IDbConnection connection = new SqlConnection(connectionString)) { var data = await connection.QueryAsync<T>(sql, parameters); return data.ToList(); } } } }Select the SqlDataAccess class and create an Interface by navigating to Quick Actions & Refactoring -> Extract Interface -> OK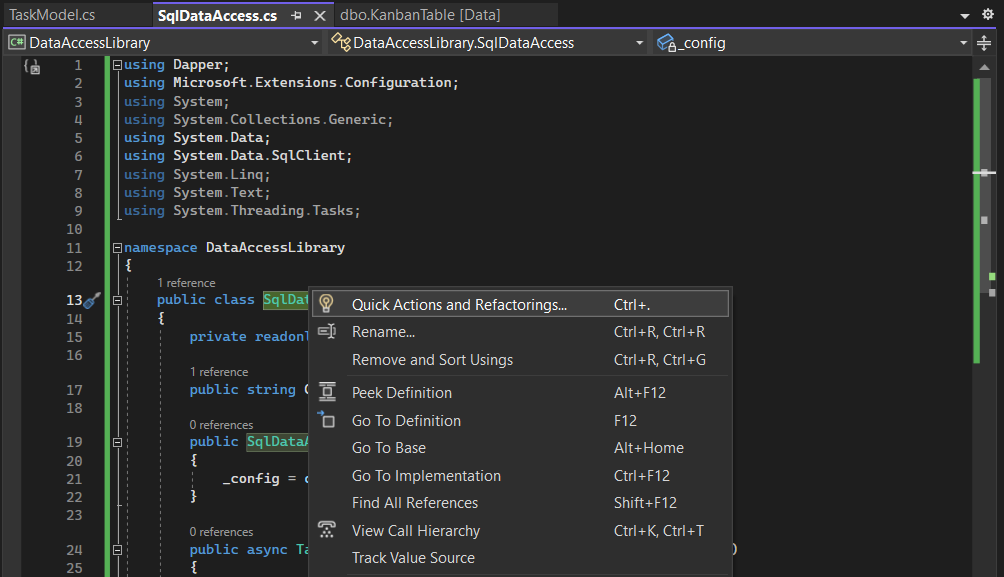
- Inside DataAcessLibrary, create a new new item of type
Classcalled EventsData.cs
Here we will create the GetEvents method, which executes a sql query and returns an array, where each item is a Event object:using DataAccessLibrary.Models; using System; using System.Collections.Generic; using System.Text; using System.Threading.Tasks; namespace DataAccessLibrary { public class EventsData { private readonly ISqlDataAccess _db; public EventsData(ISqlDataAccess db) { _db = db; } public Task<List<EventModel>> GetEvents() { string sql = "select * from dbo.SchedulerTable"; return _db.LoadData<EventModel, dynamic>(sql, new { }); } } }Then create a new interface for EventsData by following the same steps as for SqlDataAccess
-
Add a reference of DataAcessLibrary in the original Blazor project by right-clicking on the BlazorApp and selecting Add -> Project Reference

-
Inside the Program.cs file, add the
SqlDataAccessandEventsDataServices:For .NET 6 and .NET 7:
using MyBlazorApp.Data;
using Microsoft.AspNetCore.Components;
using Microsoft.AspNetCore.Components.Web;
using Smart.Blazor;
using DataAccessLibrary;

var builder = WebApplication.CreateBuilder(args);

// Add services to the container.
builder.Services.AddRazorPages();
builder.Services.AddServerSideBlazor();
builder.Services.AddSingleton<WeatherForecastService>();
builder.Services.AddTransient<ISqlDataAccess, SqlDataAccess>();
builder.Services.AddTransient<IEventsData, EventsData>();

// Add Smart UI for Blazor.
builder.Services.AddSmart();

var app = builder.Build();
.....
For .NET 5:
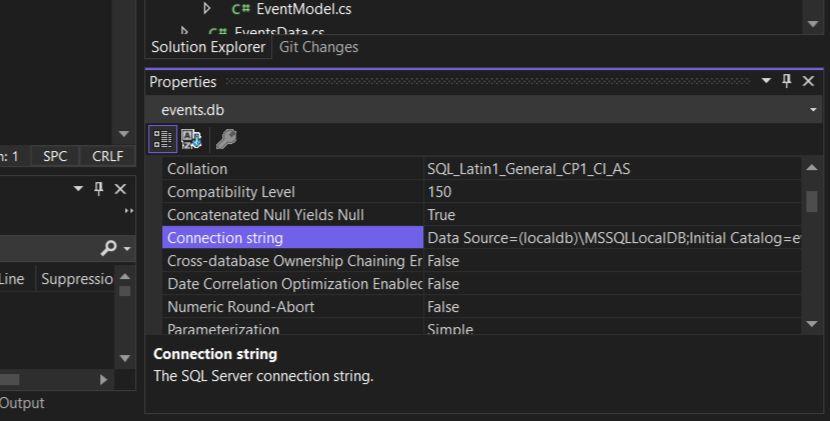
..... public void ConfigureServices(IServiceCollection services) { services.AddRazorPages(); services.AddServerSideBlazor(); services.AddSingleton<WeatherForecastService>(); services.AddTransient<ISqlDataAccess, SqlDataAccess>(); services.AddTransient<IEventsData, EventsData>(); services.AddSmart(); } ..... - Finally, navigate to events.db using the SQL Server Object Explorer, right-click and select properties.
Then copy the value of the "Connection string" property
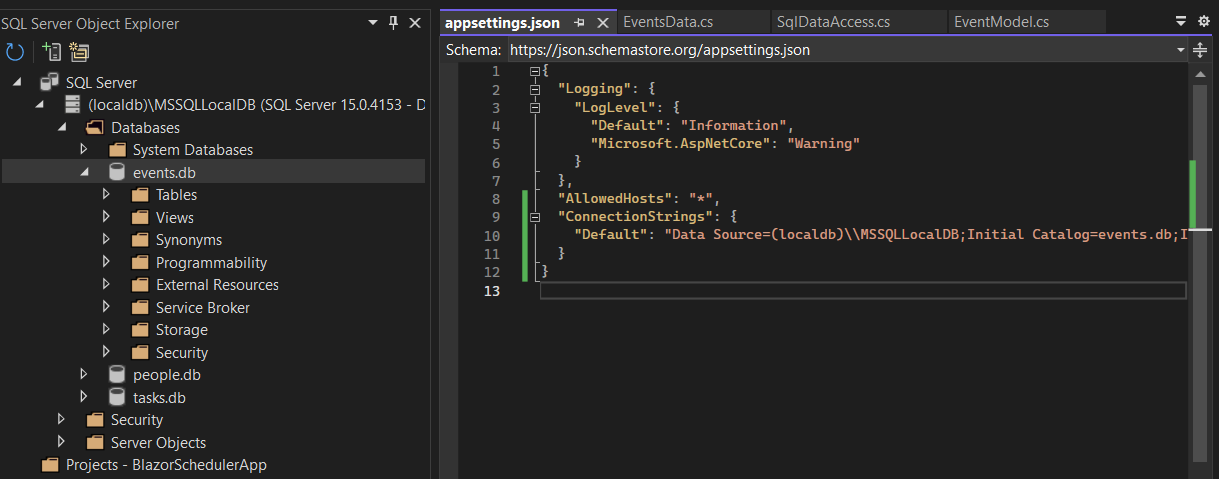
Inside your Blazor Application, navigate to appsettings.json and set ConnectionStrings.Default to the copied value:
Bind Scheduler to SQL Data
- Add the Scheduler component to the Pages/Index.razor file of your Blazor Application.
<Scheduler @ref="scheduler" DataSource="dataSource" HourStart="@hourStart"></Scheduler>
- Now we need to create a helper function, which will convert the EventModel class in the required SchedulerDataSource class.
This means that the SQL dataFields don't need to match the Scheduler dataFields.public static SchedulerDataSource ConvertEventModelToSchedulerDataSource(EventModel eventModel) { if (eventModel == null) { throw new ArgumentNullException(nameof(eventModel)); } return new SchedulerDataSource() { Id = eventModel.Id.ToString(), Label = eventModel.Label, Description = eventModel.Description, DateStart = eventModel.DateStart, DateEnd = eventModel.DateEnd }; } -
Finally, invoke the _db.GetEvents() method and use the helper function to create a dataSource for the Scheduler:
@page "/"

@using DataAccessLibrary
@using DataAccessLibrary.Models

@inject IEventsData _db

<Scheduler DataSource="@dataSource" HourStart="@hourStart"></Scheduler>

@code{
    int hourStart = 9;

    List<SchedulerDataSource> dataSource;

    public static SchedulerDataSource ConvertEventModelToSchedulerDataSource(EventModel eventModel)
    {
        if (eventModel == null)
        {
            throw new ArgumentNullException(nameof(eventModel));
        }

        return new SchedulerDataSource()
            {
                Id = eventModel.Id.ToString(),
                Label = eventModel.Label,
                Description = eventModel.Description,
                DateStart = eventModel.DateStart,
                DateEnd = eventModel.DateEnd
            };
    }


    protected override async Task OnInitializedAsync()
    {
        var events = await _db.GetEvents();
        dataSource = events.Select(ConvertEventModelToSchedulerDataSource).ToList();
    }
}