Build your web apps using Smart UI
Smart.Accordion - Angular Routing With Accordion Component
Angular Routing With Accordion Component
The Angular Router enables navigation from one view to the next as users perform application tasks.
This guide will cover the router's primary features, illustrating them throught the Smart Accordion Component.
Project Overview
The Angular project will contain one Accordion component with two Accordion Items. Each of them will have a router-outlet that will be used to visualize the different components for each Accordion Item. The components will be handled by two Angular modules, one for each Accordion Item that will have two views - list view to show all of the items and details view that will appear when an item is clicked. The router navigations will be animated.
Configurations
-
Create a new Angular Project by typing in the following command:
ng new angular-routing
- From inside the newly created project directory, create two new folders called crisis and heroes. These two will contain the required files for the two modules that we are going to create. Both folders will contain module files and components.
-
Create the components for the crisis view by typing in the following command from
inside the directory:
ng generate component crisis-detail
ng generate component crisis-list
Two new folders with component configuration files ( css, ts, html) should be created inside each folder.
Open the crisis-detail.component.ts file and add the following lines of code:import { Component, OnInit, HostBinding, ViewEncapsulation } from '@angular/core'; import { Router, ActivatedRoute, ParamMap } from '@angular/router'; import { Crisis } from '../crisis'; import { CrisisService } from '../crisis.service'; @Component({ selector: 'app-crisis-detail', templateUrl: './crisis-detail.component.html', styleUrls: ['./crisis-detail.component.css'], encapsulation: ViewEncapsulation.None }) export class CrisisDetailComponent implements OnInit { crisis: Crisis; editName: string; constructor( private route: ActivatedRoute, private router: Router, private service: CrisisService ) { } ngOnInit() { const that = this; this.route.data .subscribe((data: { crisis: Crisis }) => { this.editName = data.crisis.name; this.crisis = data.crisis; }); } cancel() { this.gotoCrises(); } save() { this.crisis.name = this.editName; this.gotoCrises(); } gotoCrises() { let crisisId = this.crisis ? this.crisis.id : null; // Pass along the crisis id if available // so that the CrisisListComponent can select that crisis. // Add a totally useless `foo` parameter for kicks. // Relative navigation back to the crises this.router.navigate(['../', { id: crisisId }], { relativeTo: this.route }); } }- Crisis represents a reference to the Crisis class that is located in the same directory.
- CrisisService is a service used to handle the Crisis class by providing methods for getting the demo data that is located in a separate file called mock-crisis.ts.
- cancel, save and gotoCrises represent click event handlers for the Cancel, Save and Back buttons inside app.component.html. The gotoCrises handler uses the Router component to navigate back to the previous view which is the list of crisis by passing in the id of the crisis tha was selected in order to style it as active.
this.router.data is additional data that we are going to add to the router object when navigating from crisis-list to crisis-detail. The usage if this additional data is defined in the crsis router module that will be created later in the crisis folder. Here's how the crisis-detail.component.html looks like:
<h1>Angular Router with Accordion</h1>

<smart-accordion #accordion [expandedIndexes]="[1]">
  <smart-accordion-item [label]="'Crisis List'">
    <div [@routeAnimation]="getAnimationData(routerOutletAux)">
      <router-outlet #routerOutletAux="outlet" name="crisis"></router-outlet>
    </div>
    </smart-accordion-item>
    <smart-accordion-item [label]="'Heores'">
      <div [@routeAnimation]="getAnimationData(routerOutlet)">
        <router-outlet #routerOutlet="outlet"></router-outlet>
      </div>
    </smart-accordion-item>
</smart-accordion>
Open the crisis-list.components.ts and add the following lines of code:
import { Component, OnInit, ViewEncapsulation } from '@angular/core'; import { ActivatedRoute } from '@angular/router'; import { Observable } from 'rxjs'; import { switchMap } from 'rxjs/operators'; import { CrisisService } from '../crisis.service'; import { Crisis } from '../crisis'; @Component({ selector: 'app-crisis-list', templateUrl: './crisis-list.component.html', styleUrls: ['./crisis-list.component.css'], encapsulation: ViewEncapsulation.None }) export class CrisisListComponent implements OnInit { crises$: ObservableThis will be the view that will render the list of all crises. Clicking on a crisis will take you to the crisis-detail view to edit the crisis. Here's how the crisis-list.component.html looks like:
 <h2>CRISES</h2>

  <ul class="crises">
    <li *ngFor="let crisis of crises$ | async"
      [class.selected]="crisis.id === selectedId">
      <a [routerLink]="[crisis.id]">
        <span class="badge">{{ crisis.id }}</span>{{ crisis.name }}
      </a>
    </li>
  </ul>
The router-link navigates to the crisis-detail view of a specific crisis with id crisis.id.
-
Create the additonal modules and TS definitions for the crisis module.
The following files should be present inside the crisis folder:
- crisis-detail-resolver.service.ts -
The CrisisDetailComponent retrieves the selected crisis. If the
crisis is not found, it navigates back to the crisis list view. The experience might
be better if all of this were handled first, before the route is activated. A
CrisisDetailResolver service could retrieve a Crisis or navigate away if the Crisis
does not exist before activating the route and creating the CrisisDetailComponent.
So
in order to create the resolver service type in the following command from inside
the crisis folder:
ng generate service crisis/crisis-detail-resolver
This command will create the new service. Add the following lines of code to it:
import { Injectable } from '@angular/core'; import { Router, Resolve, RouterStateSnapshot, ActivatedRouteSnapshot } from '@angular/router'; import { Observable, of, EMPTY } from 'rxjs'; import { mergeMap, take } from 'rxjs/operators'; import { CrisisService } from './crisis.service'; import { Crisis } from './crisis'; @Injectable({ providedIn: 'root', }) export class CrisisDetailResolverService implements Resolve{ constructor(private cs: CrisisService, private router: Router) { } resolve(route: ActivatedRouteSnapshot, state: RouterStateSnapshot): Observable | Observable { let id = route.paramMap.get('id'); return this.cs.getCrisis(id).pipe( take(1), mergeMap(crisis => { if (crisis) { return of(crisis); } else { // id not found this.router.navigate([{ outlets: { crisis: ['crisis'] } }]); return EMPTY; } }) ); } } The CrisisService.getCrisis method returns an observable, in order to prevent the route from loading until the data is fetched. The Router guards require an observable to complete, meaning it has emitted all of its values. You use the take operator with an argument of 1 to ensure that the Observable completes after retrieving the first value from the Observable returned by the getCrisis method. If it doesn't return a valid Crisis, return an empty Observable, canceling the previous in-flight navigation to the CrisisDetailComponent and navigate the user back to the CrisisListComponent.
- crisis-routing.module.ts - contains the Router configuration for the
crisis module.
Since it has two components we have to define the Router routes to those
components. The crisis routing module should be created inside the crisis
folder with the following content:
import { NgModule } from '@angular/core';
import { RouterModule, Routes } from '@angular/router';

import { CrisisListComponent } from './crisis-list/crisis-list.component';
import { CrisisDetailComponent } from './crisis-detail/crisis-detail.component';

import { CrisisDetailResolverService } from './crisis-detail-resolver.service';

const crisisRoutes: Routes = [
  { path: 'crisis', component: CrisisListComponent, outlet: 'crisis', data: { animation: 'heroes' } },
  {
    path: 'crisis/:id', component: CrisisDetailComponent, outlet: 'crisis', data: { animation: 'hero' },
    resolve: {
      crisis: CrisisDetailResolverService
    }
  }
];

@NgModule({
  imports: [
    RouterModule.forChild(crisisRoutes)
  ],
  exports: [
    RouterModule
  ]
})
export class CrisisRoutingModule { }
RouterModule.forChild(crisisRoutes) adds the new routes to the Router.
- crisis.module.ts - contains the module definition for the crisis module:
import { NgModule }       from '@angular/core';
import { FormsModule }    from '@angular/forms';
import { CommonModule }   from '@angular/common';

import { CrisisListComponent }       from './crisis-list/crisis-list.component';
import { CrisisDetailComponent }     from './crisis-detail/crisis-detail.component';

import { ButtonModule } from 'smart-webcomponents-angular/button';
import { TextBoxModule } from 'smart-webcomponents-angular/textbox';

import { CrisisRoutingModule } from './crisis-routing.module';

@NgModule({
  imports: [
    CommonModule,
    FormsModule,
    ButtonModule,
    TextBoxModule,
    CrisisRoutingModule
  ],
  declarations: [
    CrisisListComponent,
    CrisisDetailComponent
  ]
})
export class CrisisModule {}
Important to note here is the inclusion of the CrisisRoutingModule and the declaration of the two components: CrisisListComponent and CrisisDetailComponent
- crisis.service.ts - contains setters and getters for the Crisis class
and allows to interact with data that is located
inside the mock-crisis TS file. Here's what it looks like:
import { BehaviorSubject } from 'rxjs'; import { map } from 'rxjs/operators'; import { Injectable } from '@angular/core'; import { Crisis } from './crisis'; import { CRISES } from './mock-crises'; @Injectable({ providedIn: 'root', }) export class CrisisService { static nextCrisisId = 100; private crises$: BehaviorSubjectgetCrises() method returns all crises records from the mock-crises file. The getCrisis() method allows to fetch a specific crisis that matches it's id. The addCrisis() method allows to add a new crisis to the list. Since we are using an Observable to fetch crisis, editing the name of a crisis when insinde the crisis-detail updates the original item.
- crisis.ts - the TS definition for a Crisis.
export class Crisis { id: number; name: string; } - mock-crises.ts - contains mock up crises data:
import { Crisis } from './crisis';

export const CRISES: Crisis[] = [
  { id: 1, name: 'Dragon Burning Cities' },
  { id: 2, name: 'Sky Rains Great White Sharks' },
  { id: 3, name: 'Giant Asteroid Heading For Earth' },
  { id: 4, name: 'Procrastinators Meeting Delayed Again' },
]
- crisis-detail-resolver.service.ts -
The CrisisDetailComponent retrieves the selected crisis. If the
crisis is not found, it navigates back to the crisis list view. The experience might
be better if all of this were handled first, before the route is activated. A
CrisisDetailResolver service could retrieve a Crisis or navigate away if the Crisis
does not exist before activating the route and creating the CrisisDetailComponent.
So
in order to create the resolver service type in the following command from inside
the crisis folder:
-
Create the components for the heroes the same way as with crisis inside the
heroes folder
via the following commands:
ng generate component hero-detail
ng generate component hero-list
Two new components in separate folders should be created. hero-detail will contain the view for a specific hero while hero-list should list all of the heroes.
Open the hero-detail.component.ts and add the following lines of code:
import { switchMap } from 'rxjs/operators'; import { Component, OnInit, ViewEncapsulation } from '@angular/core'; import { Router, ActivatedRoute, ParamMap } from '@angular/router'; import { Observable } from 'rxjs'; import { HeroService } from '../hero.service'; import { Hero } from '../hero'; @Component({ selector: 'app-hero-detail', templateUrl: './hero-detail.component.html', styleUrls: ['./hero-detail.component.css'], encapsulation: ViewEncapsulation.None }) export class HeroDetailComponent implements OnInit { hero$: Observable; constructor( private route: ActivatedRoute, private router: Router, private service: HeroService ) { } ngOnInit() { this.hero$ = this.route.paramMap.pipe( switchMap((params: ParamMap) => this.service.getHero(params.get('id'))) ); } gotoHeroes(event: CustomEvent, hero: Hero) { let heroId = hero ? hero.id : null; // Pass along the hero id if available // so that the HeroList component can select that hero. // Include a junk 'foo' property for fun. this.router.navigate(['/superheroes', { id: heroId }]); } } - The gotoHeroes method is responsible for navigating back to the hero-list view. It passes an additional argument in the URL in order to tell the hero-list view which hero was selected and highlight it as active. Important thing to note here is the hero$ attribute which represents an Observable that contains a Hero object. The id of the selected hero is passed in the navigation URL and can be fetched via this.route.paramMap using a swtichMap.
- An additional HeroService is also created to provide getter methods for the heroes.
- The Hero import represents the Hero Class that contains the definitions for a hero.
Here's how the hero-detail.component.html looks like:
	<h2>HEROES</h2>
	<div *ngIf="hero$ | async as hero" >
	  <h3>"{{ hero.name }}"</h3>
	  <div>
		<label>Id: </label>{{ hero.id }}</div>
	  <div class="component-container">
		<label>Name: </label>
		<smart-text-box [(ngModel)]="hero.name" [placeholder]="'Name'" ></smart-text-box>
	  </div>
	  <p>
		<smart-button (onClick)="gotoHeroes($event, hero)">Back</smart-button>
	  </p>
	</div>
The hero-detail view shows the name and id of the a hero and allows to edit the name.
Now open the hero-list.component.ts and paste the following code inside:
// TODO: Feature Componetized like CrisisCenter import { Observable } from 'rxjs'; import { switchMap } from 'rxjs/operators'; import { Component, OnInit, ViewEncapsulation } from '@angular/core'; import { ActivatedRoute } from '@angular/router'; import { HeroService } from '../hero.service'; import { Hero } from '../hero'; @Component({ selector: 'app-hero-list', templateUrl: './hero-list.component.html', styleUrls: ['./hero-list.component.css'], encapsulation: ViewEncapsulation.None }) export class HeroListComponent implements OnInit { heroes$: ObservableWhen the view is initialized during ngOnInit the heroes$ Observable is updated to contain all of the heroes using the HeroService in order to display them. The Router parameters are checked for the existence of hero id using the router.paramMap in order to apply additional style to the active hero. This additional parameter is passed from the hero-detail component and stored inside the selectedId variable.
Here is the contents of hero-list.component.html:
<h2>HEROES</h2>
<ul class="heroes">
  <li *ngFor="let hero of heroes$ | async"
    [class.selected]="hero.id === selectedId">
    <a [routerLink]="['/', { outlets: { primary: ['superhero', hero.id], crisis: 'crisis' } }]">
      <span class="badge">{{ hero.id }}</span>{{ hero.name }}
    </a>
  </li>
</ul>
The routerLink navigates to the hero-detail view by passing in an additional argument - the id of the target hero. If the id is not provided the Router will take us back to the hero-list view.
-
Create the additonal modules and TS definitions for the heroes module.
The process of creating the additional files for the heroes is the same as with crisis.
The following files should be present inside the heroes folder:
-
heroes-routing.module.ts -contains the Router configuration for the heroes
module. Since it has two components we have to define the Router routes to those
components. The heroes routing module should be created inside the heroes folder
with the following content:
import { NgModule }             from '@angular/core';
import { RouterModule, Routes } from '@angular/router';

import { HeroListComponent }    from './hero-list/hero-list.component';
import { HeroDetailComponent }  from './hero-detail/hero-detail.component';

const heroesRoutes: Routes = [
  { path: 'heroes', redirectTo: '/superheroes' },
  { path: 'hero/:id', redirectTo: '/superhero/:id' },
  { path: 'superheroes',  component: HeroListComponent, data: { animation: 'heroes' } },
  { path: 'superhero/:id', component: HeroDetailComponent, data: { animation: 'hero' } }
];

@NgModule({
  imports: [
    RouterModule.forChild(heroesRoutes)
  ],
  exports: [
    RouterModule
  ]
})
export class HeroesRoutingModule { }
In addition to the default 'heroes' route we also added 'superheroes' so adding either of them in the URL will take us to the hero-list component.
-
heroes.module.ts - contains the Router routes for the heroes components:
import { NgModule }       from '@angular/core';
import { CommonModule }   from '@angular/common';
import { FormsModule }    from '@angular/forms';

import { HeroListComponent }    from './hero-list/hero-list.component';
import { HeroDetailComponent }  from './hero-detail/hero-detail.component';

import { ButtonModule } from 'smart-webcomponents-angular/button';
import { TextBoxModule } from 'smart-webcomponents-angular/textbox';

import { HeroesRoutingModule } from './heroes-routing.module';

@NgModule({
  imports: [
    CommonModule,
    FormsModule,
    ButtonModule,
    TextBoxModule,
    HeroesRoutingModule
  ],
  declarations: [
    HeroListComponent,
    HeroDetailComponent
  ]
})
export class HeroesModule {}
The HeroesRoutingModule definition is important in order to configure the Router for the hero components.
-
hero.service.ts - contains the setters/getters for the heroes data located in
the mock-heroes.ts file.
import { Injectable } from '@angular/core'; import { Observable, of } from 'rxjs'; import { map } from 'rxjs/operators'; import { Hero } from './hero'; import { HEROES } from './mock-heroes'; @Injectable({ providedIn: 'root', }) export class HeroService { getHeroes(): ObservableTwo methods are available for the heroes - getHeroes() returns an Observable array of all heroes and getHero() which return an Observable of a specific hero according to it's id.
-
hero.ts - contains the class definition for a hero:
export interface Hero { id: number; name: string; } -
mock-heroes.ts - contains a mock up list of heroes:
import { Hero } from './hero';

export const HEROES: Hero[] = [
  { id: 11, name: 'Dr Nice' },
  { id: 12, name: 'Narco' },
  { id: 13, name: 'Bombasto' },
  { id: 14, name: 'Celeritas' },
  { id: 15, name: 'Magneta' },
  { id: 16, name: 'RubberMan' },
  { id: 17, name: 'Dynama' },
  { id: 18, name: 'Dr IQ' },
  { id: 19, name: 'Magma' },
  { id: 20, name: 'Tornado' }
];
-
heroes-routing.module.ts -contains the Router configuration for the heroes
module. Since it has two components we have to define the Router routes to those
components. The heroes routing module should be created inside the heroes folder
with the following content:
- Configure the Application
- Create a separate app-routing.module.ts that will contain the Router routes
for the crises and heroes components. Here's what it looks like:
import { NgModule } from '@angular/core';
import { RouterModule, Routes } from '@angular/router';

const appRoutes: Routes = [
  {
    path: 'crisis', outlet: 'crisis',
    loadChildren: () => import('./crisis/crisis.module').then(m => m.CrisisModule)
  },
  { path: '', redirectTo: '/superheroes', pathMatch: 'full' },
  { path: '**', redirectTo: '/superheroes' }
];

@NgModule({
  imports: [
    RouterModule.forRoot(
      appRoutes,
      {
        enableTracing: false, // <-- debugging purposes only
      }
    )
  ],
  exports: [
    RouterModule
  ]
})
export class AppRoutingModule { }
The routes are defined inside the appRoutes variable and passed to the RouterModule via RouterModule.forRoot(appRoutes). Since this is the app module we use forRoot instead of forChild.
We are using an auxiliary router-outlet called 'crisis' to show the crisis components, we need to add the name of the outlet to the crisis route and loadChildren which will point to the CrisisModule that contains the crisis-routing.module. The heroes components are displayed inside the primary router-outlet.
-
Prepare the app.comonent.html - the main page of the application will load a
Smart Accordion component
with two Accordion Items. Each of them will have a router-outlet Angular component.
The Heroes Accordion Item will hold
the primary router-outlet while the Crisis Accordion Item will use an auxiliary
router-outlet. The default view
of the application will show the primary router-outlet - the Heroes.
Here's how the HTML of the Application looks like:
<h1>Angular Router with Accordion</h1>

<smart-accordion #accordion [expandedIndexes]="[1]">
  <smart-accordion-item [label]="'Crisis List'">
    <div [@routeAnimation]="getAnimationData(routerOutletAux)">
      <router-outlet #routerOutletAux="outlet" name="crisis"></router-outlet>
    </div>
    </smart-accordion-item>
    <smart-accordion-item [label]="'Heores'">
      <div [@routeAnimation]="getAnimationData(routerOutlet)">
        <router-outlet #routerOutlet="outlet"></router-outlet>
      </div>
    </smart-accordion-item>
</smart-accordion>
The router-outlets are wrapped around a DIV element with @routeAnimation attribute in order to animate them. We will show how this is done in the next steps.
Note that the named router-outlet will be the auxiliary router-outlet thanks to the name attribute.
-
Prepare the app.component.ts - contains the EventListener for the Accordion
component.
When the user selects a different Accordion Item, a indexChange event is fired and the
corresponding
view can be rendered by passing in the appropriate URL. Here are
the contents
of the main TS file:
import { Component, AfterViewInit, OnInit, ViewChild, ViewEncapsulation } from '@angular/core';
import { RouterOutlet, Router } from '@angular/router';
import { slideInAnimation } from './animations';

import { AccordionComponent, AccordionItem } from 'smart-webcomponents-angular/accordion';

@Component({
  selector: 'app-root',
  templateUrl: 'app.component.html',
  styleUrls: ['app.component.css'],
  animations: [slideInAnimation],
  encapsulation: ViewEncapsulation.None
})
export class AppComponent implements AfterViewInit, OnInit {
  @ViewChild('accordion', { read: AccordionComponent, static: false }) accordion: AccordionComponent;

  constructor(private router: Router) { }

  getAnimationData(outlet: RouterOutlet) {
    return outlet && outlet.activatedRouteData && outlet.activatedRouteData['animation'];
  }

  ngOnInit(): void {
    // onInit code.
  }

  ngAfterViewInit(): void {
    // afterViewInit code.
    this.init();
  }

  init(): void {
    // init code.

    const that = this;

    that.accordion.addEventListener('indexChange', function (event: CustomEvent) {
      const accordionItemIndex: number = event.detail.newIndex,
        tabItemLabel = (<AccordionItem>that.accordion.nativeElement.querySelectorAll('smart-accordion-item')[accordionItemIndex]).label;

      if (tabItemLabel === 'Heores') {
        that.router.navigate(['/superheroes']);
      }
      else {
        that.router.navigate([{ outlets: { crisis: ['crisis'] } }]);
      }
    })
  }
}
Sliding animations will be used to transition from one component to another. getAnimationData is used to configure the animation for the components. Remember to import the slide animation definition to the animations of the Component.
Inside the init()method we add an EventListener to the Accordion Component in order to navigate to the appropriate component. Since we are using an auxiliary router-outlet the URL for the crisis component looks differently and is specified by pointing out the target outlet, like so that.router.navigate([{ outlets: { crisis: ['crisis'] } }]). This will navigate the application to /superheroes(crisis:crisis) which will display the CrisisListComponent according to the CrisisRoutingModule that we created earlier.
- Configure app.module.ts - the module TS file for the application should
import
all necessary modules that we previously created - CrisisModule, HeroesModule,
AppRoutingModule.
import { NgModule } from '@angular/core';
import { BrowserModule } from '@angular/platform-browser';
import { FormsModule } from '@angular/forms';
import { BrowserAnimationsModule } from '@angular/platform-browser/animations';

import { Router } from '@angular/router';

import { AccordionModule } from 'smart-webcomponents-angular/accordion';

import { AppComponent } from './app.component';

import { AppRoutingModule } from './app-routing.module';
import { HeroesModule } from './heroes/heroes.module';
import { CrisisModule } from './crisis/crisis.module';

@NgModule({
  imports: [
    BrowserModule,
    BrowserAnimationsModule,
    FormsModule,
    CrisisModule,
    HeroesModule,
    AppRoutingModule,
    AccordionModule
  ],
  declarations: [
    AppComponent
  ],
  bootstrap: [AppComponent]
})
export class AppModule {
}
Don't forget to also import the AccordionModule since we are going to use a AccordionComponent.
-
Configure the Animations for the components - the router-outlets can be
animated thanks to the @angular/animations package.
For the purpose we need to create a animations.ts file at the root of the
application with the following content:
import {
  trigger, animateChild, group,
  transition, animate, style, query
} from '@angular/animations';


// Routable animations
export const slideInAnimation =
  trigger('routeAnimation', [
    transition('heroes <=> hero', [
      style({ position: 'relative' }),
      query(':enter, :leave', [
        style({
          position: 'absolute',
          top: 0,
          left: 0,
          width: '100%'
        })
      ]),
      query(':enter', [
        style({ left: '-100%'})
      ]),
      query(':leave', animateChild()),
      group([
        query(':leave', [
          animate('300ms ease-out', style({ left: '100%'}))
        ]),
        query(':enter', [
          animate('300ms ease-out', style({ left: '0%'}))
        ])
      ]),
      query(':enter', animateChild()),
    ])
  ]);
The file contains all necessary settings for the slide animation of the components.
The transition is applied to the Router routes inside the crisis-routing.module.ts and heroes-routing.module.ts as data attributes.
- Create a separate app-routing.module.ts that will contain the Router routes
for the crises and heroes components. Here's what it looks like:
-
Build and Run The Application
After configuring the corresponding project configuration files enter the following command in order to build the application for production:
ng build --prod
A live version of the code presented in this tutorial can be found in the demo Angular Routing with Accordion.
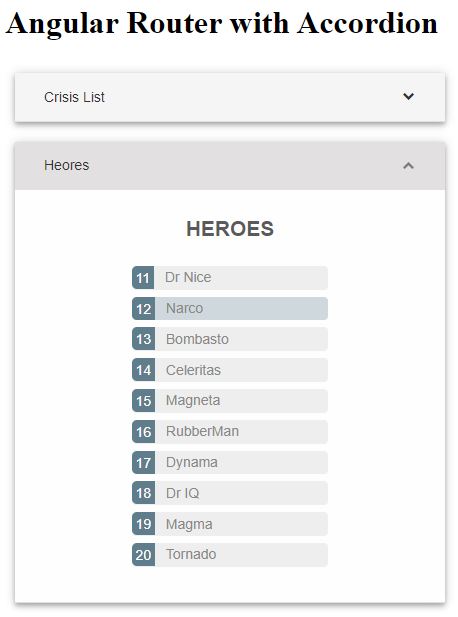
Here is what the application looks like when launched.