Blazor - Get Started with Smart.Table
Setup The Project
Follow the Getting Started guide to set up your Blazor Application with Smart UI.
Setup Basic Table
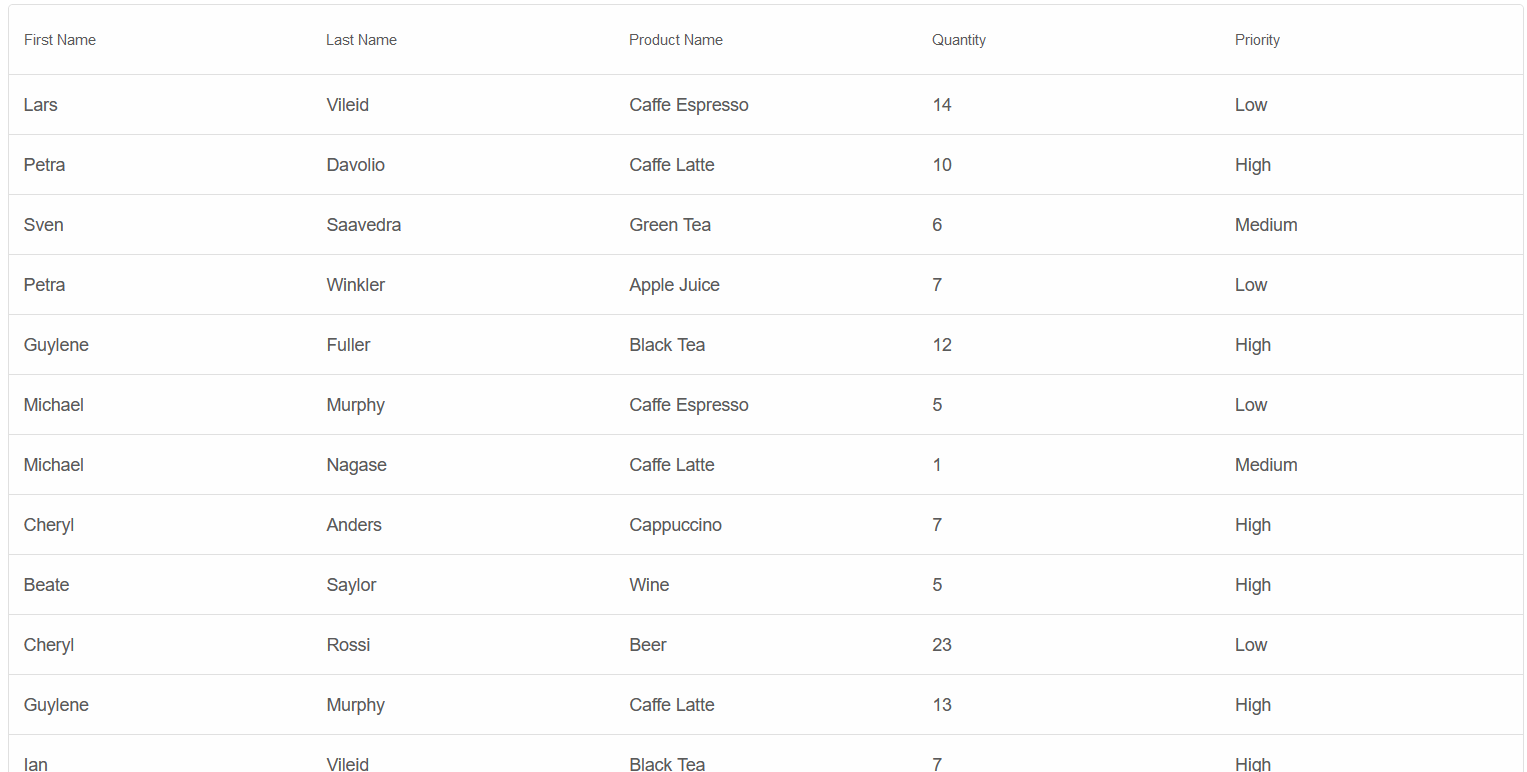
Smart.Table can be used to extend the functionality of the basic HTML Table by supporting custom styles, hover effects, sorting, filtering and other data related capabilities.
- Add the Table component to the Pages/Index.razor file
<Table></Table>
- Inside the
@codeblock, declare the Table Columns and set them as properties of the Table componentTableColumn[] columns = new TableColumn[]{ new TableColumn(){ Label="First Name", DataField="FirstName", }, new TableColumn(){ Label="Last Name", DataField="LastName", }, new TableColumn(){ Label="Product Name", DataField="ProductName", }, new TableColumn(){ Label="Quantity", DataField="Quantity", DataType= TableColumnDataType.Number }, new TableColumn(){ Label="Priority", DataField="Priority", } }; - Create an example Order data and bind it to the Table using the
Datasourceproperty<Table DataSource="@orders" Columns="@columns"></Table> @code{ ... class Order { public string FirstName { get; set; } public string LastName { get; set; } public string ProductName { get; set; } public int Quantity { get; set; } public string Priority { get; set; } public Order(string firstName, string lastName, string productName, int quantity, string priority){ FirstName = firstName; LastName = lastName; ProductName = productName; Quantity = quantity; Priority = priority; } } Order[] orders = new Order[] { new Order("Lars", "Vileid","Caffe Espresso", 14, "Low"), new Order("Petra", "Davolio","Caffe Latte", 10, "High"), new Order("Sven", "Saavedra","Green Tea", 6, "Medium"), new Order("Petra", "Winkler","Apple Juice", 7, "Low"), new Order("Guylene", "Fuller","Black Tea", 12, "High"), new Order("Michael", "Murphy","Caffe Espresso", 5, "Low"), new Order("Michael", "Nagase","Caffe Latte", 1, "Medium"), new Order("Cheryl", "Anders","Cappuccino", 7, "High"), new Order("Beate", "Saylor","Wine", 5, "High"), new Order("Cheryl", "Rossi","Beer", 23, "Low"), new Order("Guylene", "Murphy","Caffe Latte", 13, "High"), new Order("Ian", "Vileid","Black Tea", 7, "High"), new Order("Ian", "Devling","Apple Juice", 8,"Low"), new Order("Peter", "Murphy","Cappuccino", 10, "Medium"), new Order("Nancy", "Bein","Black Tea", 7,"High"), new Order("Andrew", "Winkler","Wine", 7, "Low"), new Order("Mayumi", "Davolio","Apple Juice", 4, "High"), new Order("Shelley", "Saavedra","Cappuccino", 12, "Low"), new Order("Yoshi", "Ohno","Wine", 4, "Medium"), new Order("Beate", "Vileid","Caffe Espresso", 10, "High"), new Order("Lars", "Nodier","Caffe Espresso", 1, "Low"), }; } - Alternatively, Smart.Table allows you to simply place an HTML Table inside the Table component
<Table>
  <table>
      <thead>
          <tr>
              <th scope="col">First Name</th>
              <th scope="col">Last Name</th>
              <th scope="col">Product Name</th>
              <th scope="col">Quantity</th>
              <th scope="col">Price</th>
              <th scope="col">Order Date</th>
          </tr>
          <tbody>
              <tr>
                  <td>Lars</td>
                  <td>Vileid</td>
                  <td>Caffe Espresso</td>
                  <td>14</td>
                  <td>Low</td>
              </tr>
              <tr>
                  <td>Petra</td>
                  <td>Davolio</td>
                  <td>Caffe Latte</td>
                  <td>10</td>
                  <td>High</td>
              </tr>
              .....
          </tbody>
      </thead>
  </table>
</Table>
<Table></Table>
            <Table>
              <table>
                  <thead>
                      <tr>
                          <th scope="col">First Name</th>
                          <th scope="col">Last Name</th>
                          <th scope="col">Product Name</th>
                          <th scope="col">Quantity</th>
                          <th scope="col">Price</th>
                          <th scope="col">Order Date</th>
                      </tr>
                      <tbody>
                          <tr>
                              <td>Lars</td>
                              <td>Vileid</td>
                              <td>Caffe Espresso</td>
                              <td>14</td>
                              <td>Low</td>
                          </tr>
                          <tr>
                              <td>Petra</td>
                              <td>Davolio</td>
                              <td>Caffe Latte</td>
                              <td>10</td>
                              <td>High</td>
                          </tr>
                          .....
                      </tbody>
                  </thead>
              </table>
            </Table>
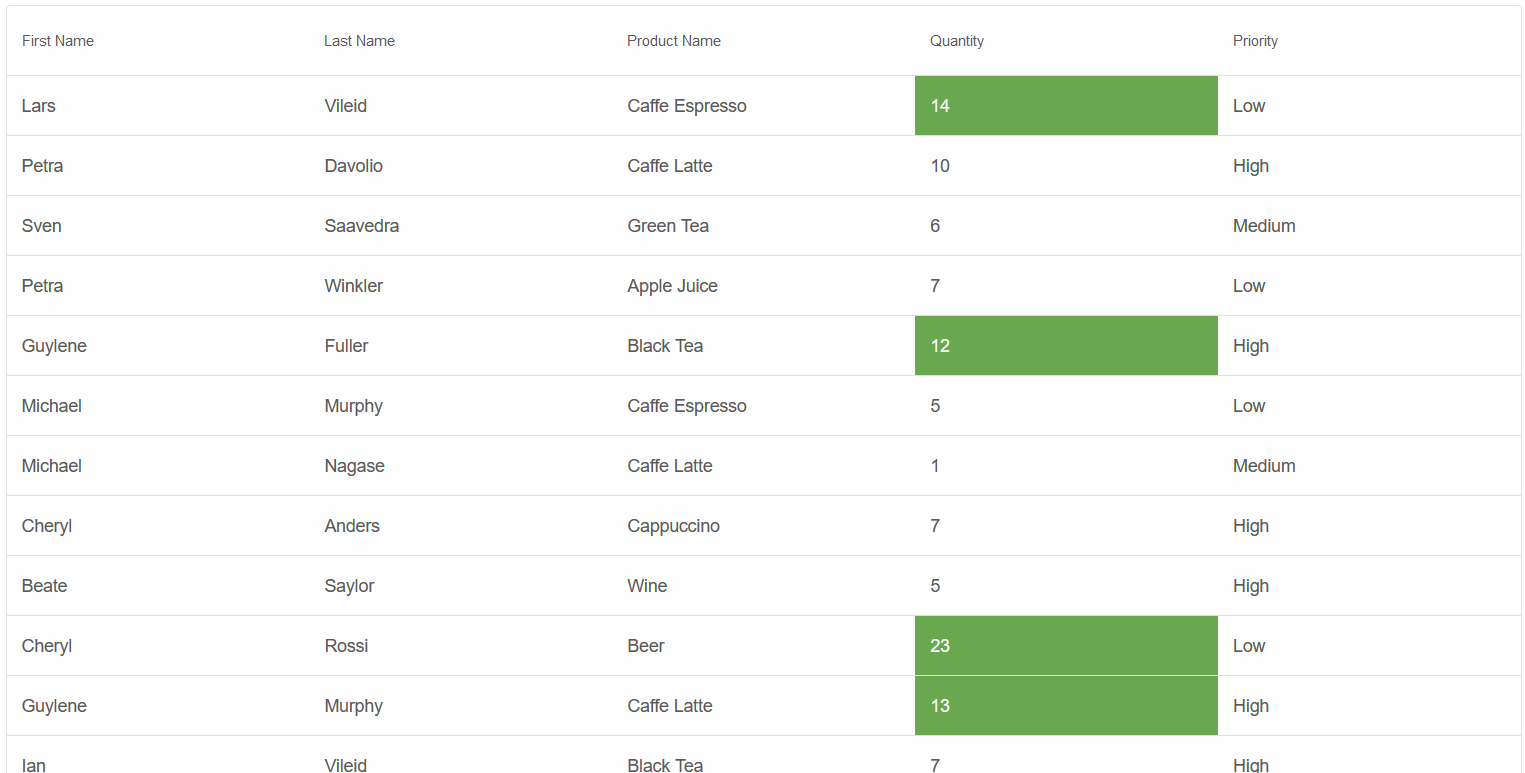
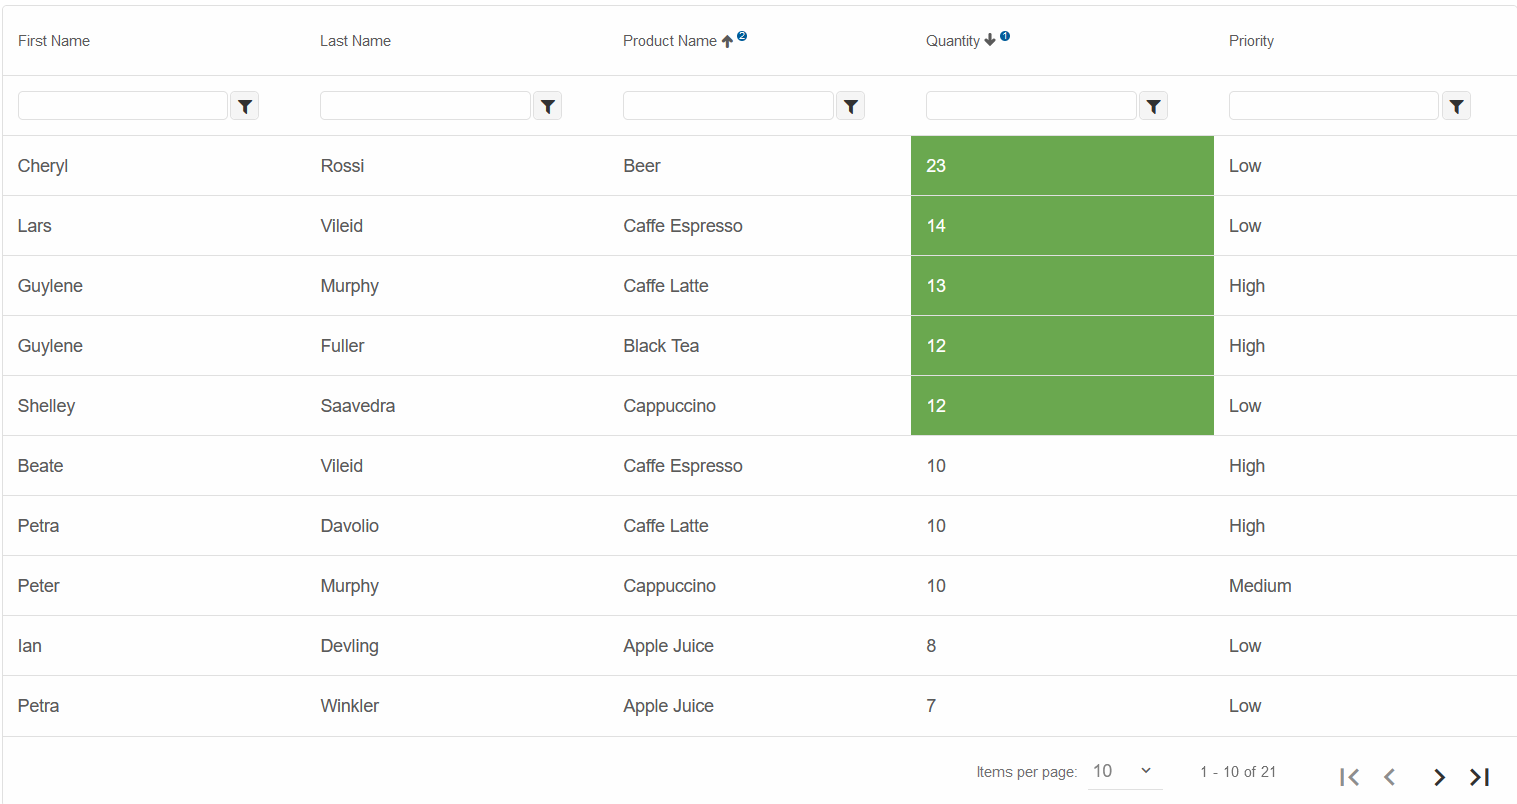
Conditional Formatting
Smart.Table allows you to set up custom formatting rules on rows or individual cells depending on the data passed in the dataSource.
Declare a new TableConditionalFormatting object to highlight products with Quantity greater than 10.
<Table DataSource="@orders" Columns="@columns" ConditionalFormatting="@formatting"></Table>
....
@code{
  List<TableConditionalFormatting> formatting = new List<TableConditionalFormatting>(){
    new TableConditionalFormatting(){
        Column="Quantity",
        Condition = TableConditionalFormattingCondition.GreaterThan,
        FirstValue =10,
        Text = "#FFFFFF",
        Highlight = "#6AA84F"
    }
  };
  ....
}
Edit Data
Set the Editing property to true to enable users to edit data.
Note that this does not alter the original data source.
<Table DataSource="@orders" Columns="@columns" ConditionalFormatting="@formatting" Editing="true">
</Table>

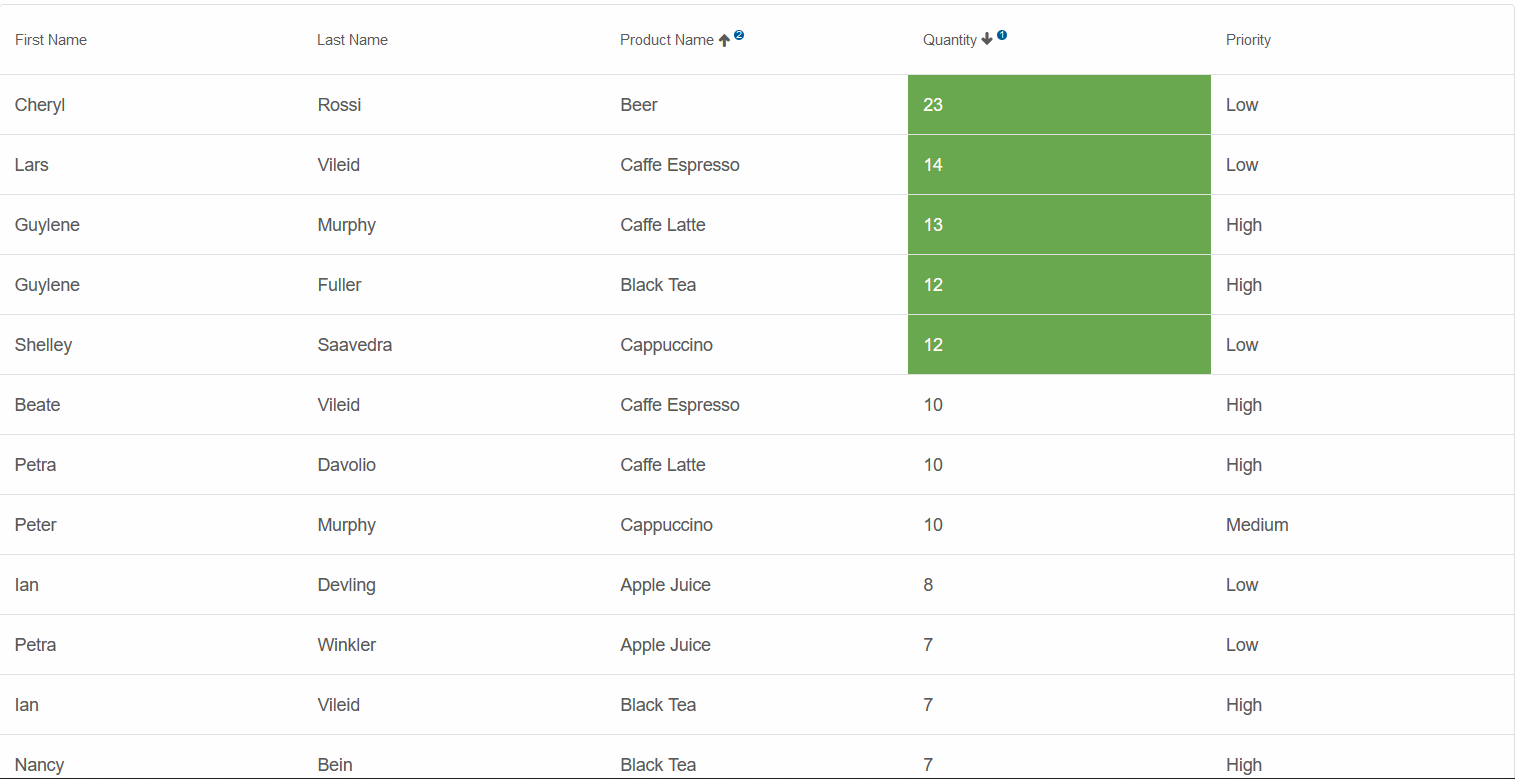
Sort Data
Smart.Table offers multiple sorting modes - Simple Sort by one column or Sort by multiple columns.
Set the SortMode property and attach the OnReady event to the Table Component.
<Table DataSource="@orders" Columns="@columns" ConditionalFormatting="@formatting" Editing="true"
  OnReady="OnTableReady" SortMode="TableSortMode.Many">
</Table>
....
@code{
  ....
  private void OnTableReady(Table table)
  {
      table.SortBy("Quantity", "desc");
      table.SortBy("ProductName", "asc");
  }
}
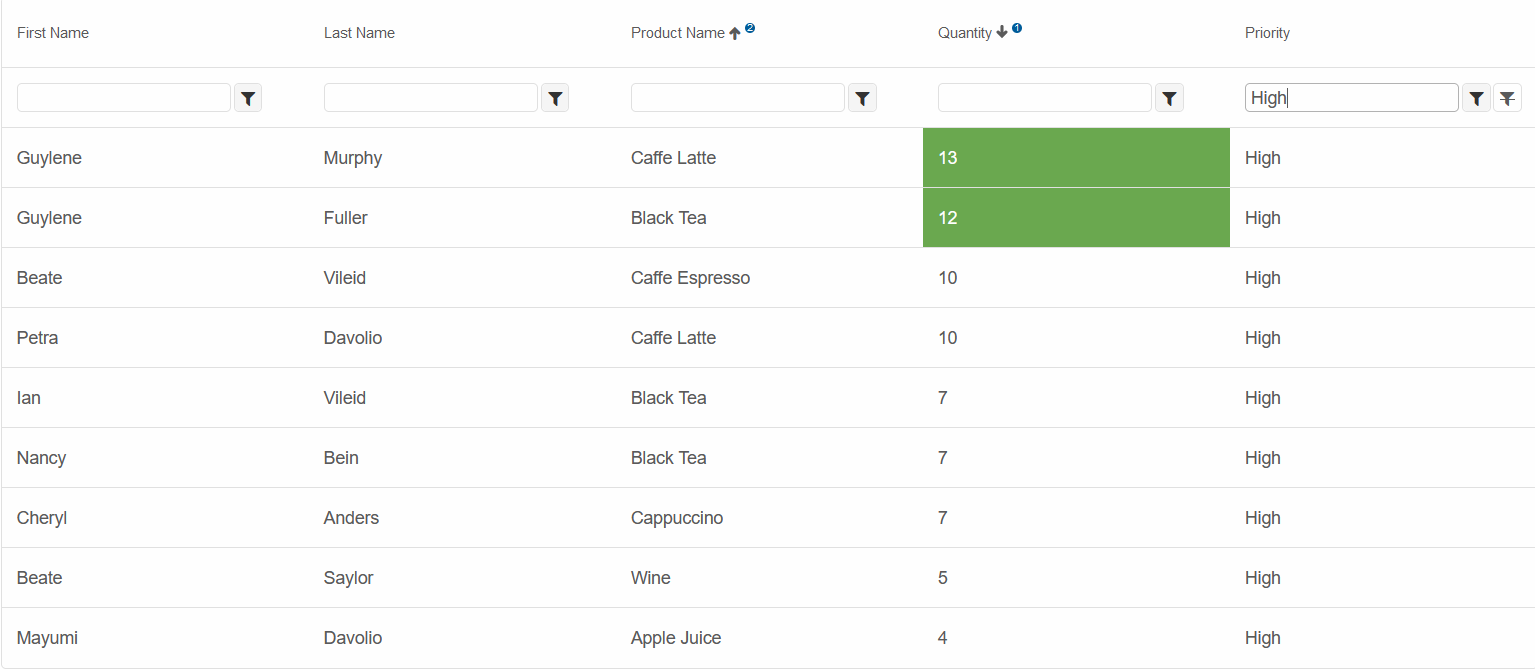
Filter Data
To allow filtering, set the Filtering property to True. Then to enable filtering on individual columns, set the FilterRow of the Component.
  <Table DataSource="@orders" Columns="@columns" ConditionalFormatting="@formatting" Editing="true"
    OnReady="OnTableReady" SortMode="TableSortMode.Many" Filtering="true" FilterRow="true">
  </Table>
Pagination
Smart.Table has built-in Pagination functionality, which also allows changing the size of the generated pages.
<Table DataSource="@orders" Columns="@columns" ConditionalFormatting="@formatting" Editing="true"
 OnReady="OnTableReady" SortMode="TableSortMode.Many" Filtering="true" FilterRow="true" PageSize="TablePageSize.Ten" Paging="true">
</Table>
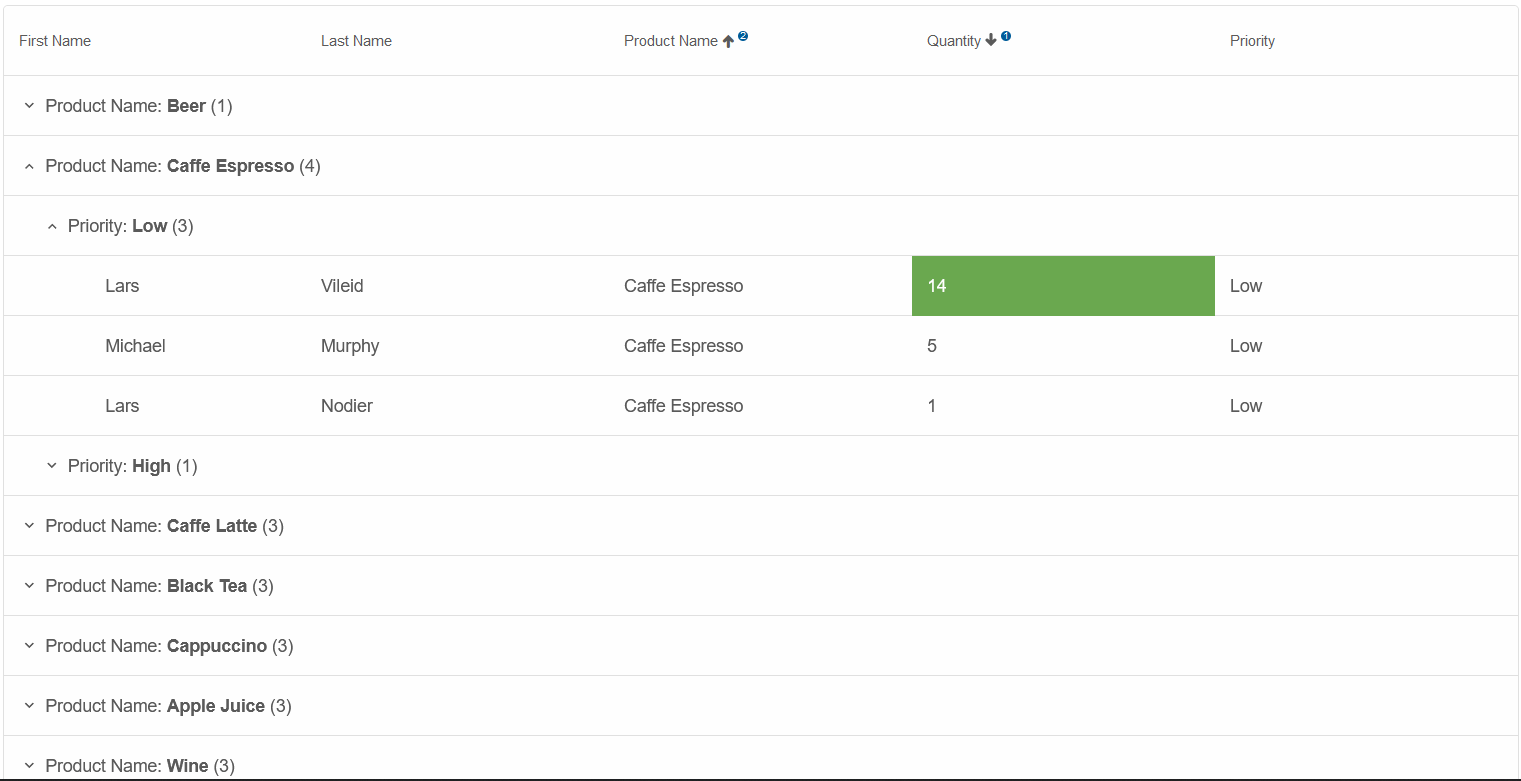
Grouping
The Grouping property allows you to easily group rows by common values.
<Table DataSource="@orders" Columns="@columns" ConditionalFormatting="@formatting" Editing="true"
  OnReady="OnTableReady" SortMode="TableSortMode.Many" Grouping="true">
</Table>
....
@code{
  ....
  private void OnTableReady(Table table)
  {
    table.SortBy("Quantity", "desc");
    table.SortBy("ProductName", "asc");
    table.AddGroup("ProductName");
    table.AddGroup("Priority");
  }
}
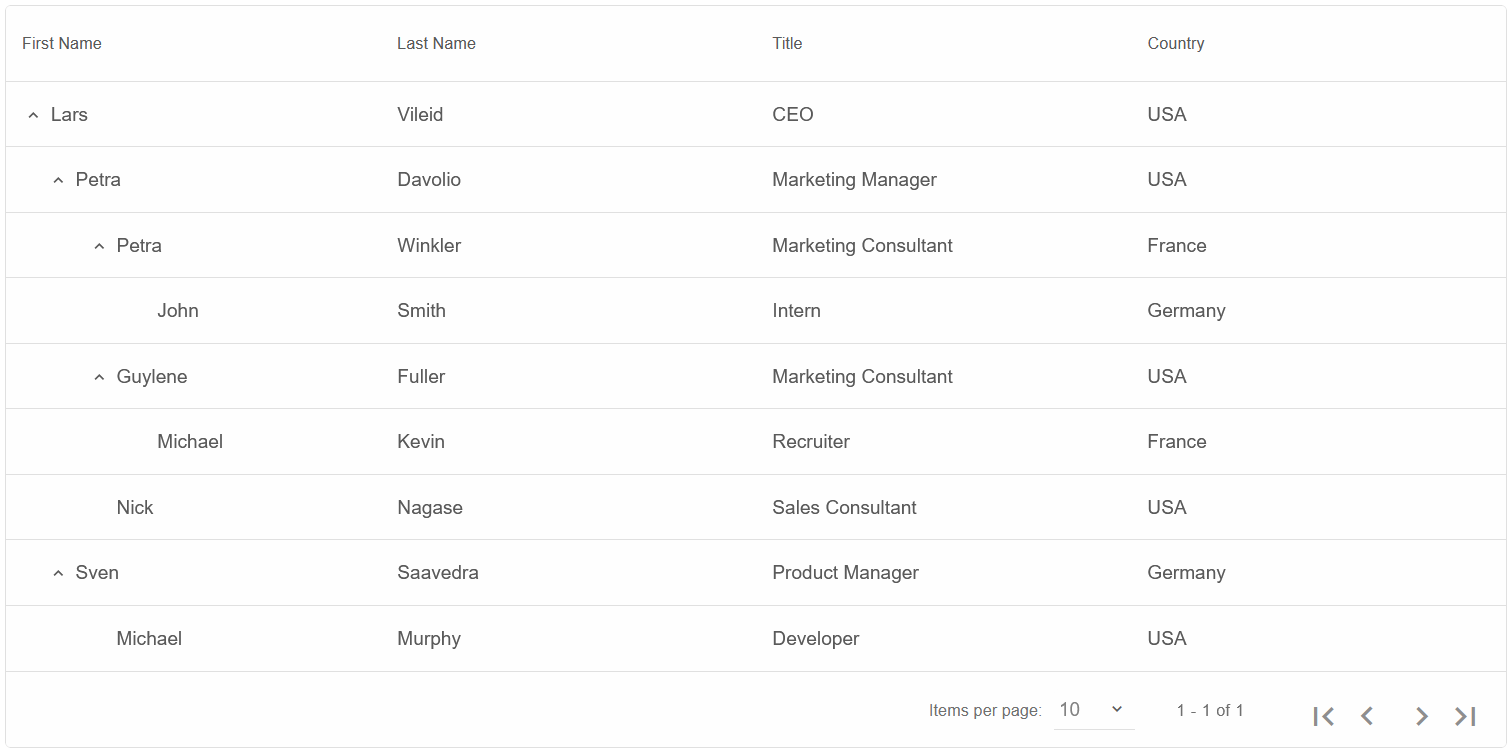
Tree Table
Smart.Table offers Tree Table functionality to make organizing hierarchical data eaiser.
Create a new set of Data and Columns and bind them to the Table Component. Then set the Data Field, by which to organize the Table.
<Table DataSource="@employees" Columns="@employeeColumns" DataSourceSettings="dataSourceSettings" Paging="true">
</Table>
@code{
  TableDataSourceSettings dataSourceSettings = new TableDataSourceSettings()
  {
    KeyDataField = "EmployeeID",
    ParentDataField = "ReportsTo",
    Id = "EmployeeID"
  };
  class Employee {
    public int EmployeeID {get; set;}
    public string FirstName { get; set; }
    public string LastName { get; set; }
    public int ReportsTo { get; set; }
    public string Title { get; set; }
    public string Country { get; set; }

    public Employee(int employeeID, string firstName, string lastName, int reportsTo, string title, string country){
        EmployeeID = employeeID;
        FirstName = firstName;
        LastName = lastName;
        ReportsTo = reportsTo;
        Title = title;
        Country = country;
    }
  }
  Employee[] employees = new Employee[]
    {
    new Employee(1, "Lars", "Vileid", 0, "CEO", "USA"),
    new Employee(2, "Petra", "Davolio", 1, "Marketing Manager", "USA"),
    new Employee(3, "Sven", "Saavedra", 1, "Product Manager", "Germany"),
    new Employee(4, "Petra", "Winkler", 2, "Marketing Consultant", "France"),
    new Employee(5, "Guylene", "Fuller", 2, "Marketing Consultant", "USA"),
    new Employee(6, "Michael", "Murphy", 3, "Developer", "USA"),
    new Employee(7, "John", "Smith", 4, "Intern", "Germany"),
    new Employee(8, "Nick", "Nagase", 2, "Sales Consultant", "USA"),
    new Employee(9, "Michael", "Kevin", 5, "Recruiter", "France")
    };
  TableColumn[] employeeColumns = new TableColumn[]{
    new TableColumn(){
        Label="First Name",
        DataField="FirstName",
    },
    new TableColumn(){
        Label="Last Name",
        DataField="LastName",
    },
    new TableColumn(){
        Label="Title",
        DataField="Title",
    },
    new TableColumn(){
        Label="Country",
        DataField="Country"
    }
  };
  ....
}
 <Table DataSource="@orders" Columns="@columns" ConditionalFormatting="@formatting" Editing="true"
OnReady="OnTableReady" SortMode="TableSortMode.Many">
</Table>
....
@code{
....
private void OnTableReady(Table table)
{
table.SortBy("Quantity", "desc");
table.SortBy("ProductName", "asc");
}
}
<Table DataSource="@orders" Columns="@columns" ConditionalFormatting="@formatting" Editing="true"
OnReady="OnTableReady" SortMode="TableSortMode.Many">
</Table>
....
@code{
....
private void OnTableReady(Table table)
{
table.SortBy("Quantity", "desc");
table.SortBy("ProductName", "asc");
}
}
Filter Data
To allow filtering, set the Filtering property to True. Then to filter on specific column, set the FilterRow of the Component.
        <Table DataSource="@orders" Columns="@columns" ConditionalFormatting="@formatting" Editing="true"
          OnReady="OnTableReady" SortMode="TableSortMode.Many" Filtering="true" FilterRow="true">
        </Table>
Grouping
The Grouping property allows you to easily group rows by common values.
        <Table DataSource="@orders" Columns="@columns" ConditionalFormatting="@formatting" Editing="true"
          OnReady="OnTableReady" SortMode="TableSortMode.Many" Grouping="true">
        </Table>
        ....
        @code{
          ....
          private void OnTableReady(Table table)
          {
            table.SortBy("Quantity", "desc");
            table.SortBy("ProductName", "asc");
            table.AddGroup("ProductName");
            table.AddGroup("Priority");
          }
        }