Editor Chart - Custom Toolbar Item
The guide below details how to implement Custom Toolbar Items for Editor Chart in Blazor.
To implement Custom Toolbar Items, we need to be able to directly set event listeners, enable/disable buttons and perform other DOM operations on non-Blazor elements.
For this reason, we will be using JS interop - a Blazor tool, which can invoke JavaScript (JS) functions from .NET methods and .NET methods from JS functions.
- First, create a basic Editor with multiple Toolbar Items:
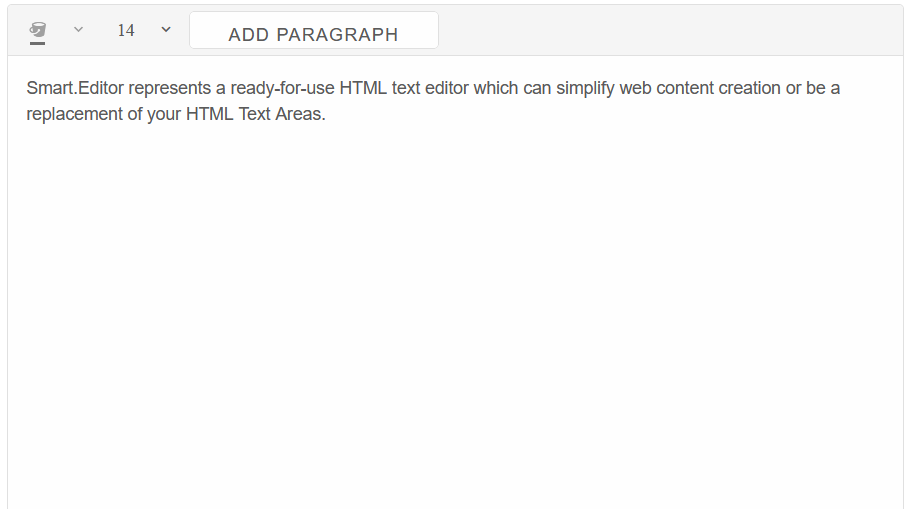
@page "/" <Editor ToolbarItems="@toolbarItems"> Smart.Editor represents a ready-for-use HTML text editor which can simplify web content creation or be a replacement of your HTML Text Areas. </Editor> @code { List<IEditorToolbarItem> toolbarItems = new List<IEditorToolbarItem>() { new EditorToolbarItem() { Name = "BackgroundColor", Disabled = true }, new EditorToolbarItem() { Name = "FontSize", DataSource = new List<string>() { "10", "20", "30", "40" } }, new EditorToolbarItem() { Name = "customButton", Width = 200, Template = "<smart-button>Add Paragraph</smart-button>" }, }; } - To implement the actions of the button, we must use JSInterop. First inject the IJSRuntime abstraction.
Then in the OnReady() callback, call the "setCustomItem" JS function, which we will later create.@inject IJSRuntime JSInterop; <Editor ToolbarItems="@toolbarItems" OnReady="OnReady"></Editor> @code{ ... private void OnReady(Editor editor) { JSInterop.InvokeVoidAsync("setCustomItem"); } } - Now, navigate to
Pages/_Host.cshtml(Blazor Server) orwwwroot/index.html(Blazor WebAssembly).
Create a <script></script> tag and paste the code below, which will create the "setCustomItem" function:<script> (function (global) { global.setCustomItem = function () { let editor = document.querySelector("smart-editor"); let toolbarItems = editor.toolbarItems.map(a => ({ ...a })); let customItem = toolbarItems[2]; customItem.template = function(element, item) { let button = document.createElement('smart-button'); button.innerHTML = "Add Paragraph"; button.addEventListener('click', function(){ editor.executeCommand("insertHTML", "<br/><p>New Paragraph</p>"); }) element.appendChild(button); } editor.toolbarItems = toolbarItems; } })(window); </script> - Now we can see that the Custom Toolbar is complete and we can now add a paragraph by clicking on the button.
: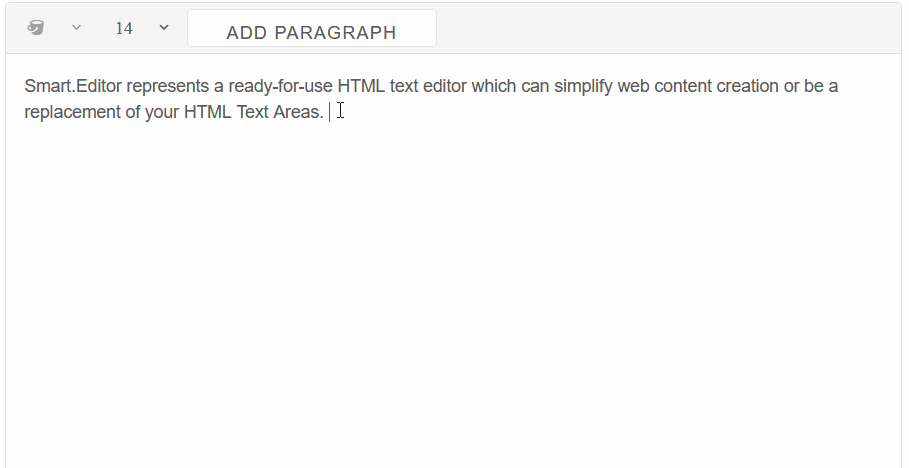
We can see that the Custom Toolbar was integrated successfully, however the "Add Paragraph" button has no effect on the Editor.