Blazor - Get Started with Smart.Form
Setup The Project
Follow the Getting Started guide to set up your Blazor Application with Smart UI.
Setup Basic Form
Smart.Form allows you to easily build complex form layouts, while offering many additional built-in features and settings.
- Add the Form component to the Pages/Index.razor file
<Form></Form>
- FormGroup is one of the main building blocks of the Form element.
It manages the value and validity state of a group of
Smart.FormControlinstances<Form> <FormGroup Label="Personal" DataField="personal"></FormGroup> <FormGroup Label="Details" DataField="details"></FormGroup> </Form>
- FormControl manages the value and validity status of an individual form control, such as 'input' or 'select'
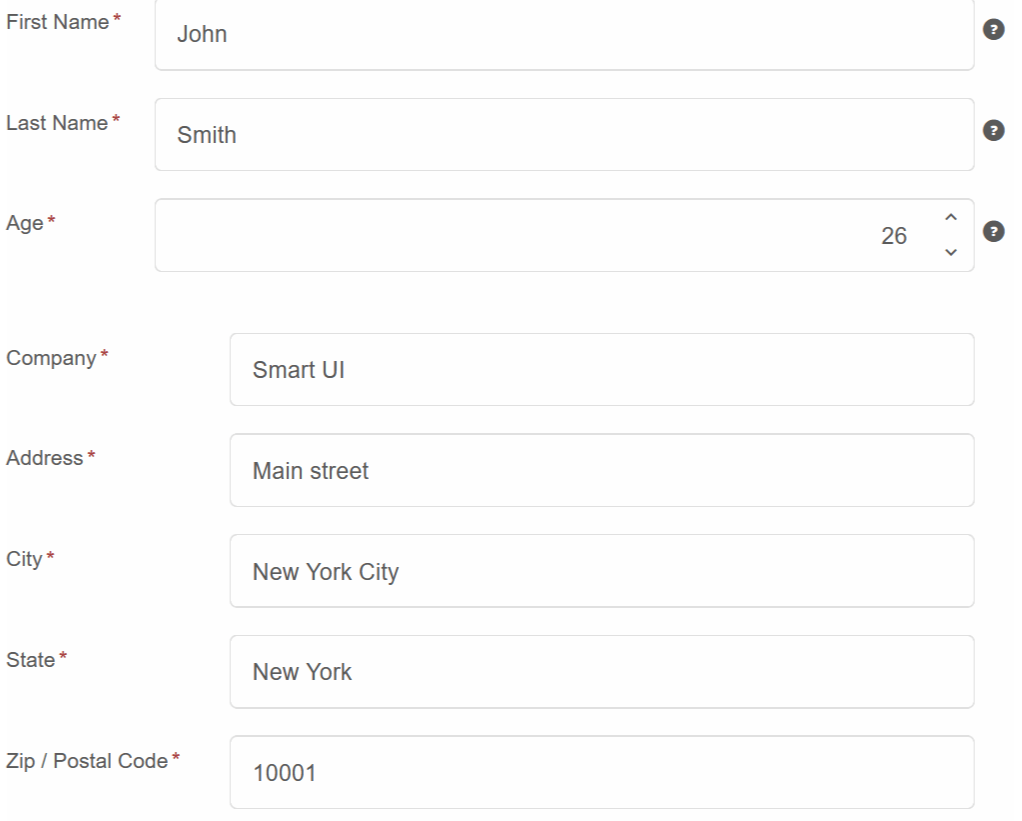
<Form id="profileForm">
  <FormGroup Label="Personal" DataField="personal">
      <FormControl Info="Enter First Name" Required Placeholder="First Name" ControlType="FormControlControlType.Input" DataField="firstName" Label="First Name" Class="outlined"></FormControl>
      <FormControl Info="Enter Last Name" Required Placeholder="Last Name" ControlType="FormControlControlType.Input" DataField="lastName" Label="Last Name" Class="outlined"></FormControl>
      <FormControl Info="Enter Age" Required Placeholder="Age" ControlType="FormControlControlType.Number" DataField="age" Label="Age" Class="outlined"></FormControl>
  </FormGroup>
  <FormGroup Label="Details" DataField="details">
      <FormControl Placeholder="Company Name" Required ControlType="FormControlControlType.Input" DataField="company" Label="Company" Class="outlined"></FormControl>
      <FormControl Placeholder="Address" Required ControlType="FormControlControlType.Input" DataField="address" Label="Address" Class="outlined"></FormControl>
      <FormControl Placeholder="City" Required ControlType="FormControlControlType.Input" DataField="city" Label="City" Class="outlined"></FormControl>
      <FormControl Placeholder="State" Required ControlType="FormControlControlType.Input" DataField="state" Label="State" Class="outlined"></FormControl>
      <FormControl Placeholder="Zip / Postal Code" Required ControlType="FormControlControlType.Input" DataField="zip" Label="Zip / Postal Code" Class="outlined"></FormControl>
  </FormGroup>
</Form>
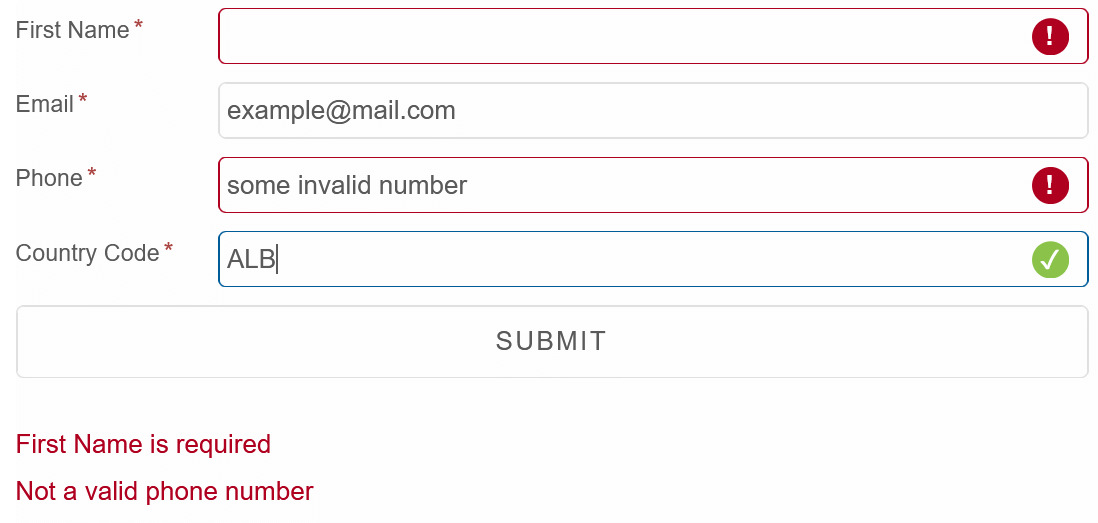
Validation Rules
Interanlly, Smart.Form uses Smart.Validatr to check the validity of the controls.
Validation Rules are set in the ValidationRules property as an array of objects,
where each object represents one rule.For each rule, we can also set a custom message for the user
In the example below, we require entering first name, check the validty of the email and phone fields
and verify that the country code is either 2 or 3 characters long:
<Form @ref="@form">
  <FormControl ControlType="FormControlControlType.Input" DataField="firstName" Label="First Name" ValidationRules="@firstNameRules"></FormControl>
  <FormControl ControlType="FormControlControlType.Input" DataField="email" Label="Email" ValidationRules="@emailRules"></FormControl>
  <FormControl ControlType="FormControlControlType.Input" DataField="phone" Label="Phone" ValidationRules="@phoneRules"></FormControl>
  <FormControl ControlType="FormControlControlType.Input" DataField="country" Label="Country Code" ValidationRules="@countryRules"></FormControl>
  <FormControl ControlType="FormControlControlType.Button" DataField="submit" Label="Submit"></FormControl>
</Form>

@code{
  Form form;

  dynamic[] firstNameRules = new dynamic[]{
      new{type="required", message="First Name is required"}
  };
  dynamic[] emailRules = new dynamic[]{
      new{type="email", message="Must be a valid email"}
  };
  dynamic[] phoneRules = new dynamic[]{
      new{type="phone", message="Not a valid phone number"},
      new{type="required"}
  };
  dynamic[] countryRules = new dynamic[]{
      new{type="stringLength", min=2, max=3, message="Must be a valid country code"}
  };
}
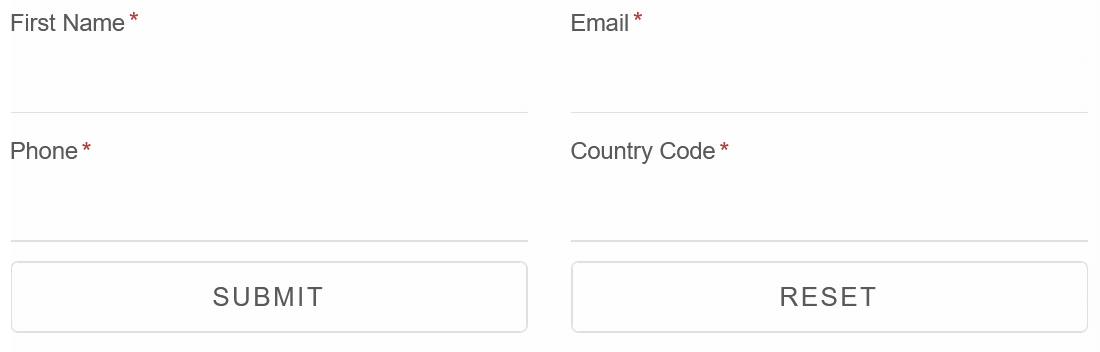
Form Customization
Smart.Form offers a wide variety of customization tools such as splitting the form into columns with Columns,
setting the position of the label with LabelPosition or chaing the look of the input fields with Class
<Form Columns="2" LabelPosition="FormLabelPosition.Top">
  <FormControl ControlType="FormControlControlType.Input" Class="underlined" DataField="firstName" Label="First Name"></FormControl>
  <FormControl ControlType="FormControlControlType.Input" Class="underlined" DataField="email" Label="Email"></FormControl>
  <FormControl ControlType="FormControlControlType.Input" Class="underlined" DataField="phone" Label="Phone"></FormControl>
  <FormControl ControlType="FormControlControlType.Input" Class="underlined" DataField="country" Label="Country Code"></FormControl>
  <FormControl ControlType="FormControlControlType.Button" Class="underlined" DataField="submit" Label="Submit"></FormControl>
  <FormControl ControlType="FormControlControlType.Button" Class="underlined" Action="FormControlAction.Reset" DataField="reset" Label="Reset"></FormControl>
</Form>
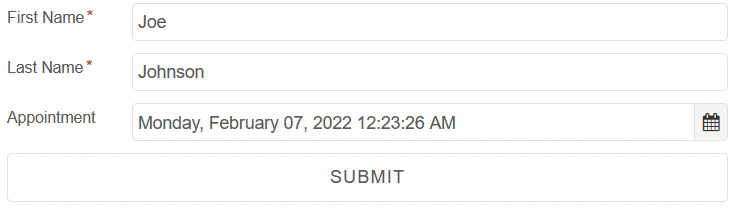
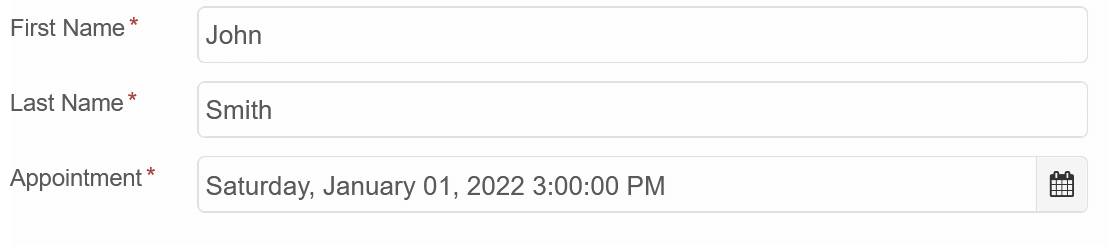
Programatic Fill
Smart.Form allows you to programatically fill the control input fields by using the Value property:
<Form Value="@values">
    <FormControl Required ControlType="FormControlControlType.Input" DataField="firstName" Label="First Name"></FormControl>
    <FormControl Required ControlType="FormControlControlType.Input" DataField="lastName" Label="Last Name"></FormControl>
    <FormControl Required ControlType="FormControlControlType.Datetime" DataField="appointment" Label="Appointment"></FormControl>
</Form>
@code{
    object values = new {
        firstName = "John",
        lastName = "Smith",
        appointment = "01/01/2022T15:00"
    };
}
Programatic Controls
Controls can be created programatically by creating an array of Control objects
and setting it to the Controls property.
        <Form Controls="@controls">
        </Form>
        @code{
            Control[] controls = new Control[]{
                new Control{
                    DataField= "firstName",
                    ControlType= ControlControlType.Input,
                    Label= "First Name",
                    ValidationRules= new dynamic[]{
                        new {type="min", value=2, message="Too short!"}
                    }
                },
                new Control{
                    DataField= "lastName",
                    ControlType= ControlControlType.Input,
                    Label= "Last Name",
                    ValidationRules= new dynamic[]{
                        new {type="requiredTrue", message="Too short!"}
                    }
                },
                new Control{
                    DataField= "appointment",
                    ControlType= ControlControlType.Datetime,
                    Label= "Appointment"
                },
                new Control{
                    ControlType= ControlControlType.Submit,
                    Label= "Submit"
                }
            };
        }