Create a new Blazor App
To start building .NET apps, download and install the .NET SDK (Software Development Kit).
Check everything installed correctlyOnce you've installed, open a new command prompt and run the following command:
dotnet
If the command runs, printing out information about how to use dotnet, you're good to go.
Got an error?
If you receive a 'dotnet' is not recognized as an internal or external command error, make sure you opened a new command prompt
Once you've installed, open a new command prompt and run the following command:
dotnet --versionIf the installation succeeded, you should see version 8.0.100 or higher outputted
Create your app
In your command prompt, run the following command to create your app:dotnet new blazor -o BlazorAppThis command creates your new Blazor Web App project and places it in a new directory called BlazorApp inside your current location.
Navigate to the new BlazorApp directory created by the previous command
cd BlazorApp
Several files were created in the BlazorApp directory, to give you a simple Blazor app that is ready to run.
Program.csis the entry point for the app that starts the server and where you configure the app services and middleware.App.razoris the root component for the app.Routes.razorconfigures the Blazor router.- The
Components/Pagesdirectory contains some example web pages for the app. BlazorApp.csprojdefines the app project and its dependencies.- The
launchSettings.jsonfile inside thePropertiesdirectory defines different profile settings for the local development environment. A port number is automatically assigned at project creation and saved on this file.
Run your app
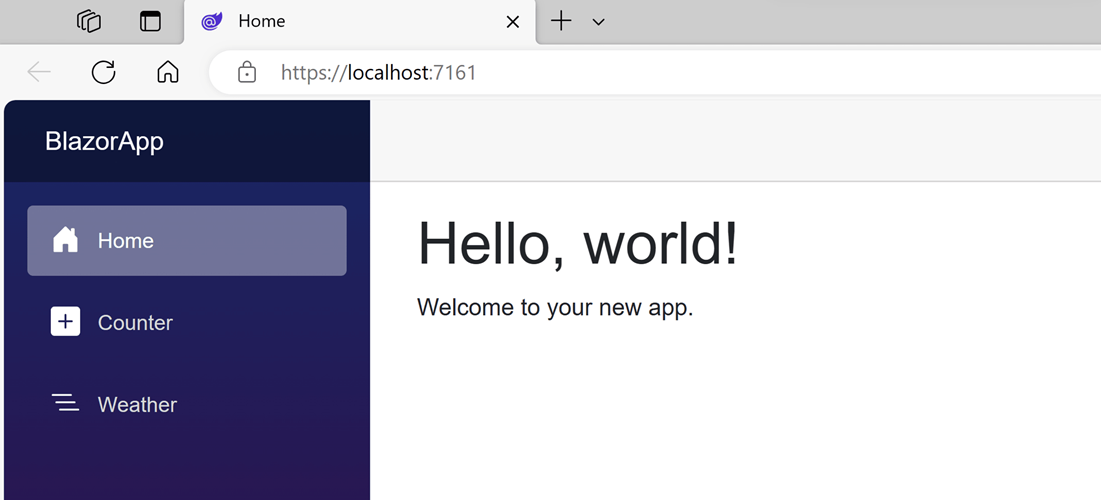
In your command prompt, run the following command:dotnet watchThe dotnet watch command will build and start the app, and then update the app whenever you make code changes. You can stop the app at any time by selecting Ctrl+C. Wait for the app to display that it's listening on http://localhost:
Create app with Visual Studio
Alternatively, if you use Visual Studio, the steps to create new Blazor app are:- Start Visual Studio and select Create a new project.
- In the Create a new project window, type Blazor on the search box and hit Enter.
- Select the Blazor Web App template and select Next.
- In the Configure your new project window, enter BlazorApp as the project name and select Next.
-
In the Additional information window, select .NET 9.0 (Long Term Support) in the Framework drop-down if not already selected and click the Create button.
When creating a Blazor Web App you can select from various options, like whether to enable authentication, what interactive render modes to enable, and how much of the app you want to be interactive.
Installation of Smart.Blazor
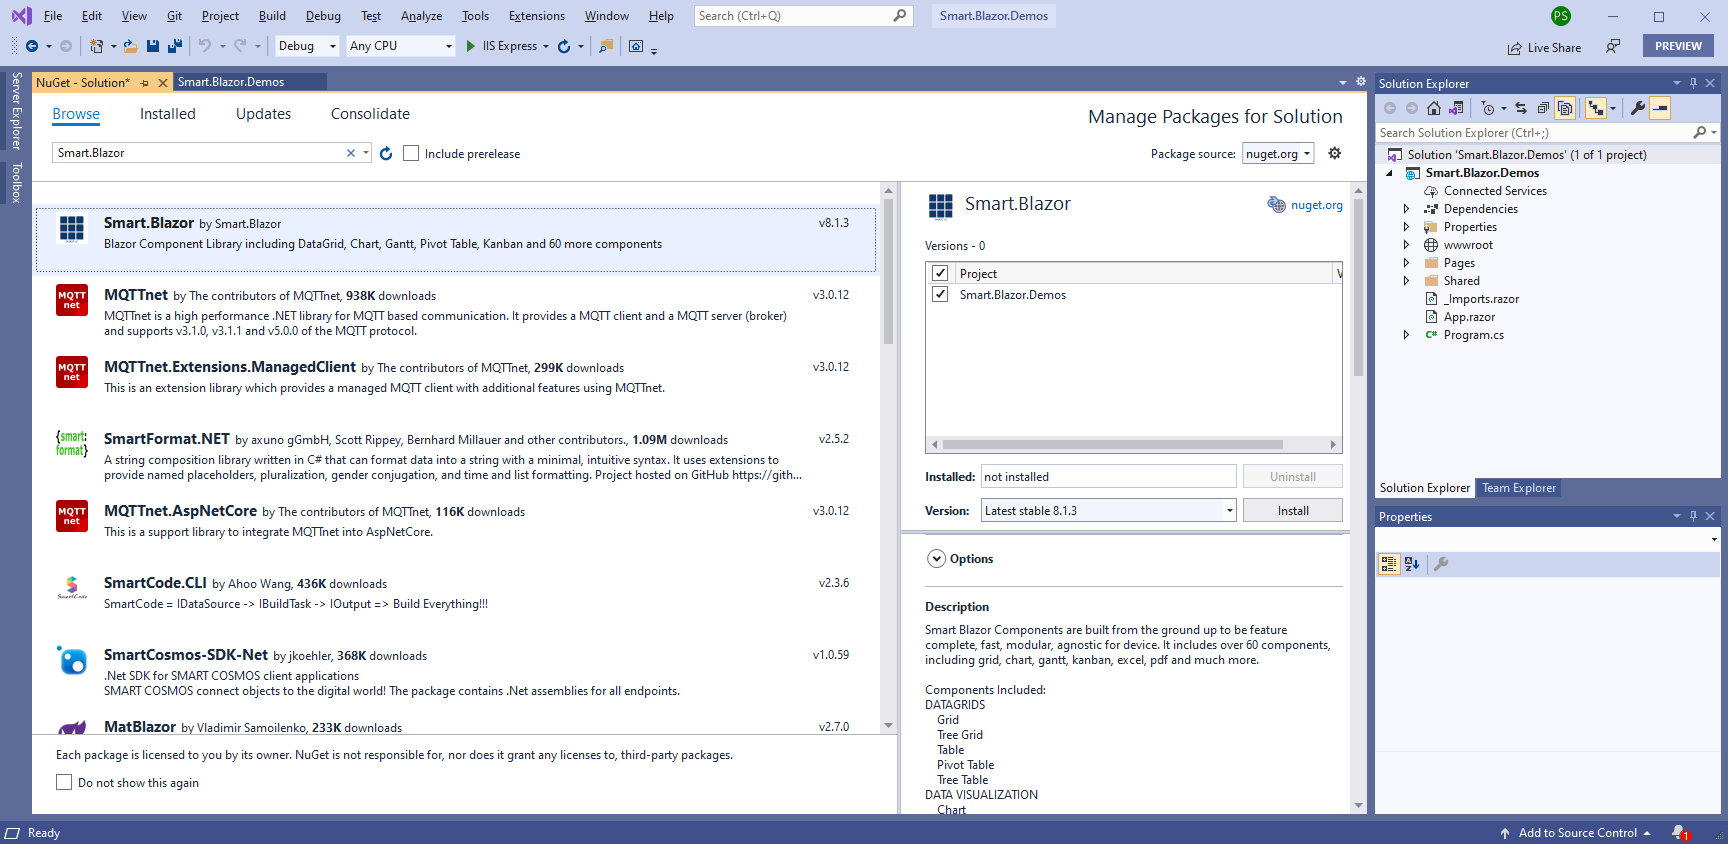
Smart.Blazor Components are distributed as the Smart.Blazor Nuget package. You can use any of the following options:- Install the package from command line by running dotnet add package Smart.Blazor
-
Alternatively, you can add the project from the Visual Nuget Package Manager.
Import the Smart.Blazor namespace
Open the _Imports.razor file of your Blazor application and add `@using Smart.Blazor`
Set a Theme
Open the App.razor file and include a theme CSS file by adding this snippet<link href="_content/Smart.Blazor/css/smart.default.css" rel="stylesheet" />You can include additional CSS themes for the Controls. Smart.Blazor package comes with Bootstrap and Material Themes.
Source files
In the App.razor file include this snippet<script src="_content/Smart.Blazor/js/smart.blazor.js"></script> <script src="_content/Smart.Blazor/js/smart.elements.js"></script>
If you would like to use only a specific component, instead of referring the smart.elements.js, you can refer the component like that:
<script type="module" src="_content/Smart.Blazor/js/modules/smart.table.js"></script>
Register the Smart Blazor Service
You should place the code into the Program.cs of your client project Program.cs
using BlazorApp.Components;
using Smart.Blazor;
var builder = WebApplication.CreateBuilder(args);
// Add services to the container.
builder.Services.AddRazorComponents()
.AddInteractiveServerComponents();
builder.Services.AddSmart();
var app = builder.Build();
// Configure the HTTP request pipeline.
if (!app.Environment.IsDevelopment())
{
app.UseExceptionHandler("/Error", createScopeForErrors: true);
// The default HSTS value is 30 days. You may want to change this for production scenarios, see https://aka.ms/aspnetcore-hsts.
app.UseHsts();
}
app.UseHttpsRedirection();
app.UseStaticFiles();
app.UseAntiforgery();
app.MapRazorComponents()
.AddInteractiveServerRenderMode();
app.Run();
Add the Smart.Blazor Components
.NET 8.0 introduces new render modes for the Blazor components. At the time of writing, the default render mode is static and not interactive, so you need to make this change explicitly in your app.
How you add the Smart.Blazor components to the app depends on which of the following approaches for configuring the render mode you chose:- Configure the Render Mode of the Entire App
- Configure the Render Mode per Page
Configure the Render Mode of the Entire App
You can set the render mode for the entire app as suggested in the Blazor documentation. This will make it easier, because you will not need to set the render mode in every page and component.App.razor
<!DOCTYPE html>
<html lang="en">
<head>
<meta charset="utf-8" />
<meta name="viewport" content="width=device-width, initial-scale=1.0" />
<base href="/" />
<link rel="stylesheet" href="bootstrap/bootstrap.min.css" />
<link rel="stylesheet" href="app.css" />
<link rel="stylesheet" href="Demos.styles.css" />
<link rel="icon" type="image/png" href="favicon.png" />
<link href="https://cdnjs.cloudflare.com/ajax/libs/font-awesome/4.7.0/css/font-awesome.css" rel="stylesheet" />
<link href="_content/Smart.Blazor/css/smart.default.css" rel="stylesheet" />
<script src="_content/Smart.Blazor/js/smart.blazor.js"></script>
<script src="_content/Smart.Blazor/js/smart.elements.js"></script>
<HeadOutlet @rendermode="RenderMode.InteractiveServer" />
</head>
<body>
<Routes @rendermode="RenderMode.InteractiveServer" />
<script src="_framework/blazor.web.js"></script>
</body>
</html>
Home.razor
@page "/"

<PageTitle>Home</PageTitle>

<h1>Hello, world!</h1>

Welcome to your new Smart app. Put Smart UI for Blazor components here.

<Button>Click Me</Button>
Configure the Render Mode per Page
As an alternative to setting the render mode for the entire app, you can set it only for specific pages and components. This is useful if you want to have different render modes in the app. In this case, make sure that the Smart Blazor component is part of a component hierarchy that has interactive render mode. App.razor
<!DOCTYPE html>
<html lang="en">

<head>
    <meta charset="utf-8" />
    <meta name="viewport" content="width=device-width, initial-scale=1.0" />
    <base href="/" />
    <link rel="stylesheet" href="bootstrap/bootstrap.min.css" />
    <link rel="stylesheet" href="app.css" />
    <link rel="stylesheet" href="Demos.styles.css" />
    <link rel="icon" type="image/png" href="favicon.png" />
    <link href="https://cdnjs.cloudflare.com/ajax/libs/font-awesome/4.7.0/css/font-awesome.css" rel="stylesheet" />
	<link href="_content/Smart.Blazor/css/smart.default.css" rel="stylesheet" />
    <script src="_content/Smart.Blazor/js/smart.blazor.js"></script>
    <script src="_content/Smart.Blazor/js/smart.elements.js"></script>
    <HeadOutlet />
</head>

<body>
    <Routes />
    <script src="_framework/blazor.web.js"></script>
</body>

</html>
Home.razor
@page "/"
@rendermode RenderMode.InteractiveServer

<PageTitle>Home</PageTitle>

<h1>Hello, world!</h1>

Welcome to your new Smart app. Put Smart UI for Blazor components here.

<Button>Click Me</Button>
Using Smart.Blazor Components
Use any Smart Blazor component by typing its tag name in a Blazor page e.g.<Button>Click Me</Button>
@page "/"
@rendermode RenderMode.InteractiveServer

<PageTitle>Home</PageTitle>

<h1>Hello, world!</h1>

Welcome to your new Smart app. Put Smart UI for Blazor components here.

<Button OnClick="@ClickHandler">Click me</Button>

<br />

@helloString

@code {
   MarkupString helloString;

    void ClickHandler()
   {
       string msg = string.Format("Hello from <strong>Smart Blazor</strong> at {0}.", DateTime.Now);
       helloString = new MarkupString(msg);
   }
}
Data binding a property
<Input Value="@text"></Input>
@code {
	string text = " Hi from Smart!";
 }
Events Handing
<Calendar id="calendar" OnChange=@OnChange></Calendar>
<div class="options">
	<div class="caption">Events</div>
	<div class="option" id="log">
	@eventLog
	</div>
</div>

@code {
	private string eventLog;

	private void OnChange(Event eventObj)
	{
		CalendarChangeEventDetail detail = eventObj\[" Detail & quot;\];

		eventLog = detail.Value\[0\].ToString();
	}
}
Alternatively you can do that:@page "/calendar"
<Calendar OnReady="OnReady" id="calendar" ></Calendar>
<div class="options">
<div class="caption">Events</div>
<div class="option" id="log">
@eventLog
</div>
</div>
@code {
private string eventLog;
private void OnReady(Calendar calendar)
{
calendar.Changed += delegate (object sender, CalendarChangedEventArgs args)
{
string value = args.Value\[0\].ToString();
eventLog = value;
StateHasChanged();
};
}
}
OnReady callback is called for each Blazor component, after it is initialized and rendered.
If you create a new app with Interactive Auto render mode and you want to use Smart.Blazor in the Server part of the project, make sure to add
@rendermode RenderMode.InteractiveServerin your component For example, let's modify the default Weather page by adding the Smart.Blazor Table component to it which is interactive.
@page "/weather"
@attribute [StreamRendering]
@rendermode RenderMode.InteractiveServer

<PageTitle>Weather</PageTitle>

<h1>Weather</h1>

<p>This component demonstrates showing data.</p>

@if (forecasts == null)
{
    <p><em>Loading...</em></p>
}
else
{
    <Table Selection="true" SortMode="TableSortMode.One">
    <table class="table">
        <thead>
            <tr>
                <th>Date</th>
                <th>Temp. (C)</th>
                <th>Temp. (F)</th>
                <th>Summary</th>
            </tr>
        </thead>
        <tbody>
            @foreach (var forecast in forecasts)
            {
                <tr>
                    <td>@forecast.Date.ToShortDateString()</td>
                    <td>@forecast.TemperatureC</td>
                    <td>@forecast.TemperatureF</td>
                    <td>@forecast.Summary</td>
                </tr>
            }
        </tbody>
    </table>
    </Table>
}

@code {
    private WeatherForecast[]? forecasts;

    protected override async Task OnInitializedAsync()
    {
        // Simulate asynchronous loading to demonstrate streaming rendering
        await Task.Delay(500);

        var startDate = DateOnly.FromDateTime(DateTime.Now);
        var summaries = new[] { "Freezing", "Bracing", "Chilly", "Cool", "Mild", "Warm", "Balmy", "Hot", "Sweltering", "Scorching" };
        forecasts = Enumerable.Range(1, 5).Select(index => new WeatherForecast
        {
            Date = startDate.AddDays(index),
            TemperatureC = Random.Shared.Next(-20, 55),
            Summary = summaries[Random.Shared.Next(summaries.Length)]
        }).ToArray();
    }

    private class WeatherForecast
    {
        public DateOnly Date { get; set; }
        public int TemperatureC { get; set; }
        public string? Summary { get; set; }
        public int TemperatureF => 32 + (int)(TemperatureC / 0.5556);
    }
}
If we want to add Smart Blazor to the BlazorApp.Client, we will still need to update the _Imports by adding @using Smart.Blazor, Program.cs like that
using Microsoft.AspNetCore.Components.WebAssembly.Hosting;
using Smart.Blazor;
var builder = WebAssemblyHostBuilder.CreateDefault(args);
builder.Services.AddSmart();
await builder.Build().RunAsync();
and the dependency to the Smart.Blazor Nuget package, should be added, too. After all that, our default Counter.razor page will look like that:
@page "/counter"
@rendermode InteractiveAuto

<PageTitle>Counter</PageTitle>

<h1>Counter</h1>

<p role="status">Current count: @currentCount</p>

<Button @onclick="IncrementCount">Click me</Button>

@code {
    private int currentCount = 0;

    private void IncrementCount()
    {
        currentCount++;
    }
}