Build your web apps using Smart Custom Elements
Smart.Scheduler - Views
Views
Smart.Scheduler has a number of default views that allow to view the events of a particular period of time. However it is possible to customize the views and change their visibility and order in the view selector.
The views property accepts an Array of strings or objects. If the array item is a string then it must match one of the default Scheduler view values. If it is an object it represents a custom view definition. The object should contain the following attributes:
| Property | Type | Description | Optional |
|---|---|---|---|
| label | string | the label of the view. The label will be dispalyed in the view selector. | no |
| value | string | the value of the view. The value is the unique identifier for the view. It is applied to the view property in order to change the view. | no |
| type | string | the type of the view. Type must be one of the possible Scheduler views: 'day', 'week', 'month', 'year', 'agenda', 'timelineDay', 'timelineWeek', 'timelineMonth'. This attribute should be provided in order to indicate what type of view is defined. | no |
| hideWeekend | boolean | Determines whether the weekend days are hidden for the particular view or not. | yes |
| hideNonworkingWeekdays | boolean | Determines whether the nonworking days are hidden for the particular view or not. Nonworking days are defined for the all views view the nonworkingDays property. | yes |
| groupOrientation | string | Determines the grouping orientation for the particular view when grouping is enabled. Grouping orientation can be 'horizontal' or 'vertical'. | yes |
| shortcutKey | string | Determines the shortcut key for the view. Shortcut keys represent keyboard key names that can be used to quickly navigate to the particular view when the view selector is focused. | yes |
The view property of the Smart.Scheduler is used to change the currently visible view. It accepts a string that should match one of the default views or the value attribute of a custom view.
Here's how to create a Scheduler with a predefined view:
//A simple array data with events
const today = new Date(),
    currentYear = today.getFullYear(), currentMonth = today.getMonth(),
    data = [
    {
            label: 'Google AdWords Strategy',
            dateStart: new Date(currentYear, currentMonth, 10, 9, 0),
            dateEnd: new Date(currentYear, currentMonth, 11, 10, 30),
            allDay: true,
            backgroundColor: '#EA80FC'
        }, {
            label: 'New Brochures',
            dateStart: new Date(currentYear, currentMonth, 11, 11, 30),
            dateEnd: new Date(currentYear, currentMonth, 12, 14, 15),
            backgroundColor: '#FF9E80'
        }, {
            label: 'Brochure Design Review',
            dateStart: new Date(currentYear, currentMonth, 12, 13, 15),
            dateEnd: new Date(currentYear, currentMonth, 14, 16, 15),
            backgroundColor: '#039BE5'
        },
        ...
];

window.Smart('#scheduler', class {
    get properties() {
        return {
            //Properties
            view: 'week',
            dataSource: data,
            views: ['day', 'week', 'month']
        };
    }
});
Demo
An additional viewType property is available but is only used to indicate the type of the currently selected view. It is automatically updated by the Smart.Scheduler and shoud not be changed by the user.
Default Views
Smart.Scheduler can display the following views:
- agenda - displays the events as an agenda in the next 7 days from the currently selected date.
- day - displays the events for the currently selected date.
- week - displays the events for the currently selected week.
- month - displays the events for the currently selected month.
- timelineDay - displays the events for the currently selected date as a timeline.
- timelineWeek - displays the events for the currently selected week as a timeline.
- timelineMonth - displays the events for the currently selected month as a timeline.
By default if the views property is not set, the possible views for selection are 'day' and 'week'.
Here's how to change the view to a different value:
const scheduler = document.querySelector('smart-scheduler');

scheduler.views = ['week', 'month', 'timelineWeek'];
Demo

Day View
The Day view displays the events during the currently selected date.
Demo
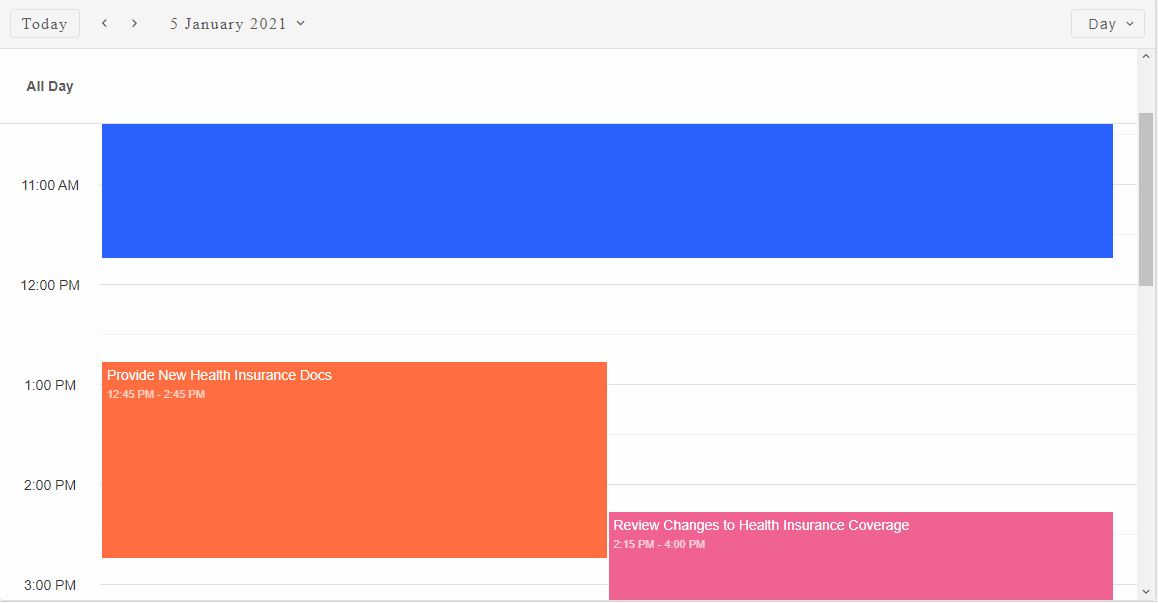
The events are positioned vertically and can be resized from top/bottom sides.
In the 'Day' view, events that last more than 24 hours are automatically transformed into all day events.
An additional All day container is displayed above the view that shows the allDay events. All Day container is specific for the Day/Week view and only visible in that view.
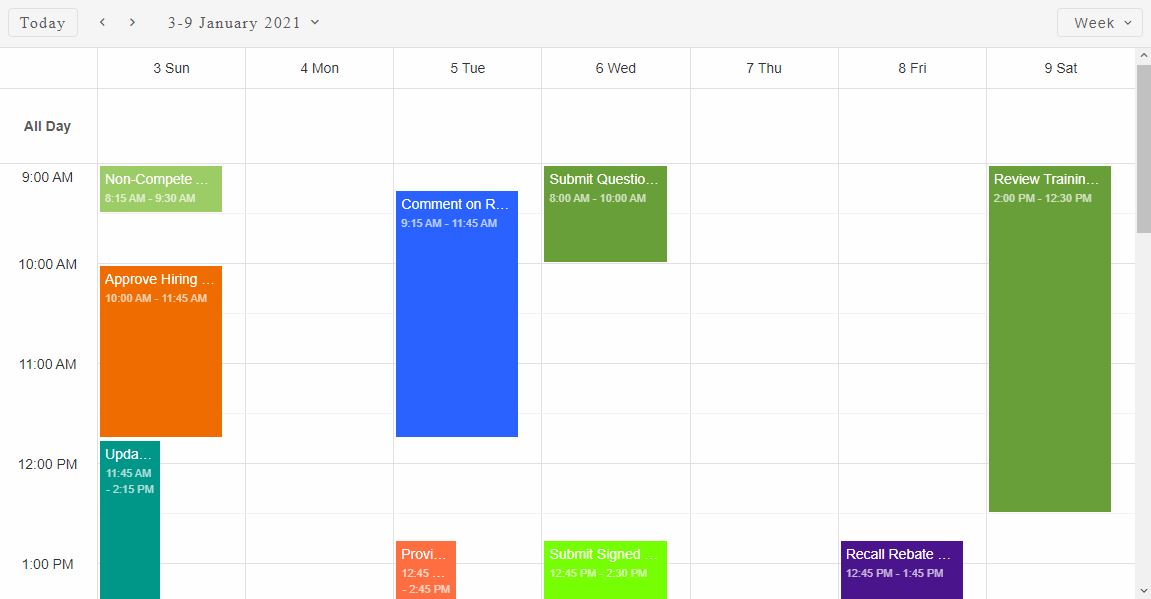
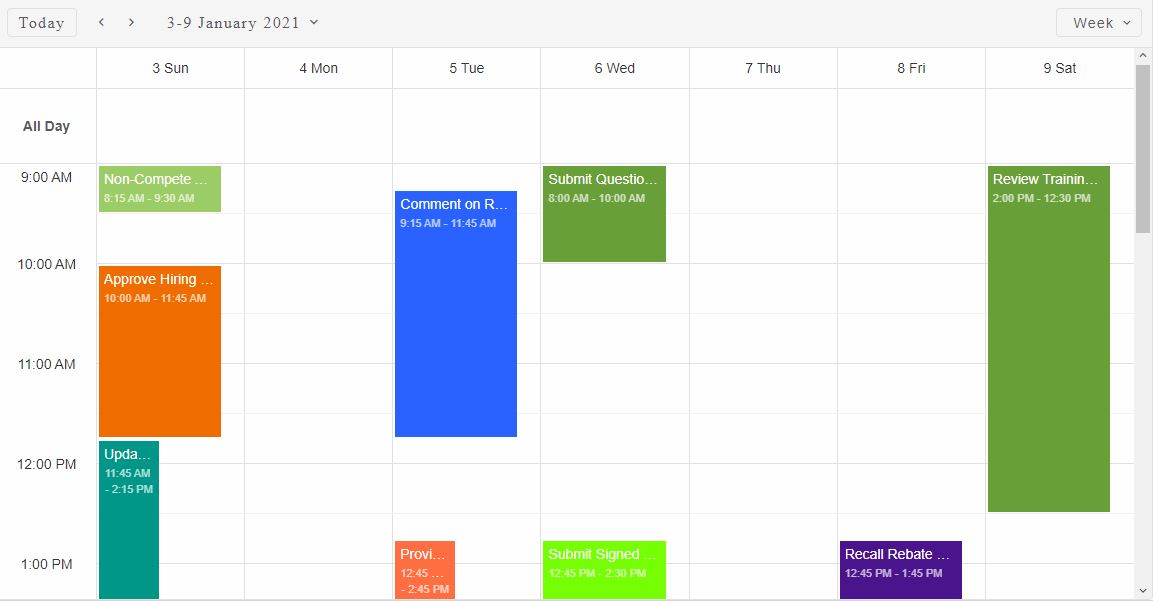
Week View
The Week view displays the events that are in the week of the currently selected date.
In the 'week' view, the events are displayed vertically and can be resized from the top/bottom sides.
An additional All day container is displayed above the view that shows the allDay events. Unlike the rest of the events in the view, the all day events are positioned and resized horizontally. All Day container is specific for the Day/Week view and only visible in that view.
The All Day events container can be hidden via the hideAllDay property.
Demo
The hourStart and hourEnd are used to limit the viewing time for the non all day events.
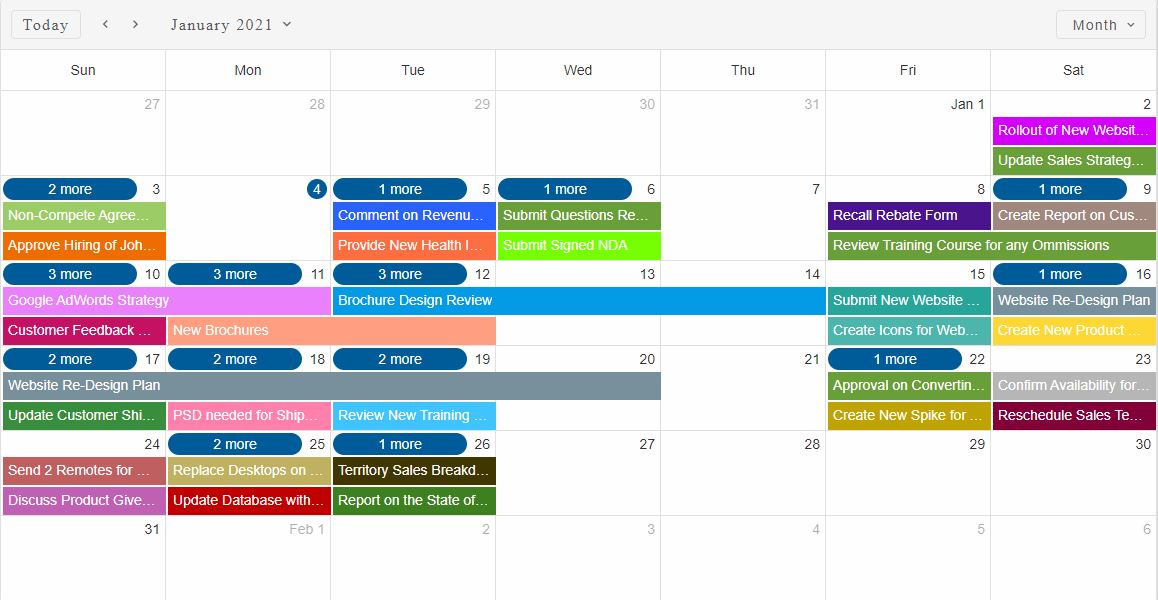
Month View
The Month view displays the events that are in the month of the currently selected date.
The events in the Month view are positioned horizontally similarly to the All Day events in the Week view.
Demo
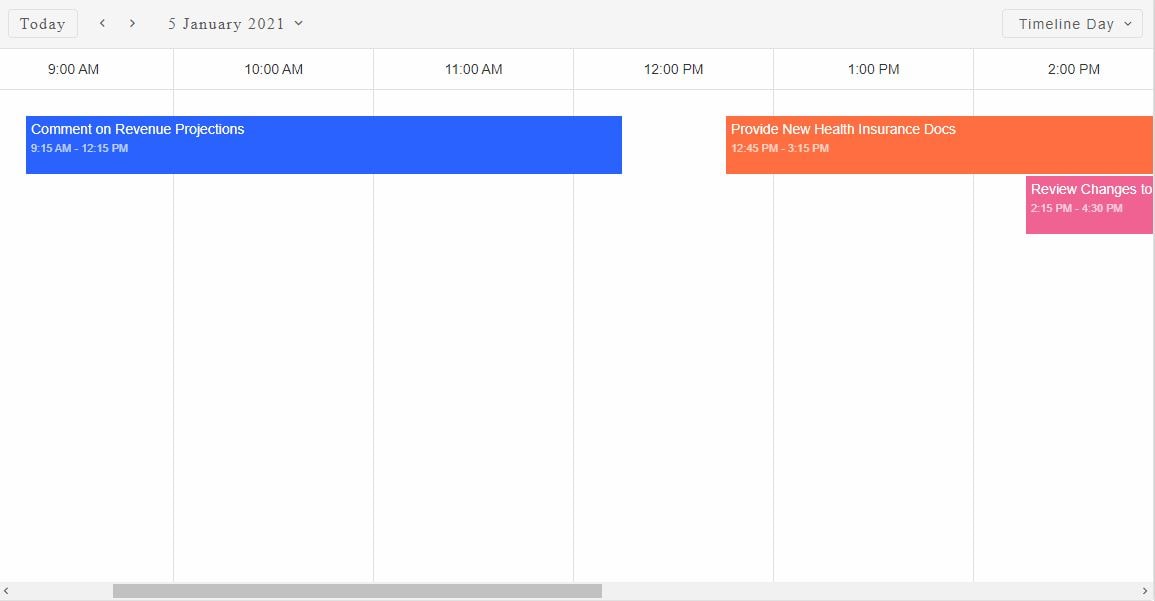
TimelineDay View
The 'timelineDay' view displays the events for the currently selected date.
Demo
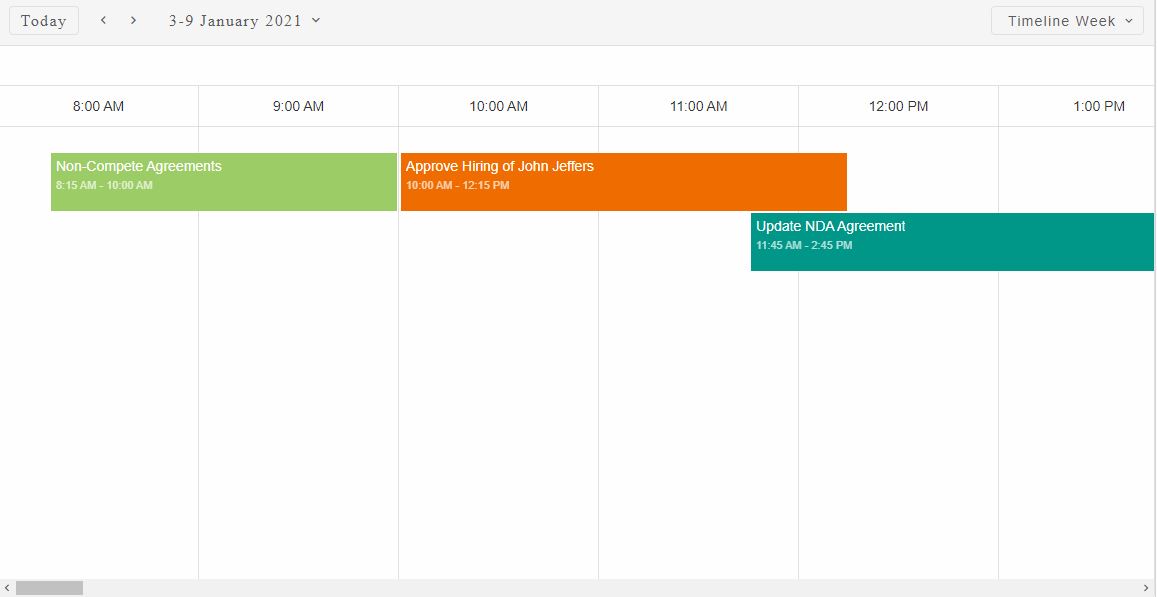
TimelineWeek View
The 'timelineWeek' view displays the events in the week of the currently selected date.
In this particular view an additional header is displayed which shows the date, since the default header shows the time.
Demo
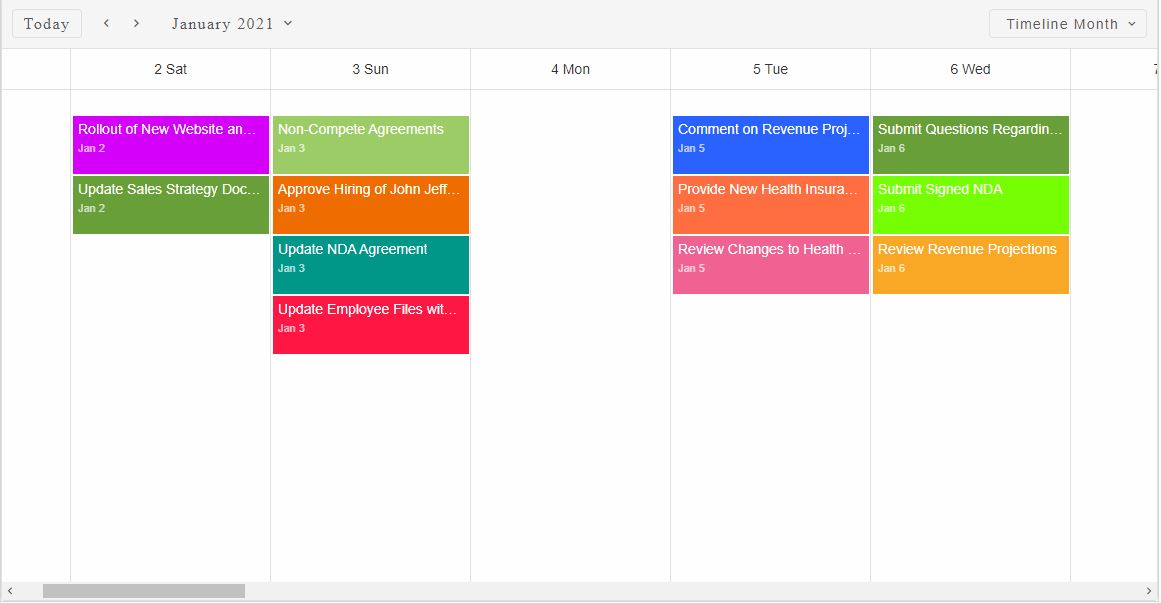
TimelineMonth View
The 'timelineMonth' view displays the events in the month of the currently selected date.
Demo
The events in all Timeline views are displayed and resized horizontally.
Events that are not in view are not displayed.
The hourStart and hourEnd are used to limit the viewing time for non month views.
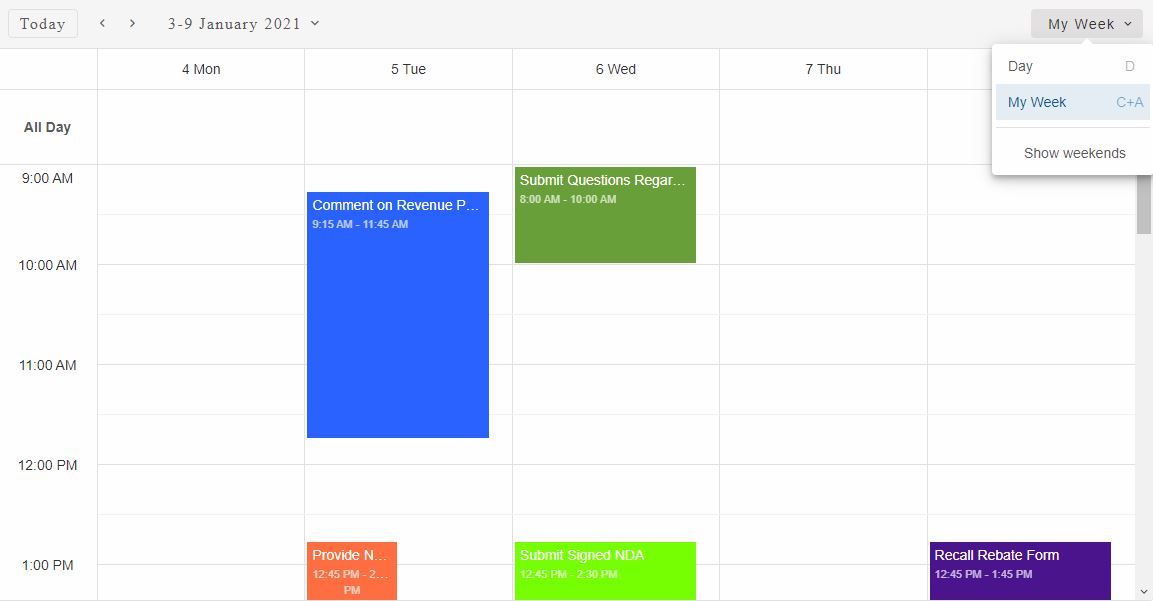
Custom Views
Custom Scheduler views are defined as objects via the views property. However if the user wants to change the label of one of the default views it can be done by defining an object with the new settings, for example:
const scheduler = document.querySelector('smart-scheduler');

scheduler.views = ['day', {
    label: 'My Week',
    value: 'week',
    type: 'week'
}];
The code above will create a custom view that will be the same as the default 'week' view with the exception of the changed label.
In order to hide the weekends only for the 'week' view, it is necessary to add the hideWeekend property to the view object definition:
scheduler.views = ['day', {
    label: 'My Week',
    value: 'week',
    type: 'week',
    hideWeekend: true
}];
In order to change the shortcut for the view simply set the shortcutKey attribute to the new keyboard key value. Keyboard combination of keys is also possible via the '+' sign between the key names, for example:
scheduler.views = ['day', {
    label: 'My Week',
    value: 'week',
    type: 'week',
    hideWeekend: true,
    shortcutKey: 'C+A'
}];
When the view selector is focused, pressing the C and A buttons on the keyboard simultaneously will change the view to the custom 'week' view.
Demo
For AI tooling
Developer Quick Reference
Topic: scheduler-views Component: Scheduler Framework: JavaScript
Main methods: (none detected)
Common config keys: views, dataSource
Implementation Notes
Compatibility: Modern browsers / Web Components API access pattern: const component = document.querySelector(...) + component.method()
Lifecycle guidance: Initialize configuration first, then invoke imperative API when element is available in DOM.
Common pitfalls:
- Calling methods before element initialization.
- Reassigning large configuration partially without understanding merge behavior.
- Missing required module script import for component type.
Validation checklist:
- Ensure module scripts and CSS are loaded once.
- Keep data schema aligned with columns/series definitions.
- Verify method calls target initialized component instance.