Build your web apps using Smart UI
Smart.Toast - Toast as an Angular Service
Overview
The following guide shows how to use the ToastComponent as an Angular Service.
The Angular application that we are going to create will use the Smart Angular ToastComponent and three Smart Angular ButtonComponents which will show/hide the Toast items.
Project Configuration
-
Create a new Angular project with the following command:
ng new angular-service
- Create the toast.service.ts - from inside the new folder create a TS file containing the
Toast service with the following content:
import { Injectable } from '@angular/core';
import { ToastComponent } from 'smart-webcomponents-angular/toast';

@Injectable()

export class ToastService {
    public toastComponent: ToastComponent;
    constructor() { }

    //Prepares the toast component for the service
    setToast: Function = (element: ToastComponent): void => {
        this.toastComponent = element;
    };

    //Shows a toast item
    openToast: Function = (value: string): void => {
        const that = this;

        that.toastComponent.open();

        if (value !== undefined) {
            that.toastComponent.value = value.toString();
        }
    }

    // Closes the last toast item
    closeToastLast: Function = (): void => {
        this.toastComponent.closeLast();
    }

    //Closes all toast items
    closeToastAll: Function = (): void => {
        this.toastComponent.closeAll();
    }
}
The Toast service is created thanks to the @Injectable directive from the Angular Core library. It will be responsible for
The service has the following methods:- setToast - sets the ToastComponent that will be used by the service.
- openToast - opens a new Toast item with a custom value.
- closeToastLast - closes the last opened Toast item.
- closeToastAll - closes all opened Toast items.
-
Configure app.module.ts to use the Toast service - the new Toast service needs to be
registered as a provider in the app.component.ts file for global usage or inside
app.component.ts if we want to use it there only. In this application we are going to set
it inside app.module.ts:
import { NgModule } from '@angular/core';
import { BrowserModule } from '@angular/platform-browser';

import { ButtonModule } from 'smart-webcomponents-angular/button';
import { ToastModule } from 'smart-webcomponents-angular/toast';

import { AppComponent } from './app.component';

import { ToastService } from './toast.service';

@NgModule({
    declarations: [AppComponent],
    imports: [BrowserModule, ButtonModule, ToastModule],
    bootstrap: [AppComponent],
    providers: [ToastService]
})

export class AppModule { }
The Toast service has to be added to the providers array in order to use it later.
The ToastComponent and ButtonComponents are also imported inside this file.
-
Configure app.component.ts to use the new Toast service - the application needs to
be configured
to use the new toast sertvice in order to use it's methods. Here's the content of the file:
import { Component, ViewChild, OnInit, AfterViewInit } from '@angular/core';
import { ToastComponent } from 'smart-webcomponents-angular/toast';

import { ToastService } from './toast.service';

@Component({
	selector: 'app-root',
	templateUrl: './app.component.html',
	styleUrls: ['./app.component.css']
})

export class AppComponent implements AfterViewInit, OnInit {
	@ViewChild('toast', { read: ToastComponent, static: false }) toast!: ToastComponent;

	constructor(private toastService: ToastService) {
	}

	open: Function = (event: CustomEvent): void => {
		this.toastService.openToast(`Toast ${document.body.querySelectorAll('smart-toast-item').length + 1}`);
	}

	closeLast: Function = (event: CustomEvent): void => {
		this.toastService.closeToastLast();
	}

	closeAll: Function = (event: CustomEvent): void => {
		this.toastService.closeToastAll();
	}

	ngOnInit(): void {
		// onInit code.

	}

	ngAfterViewInit(): void {
		// afterViewInit code.
		this.init();
	}

	init(): void {
		// init code.

		const that = this;

		//Sets the ToastComponent for the service
		that.toastService.setToast(that.toast);
	}
}
First we need to import the Toast service so we can use it's methods.
After that we need to create an instance of the ToastService inside the constructor of the component.
Note that we imported the Toast service at the top of the file with the rest of the components that we will be using. Since the application will contain a ToastComponent and ButtonComponents we need to import them as well.
Inside the init method we register the ToatComponent that will be used by the Toast service via the setToast method.
One click handler is used for each button:- open - calls the openToast method of the Toast service by passing in the value of the Toast item when the "Open" Button is clicked.
- closeLast - calls the closeToastLast method of the Toast service when the "Close Last" Button is clicked.
- closeAll - calls the closeToastAll method of the Toast service when the "Close All" Button is clicked.
-
Configure app.component.html
<smart-toast #toast [position]="'top-left'">Toast!</smart-toast> <div class="options"> <div class="caption">Settings</div> <div class="option"> <smart-button #button id="openButton" (onClick)="open($event)">Open Toast</smart-button> <smart-button #button2 id="openButton" (onClick)="closeLast($event)">Close Last Toast</smart-button> <smart-button #button3 id="openButton" (onClick)="closeAll($event)">Close All Toasts</smart-button> </div> </div> -
Build and Run the Application - build the application with the following command line:
ng build --prod
A live version of the code presented in this tutorial can be found in the demo Angular Toast Angular-Service.
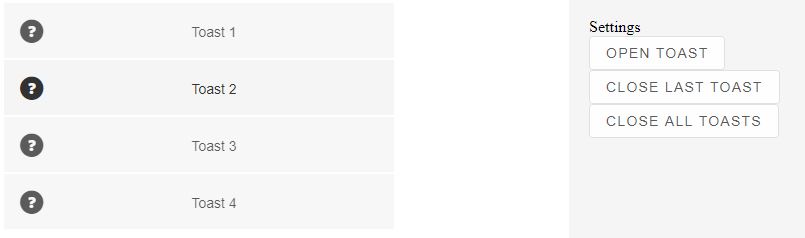
Here is what the application looks like when launched.
Live Demo: Notification Service.