Build Blazor MAUI Hybrid App with SmartUI
This tutorial will show you how to easily integrate Blazor MAUI with SmartUI.
For this tutorial you should have .NET Multi-platform App UI development installed. More about .NET MAUI
here
Create a .NET MAUI Blazor Hybrid app
Open Visual Studio 2022 and click Create a new project
In the window that will open, select MAUI as a Project type:
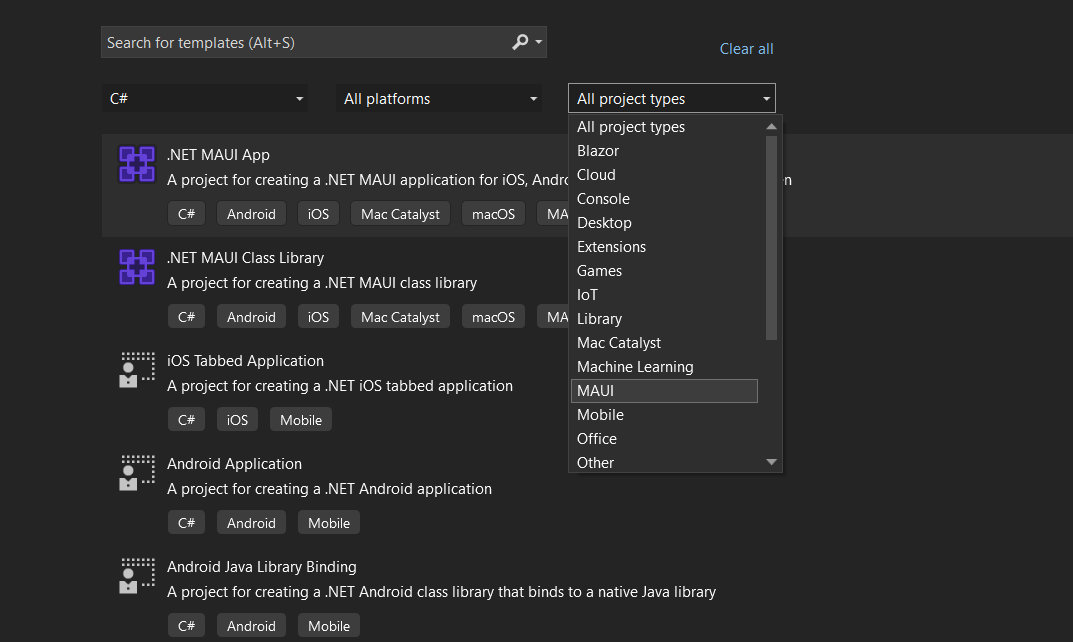
Three options will appear:
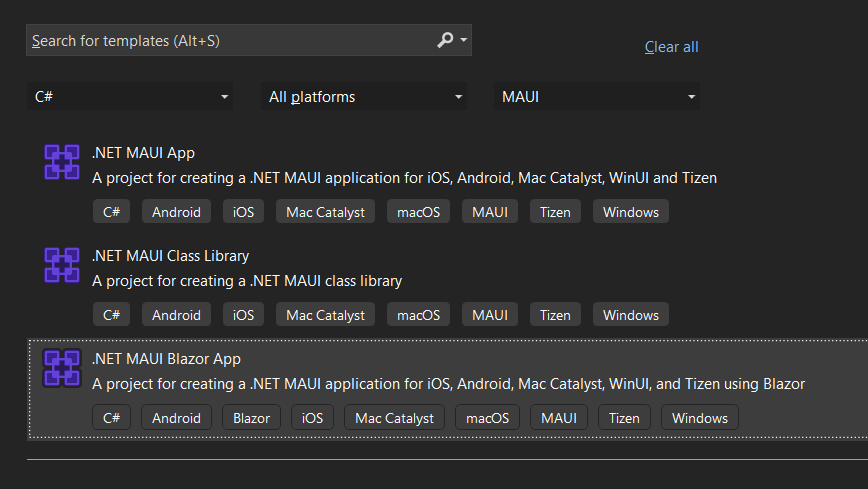
You should select the last one: .NET MAUI Blazor App
You can set SmartMAUI as a project name
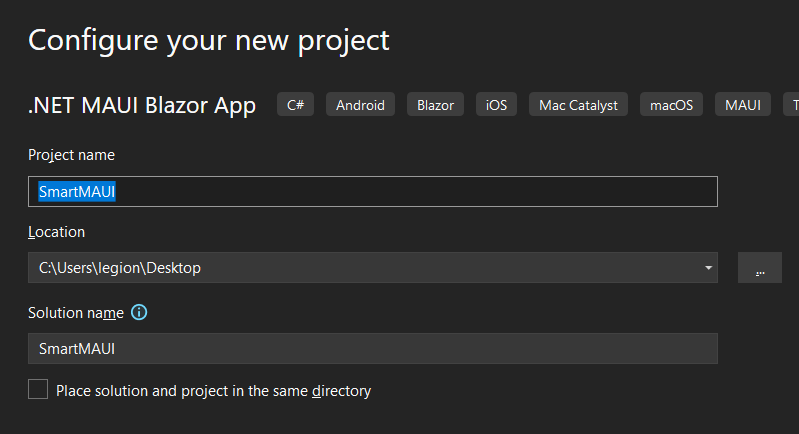
You will be asked which version to be used. Choose .NET 6 or higher

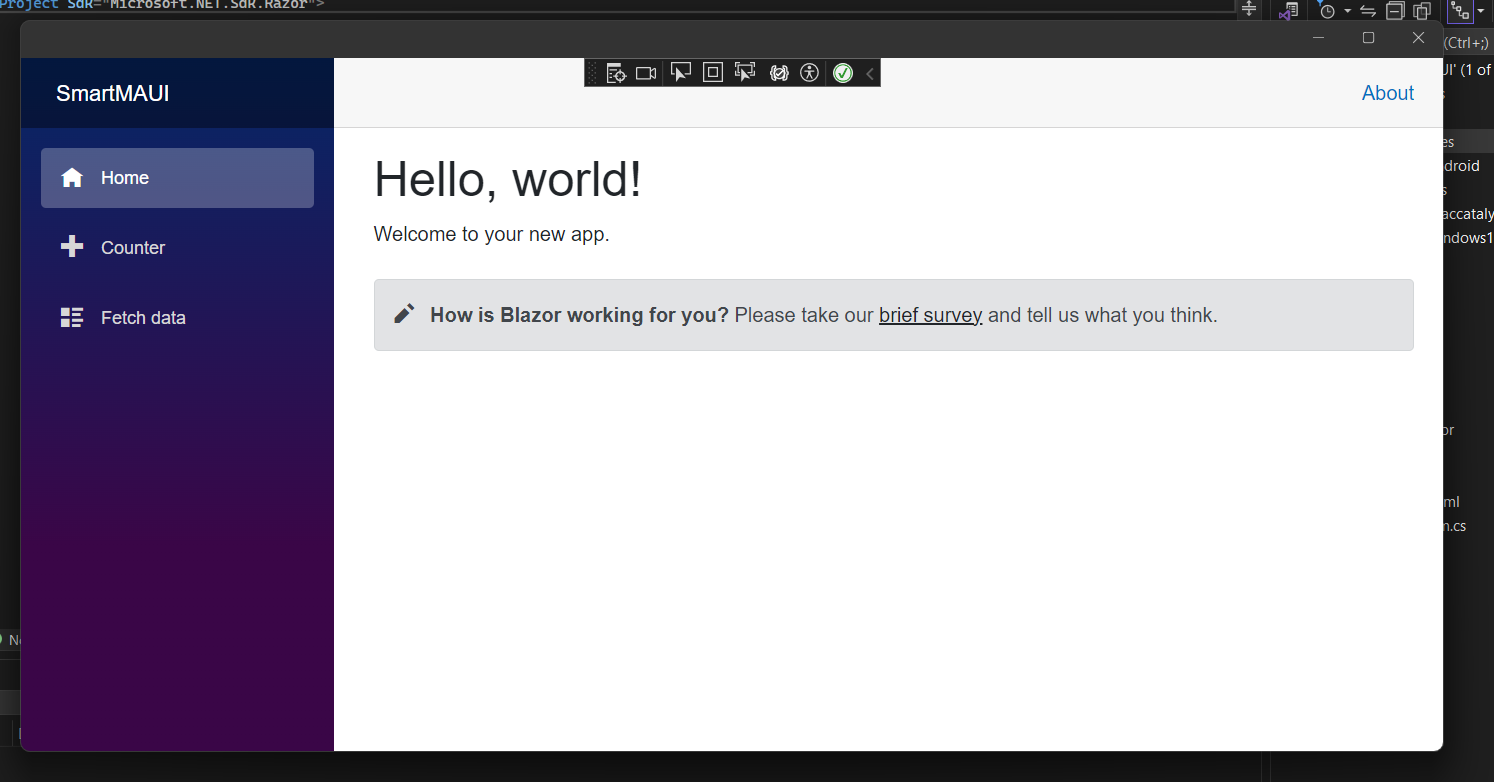
Wait for Visual Studio to create the project.
Run the app on Windows
Running the applicaiton on windows is straight-forward
Click on Windows machine

If Developer Mode isn't enabled, you will be asked to enable it in:
Settings > For
developers >
Developer
Mode (Windows 10) or Settings > Privacy & security > For developers > Developer Mode (Windows
11).
Set
the switch to On.

After that the application will start and the home page will be shown:
Run the app in the Android Emulator
To run the application in the emulator, you should change the start configuration:
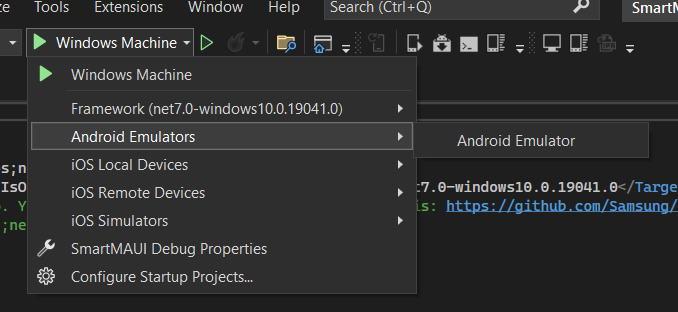
You should select Android Emulator
Once you select it, you will be asked for agreement:
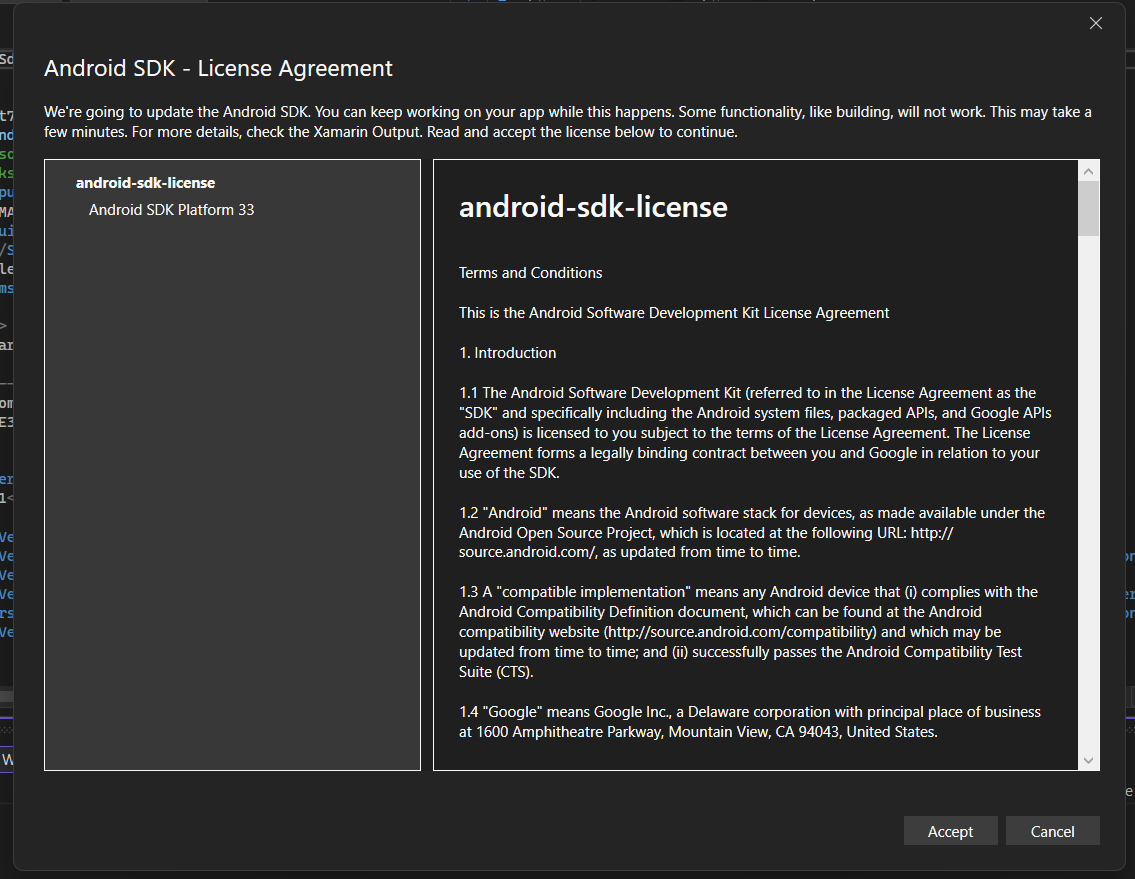
You should agree and proceed with the installation.
After a few minutes this window should appear:
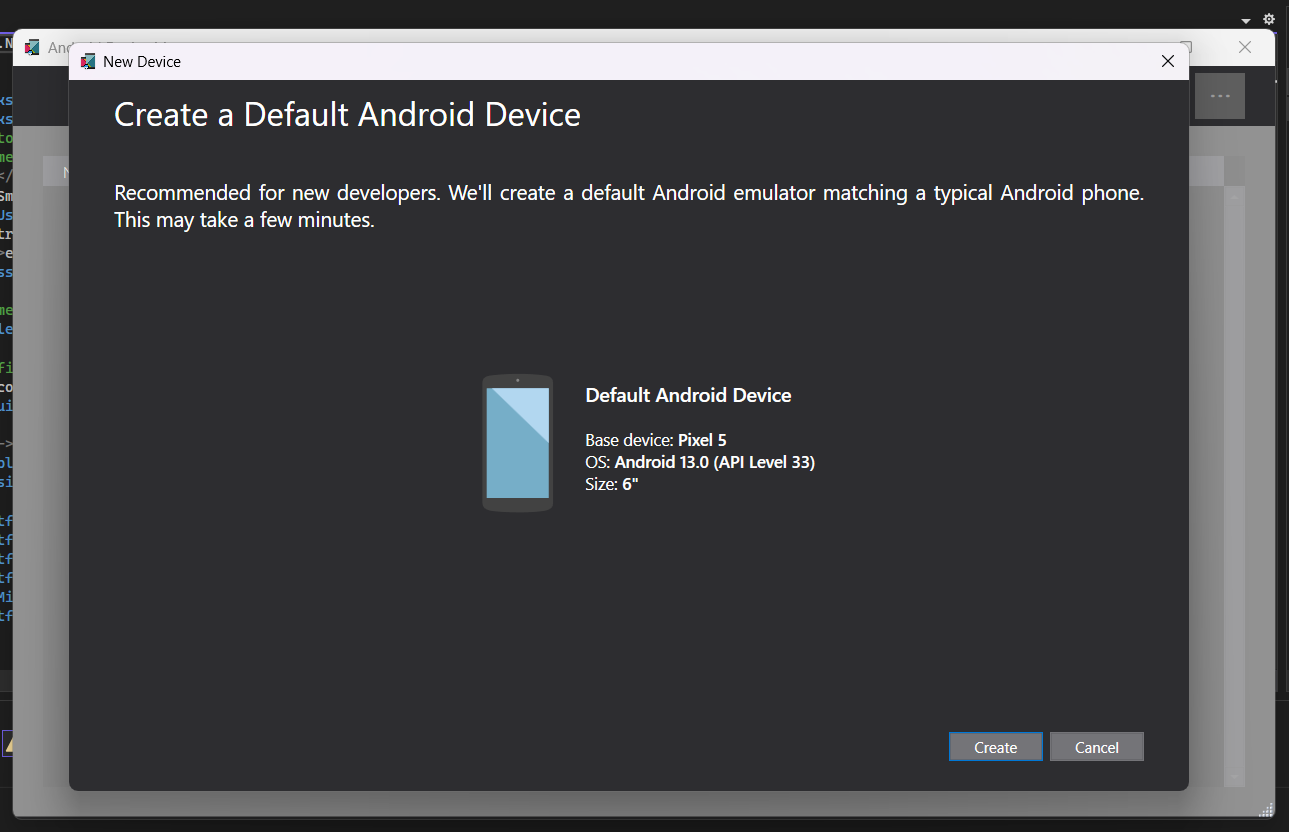
Click on create and wait...
After a few minutes again, the installation will be completed and you should see this:
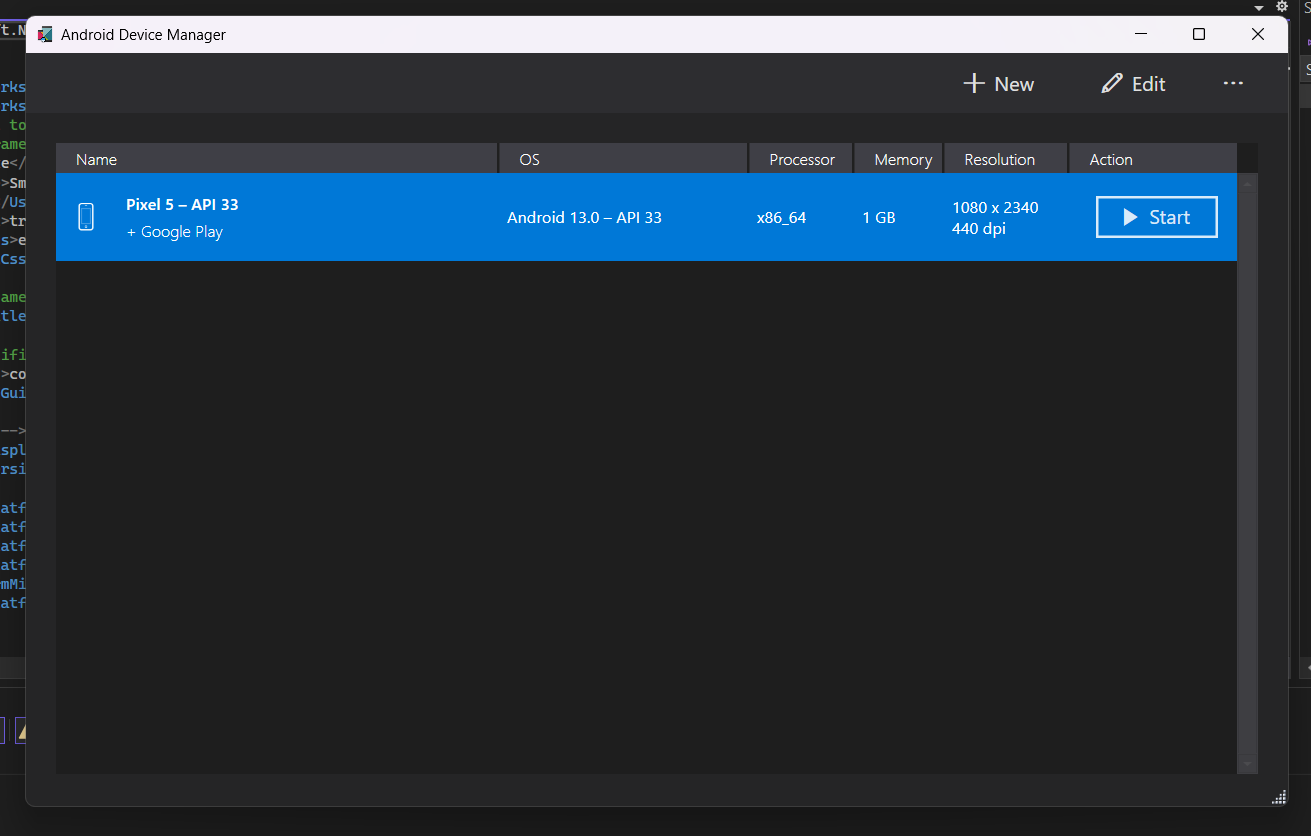
Now, start the emulator by clicking Start
The Android Emulator should start and you can safely close the Android Device Manager
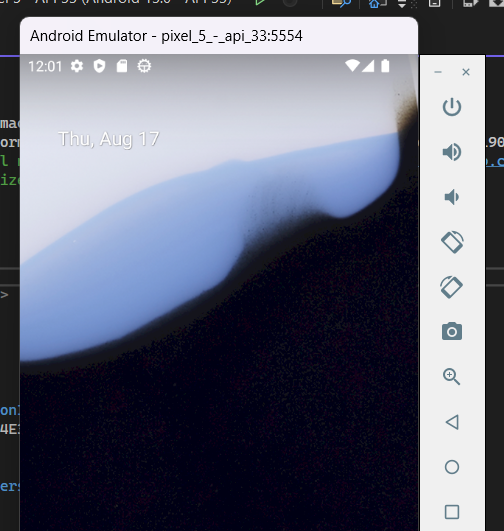
Now, open Visual Studio again and you will have the ability to start the application with the emulator:

Click on Pixel 5 - {API VERSION}
After some time the application will start on our Android Emulator
Add SmartUI
In this section, we are going to add SmartUI to our application
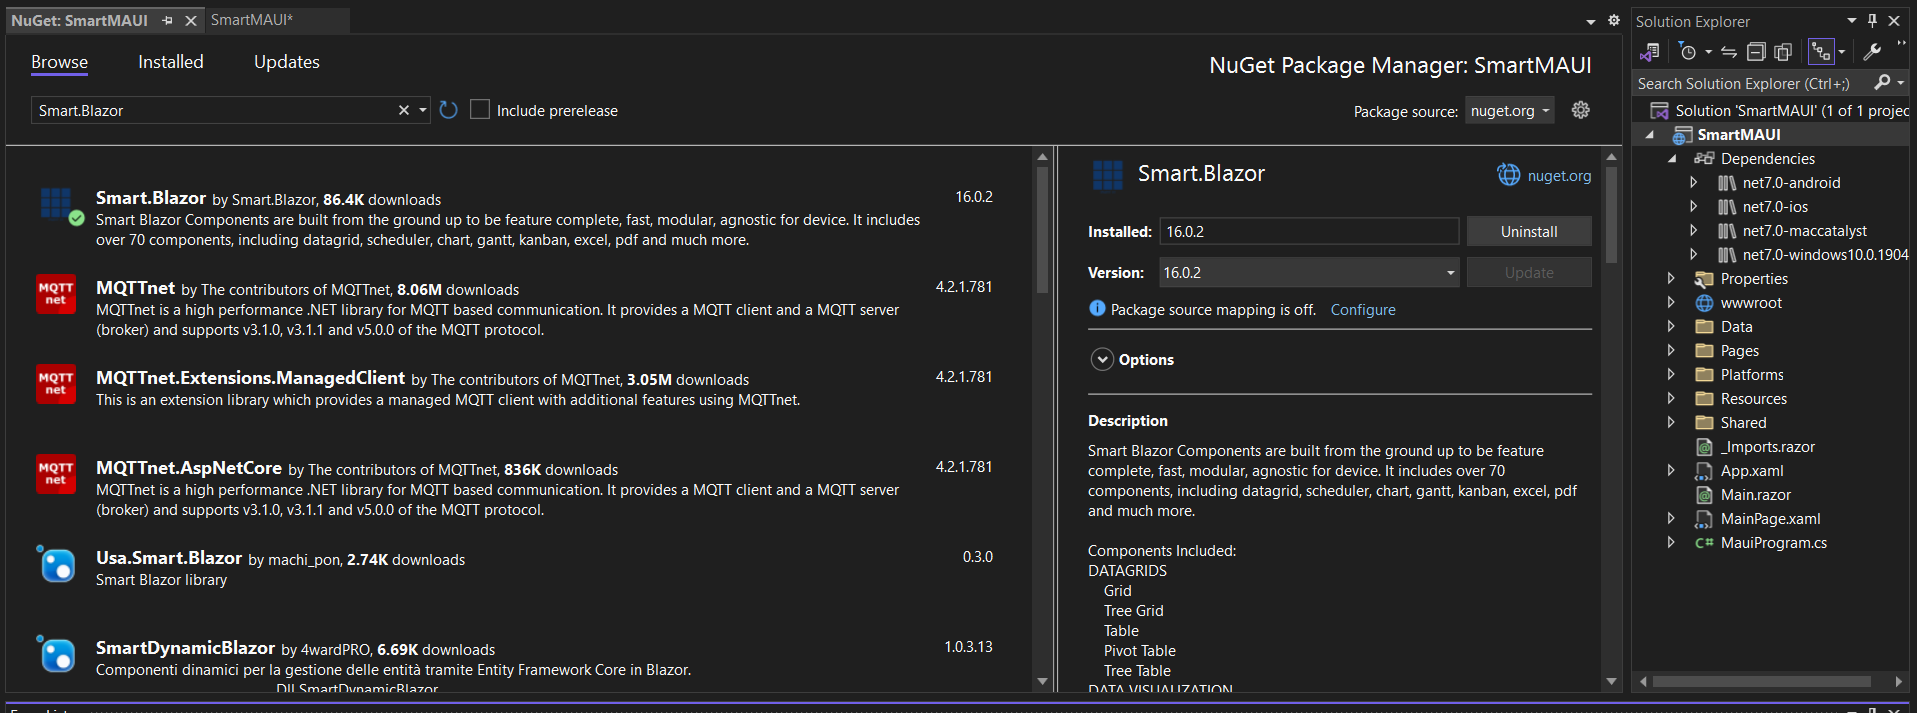
The first thing to do is to open the package manager and download Smart.Blazor:
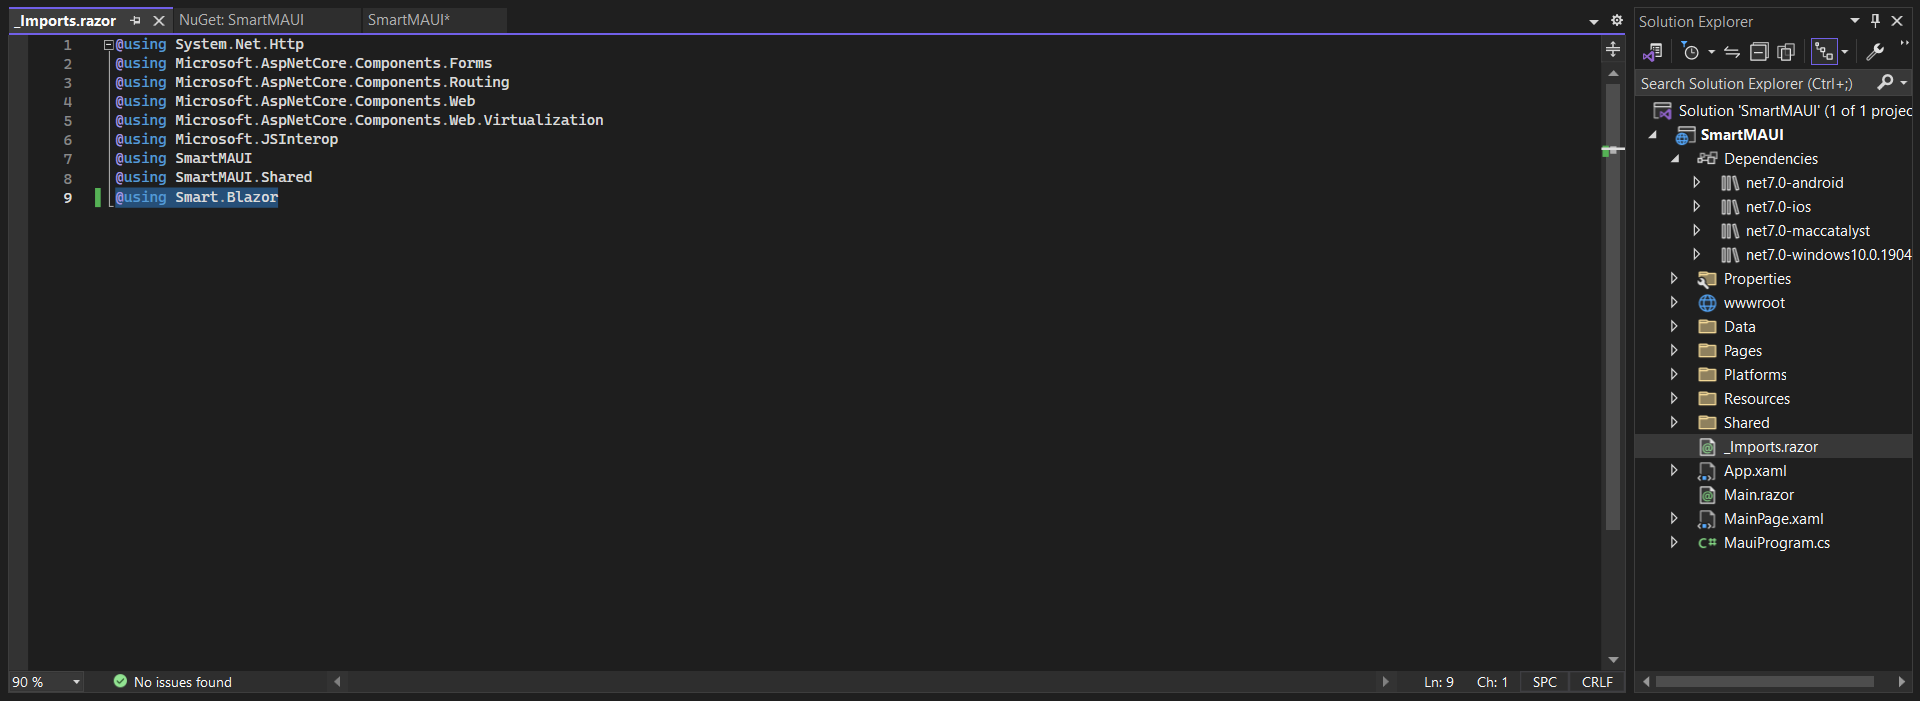
You should add Smart in the _Imports. To do so, open _Imports.razor, and add "@using Smart.Blazor"
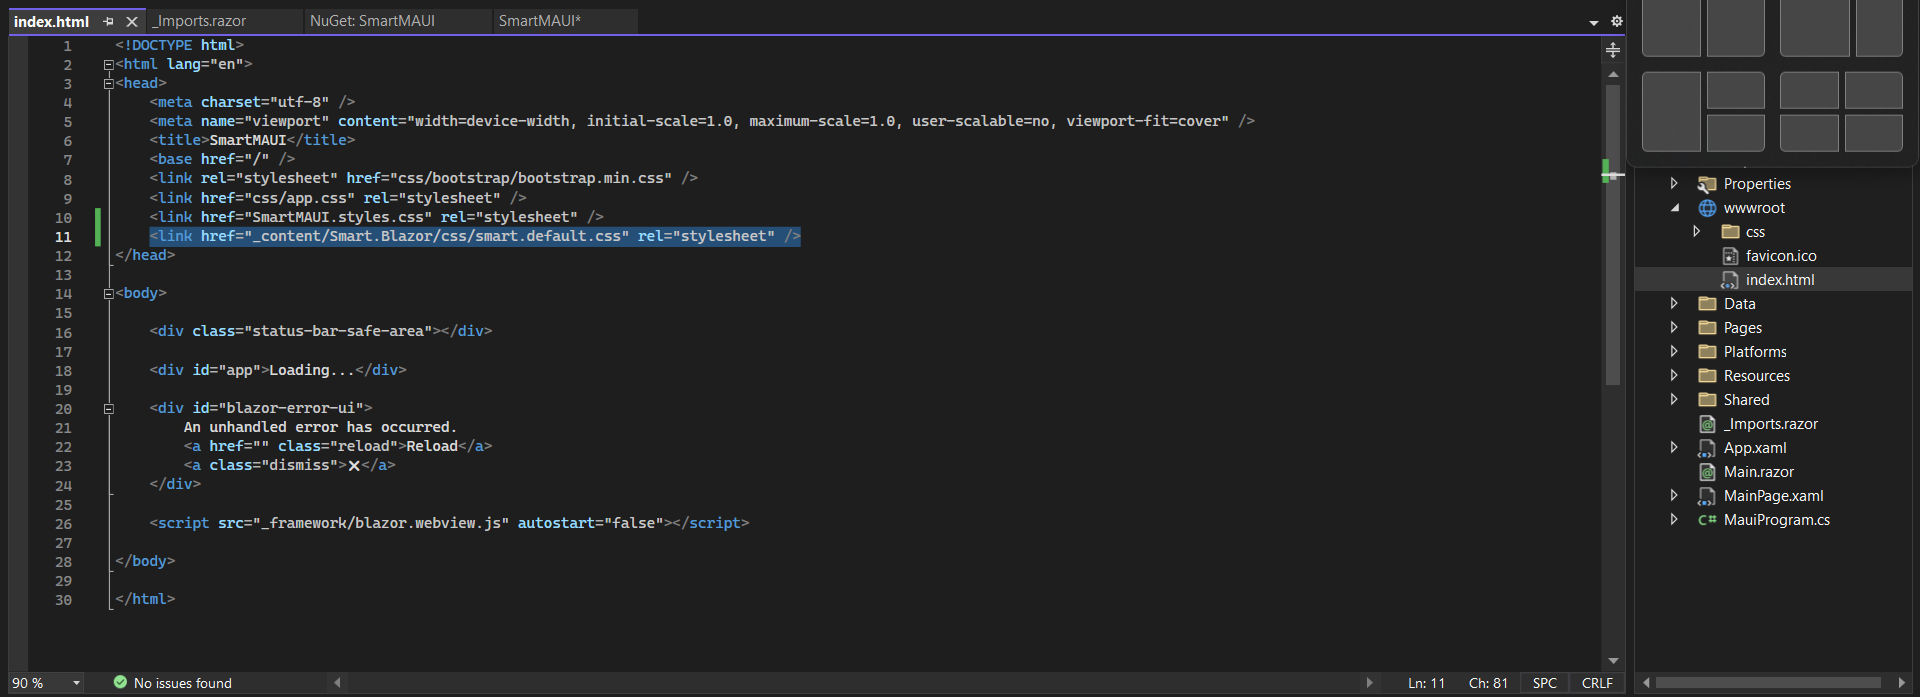
The next step is to add the default CSS. The CSS should be referenced inside wwwroot/index.html. Open that file and add the following link:
<link href="_content/Smart.Blazor/css/smart.default.css" rel="stylesheet" />
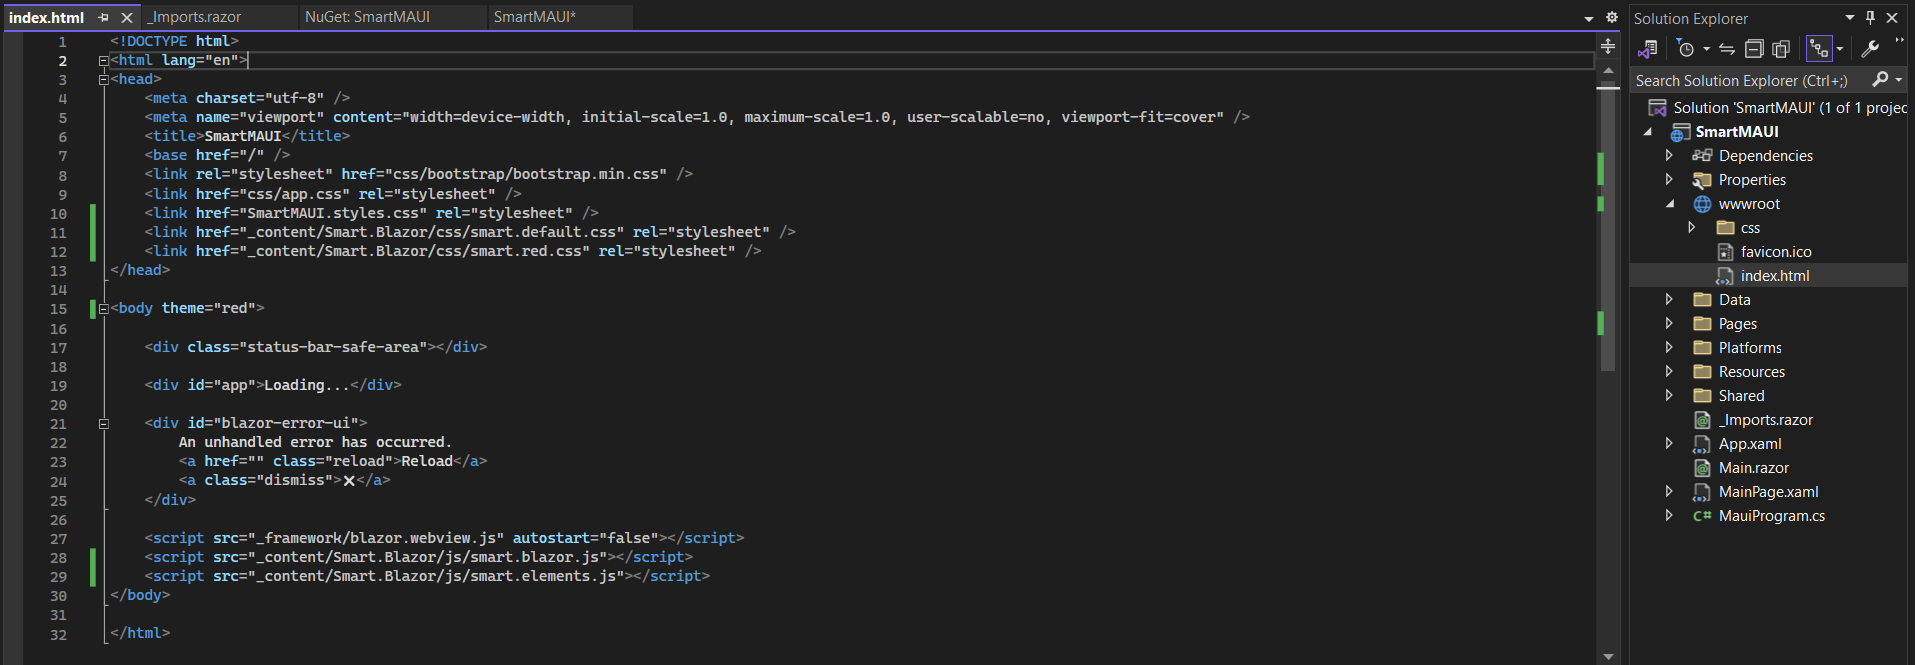
If you want to add any additional theme, you can do it here
For example: If you want to add the red theme, add the following tag below:
<link href="_content/Smart.Blazor/css/smart.red.css" rel="stylesheet" />
Set the theme attribute to the body as well.
The JavaScript files should also be referenced here. These are the links for them:
<script src="_content/Smart.Blazor/js/smart.blazor.js"></script>
<script src="_content/Smart.Blazor/js/smart.elements.js"></script>
If you want to add a specific component, not all of them, replace elements with that component
The result should look like this:
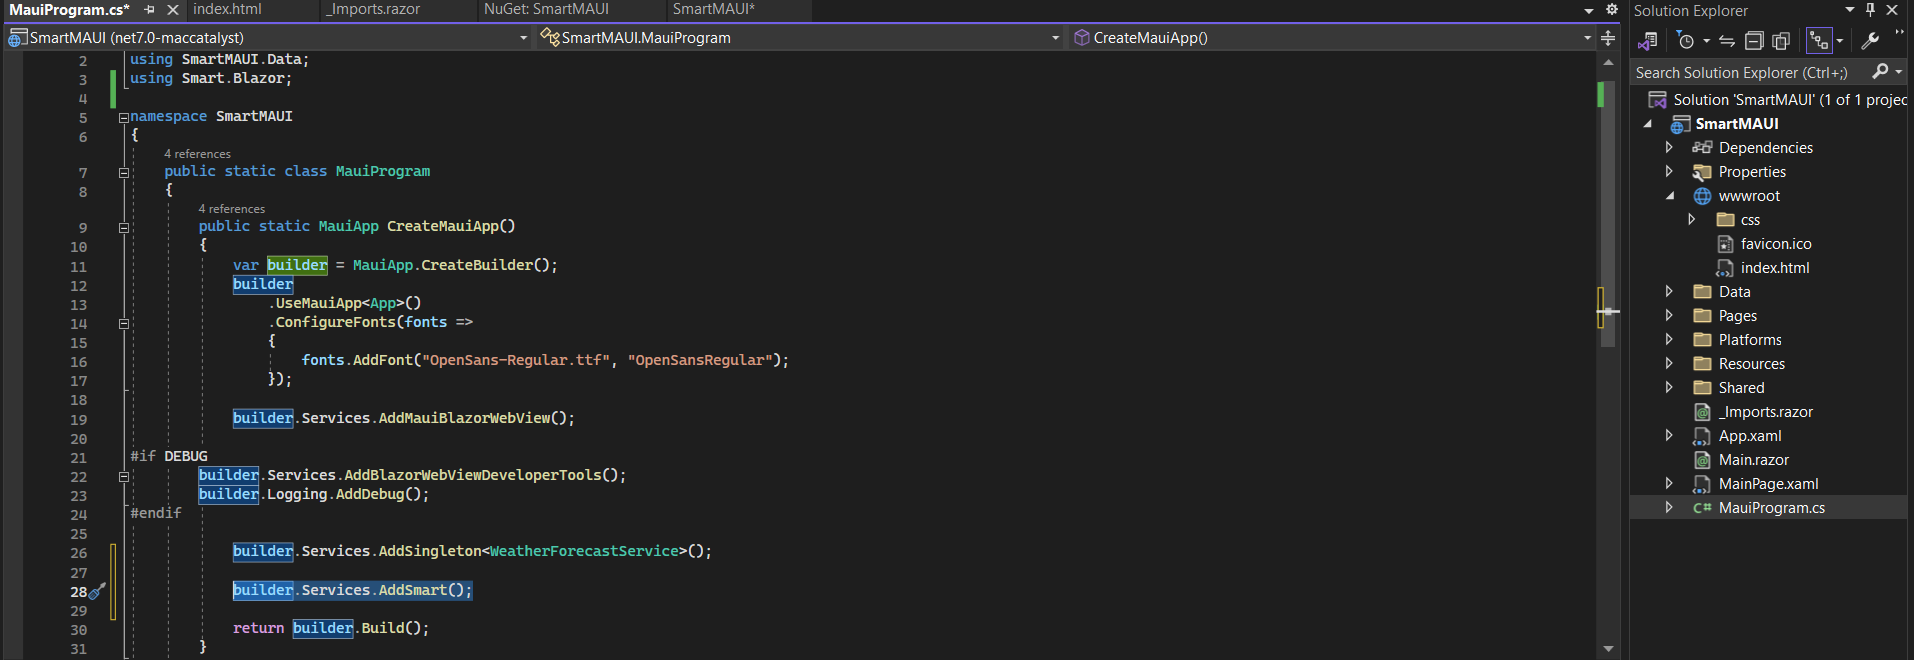
The next step is to register Smart as a service, to do so, open MauiProgram.cs, import smart using using Smart.Blazor; and invoke AddSmart()
Now, you are ready to add your first Smart.Blazor component
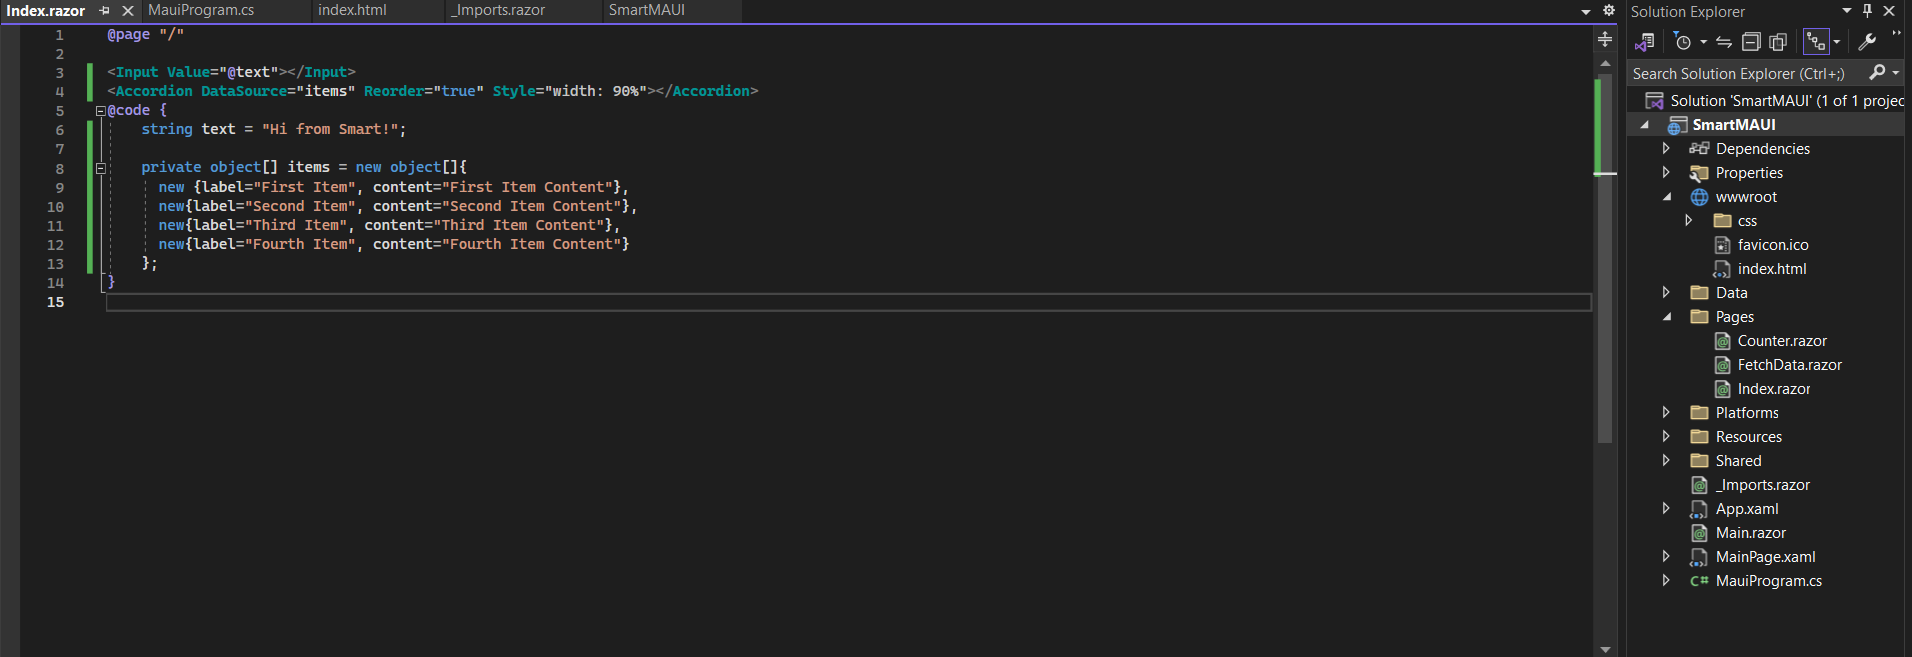
Open Pages/Index.razor and add these Smart Components:
@page "/"

<Input Value="@text"></Input>
<Accordion DataSource="items" Reorder="true" Style="width: 90%"></Accordion>
@code {
    string text = "Hi from Smart!";

    private object[] items = new object[]{
      new {label="First Item", content="First Item Content"},
      new{label="Second Item", content="Second Item Content"},
      new{label="Third Item", content="Third Item Content"},
      new{label="Fourth Item", content="Fourth Item Content"}
    };
}
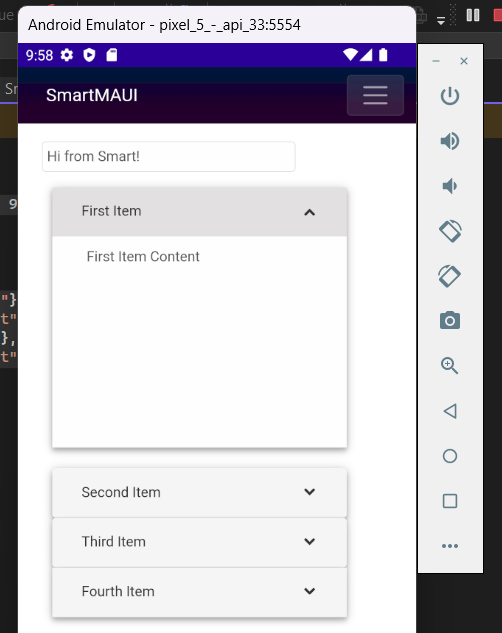
Start the Android Emulator and see the Input component live.
For more information about Smart.Blazor and many more components navigate here
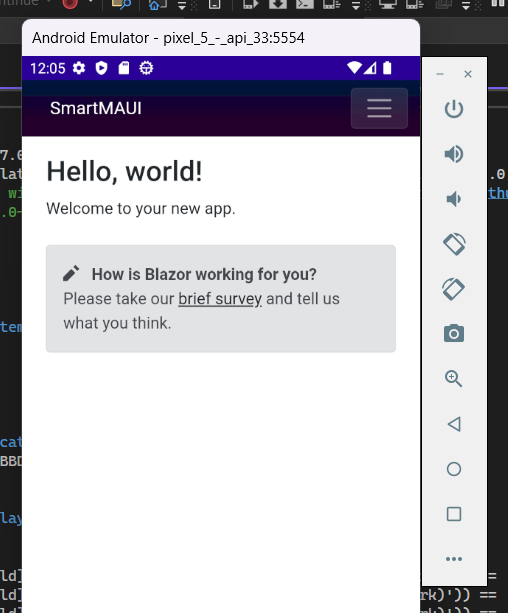
Here is the final result: